DIY Android App Compares Bus Routes to Uber in Real time
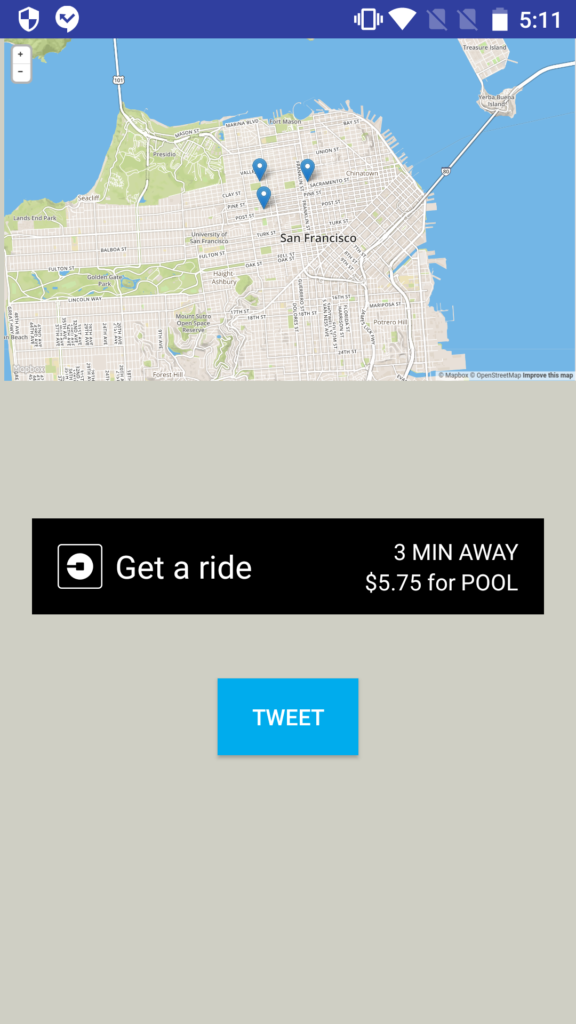
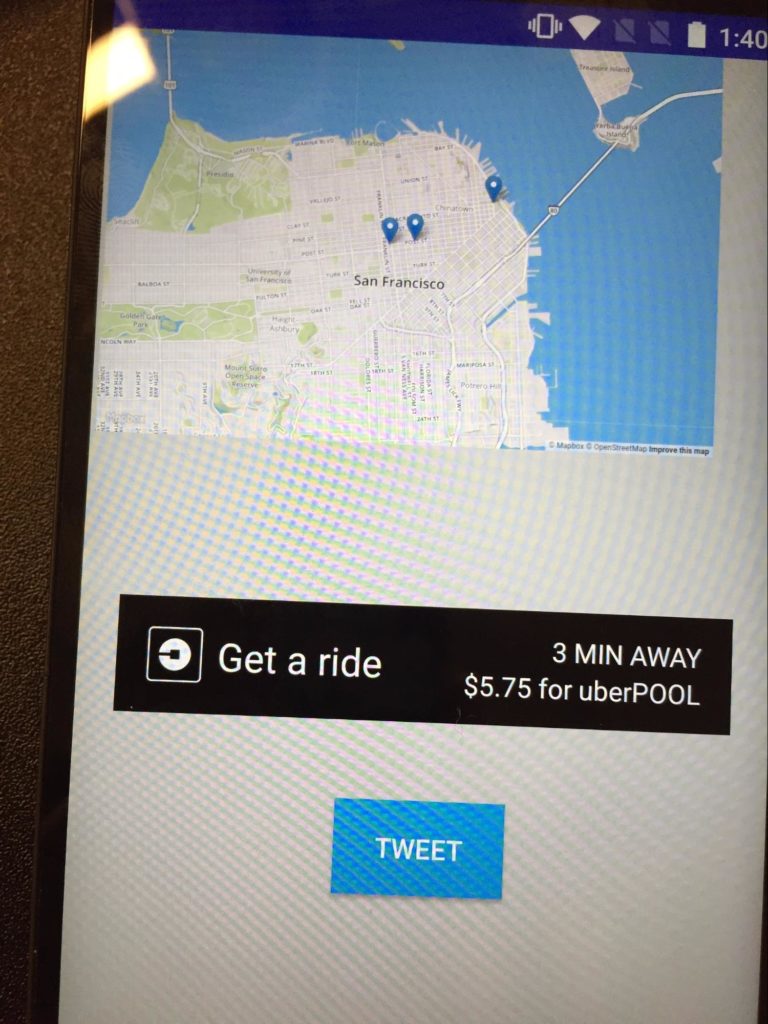
As a city dweller, this definitely falls in the category of #firstworldproblems. Do I wait for the bus, hail a taxi, or call an Uber? I thought it would be neat to solve this problem using PubNub’s Project EON on the mobile platform (in this case, Android, because I had already used EON on iOS in a past project.)
EON, a light web-based framework for real-time charts and maps which is extremely developer-friendly, has been fun to work with across platforms.This project pulls data from a live Muni feed (SF's bus system), displays it in a webview, and incorporates Twitter Fabric and the Uber API for some fun, extra features.

Getting the Bus Data
On the JavaScript side, you will need to install some node modules, like gtfs-realtime-bindings and nextbus-live-feed. The data comes from NextBus, which, using “GPS technology and a proprietary algorithm that incorporates historical travel data to track transit vehicles,” considers the “actual vehicle positions, their intended stops, and typical traffic patterns.” The API provides a live XML feed of public transportation, like this one.
It provides data like latitude and longitude of different buses on routes. The a, standing for agency, in this case is a constant, sf-muni. R, meaning route, is the value that changes. In this tutorial, we use the 1, 2, and the 3 Muni bus routes, but you can adapt it to fit the buses you would like to see on the map.
First, you’ll need to make a WebView to hold your EON chart (that code goes in basic HTML and JS files.)
Node Modules in JavaScript file
The modules you need include gtfs, gtfs-realtime-bindings, and nextbus-live-feed. The JavaScript code here in this file is for the Node modules, while the client-side JavaScript code is in the corresponding HTML file. Here, you also declare requestSettings, check that you are able to read the XML files containing the Muni bus location data, and make sure that it updates.
request(requestSettings, function (error, response, body) {
 if (!error && response.statusCode == 200) {
   var feed = GtfsRealtimeBindings.FeedMessage.decode(body);
   feed.entity.forEach(function(entity) {
     if (entity.trip_update) {
       console.log(entity.trip_update);
     }
   });
 }
});
image
Getting your PubNub Keys
Include the following lines in the head of your HTML File:
<script type="text/javascript" src="http://pubnub.github.io/eon/v/eon/0.0.10/eon.js"></script>
<link type="text/css" rel="stylesheet" href="http://pubnub.github.io/eon/v/eon/0.0.10/eon.css"/>
Then, once you login to your PubNub Dashboard and generate your own publish and subscribe keys, you can create your PubNub object like below, you can begin using EON.
var pb= PUBNUB.init({
   publish_key: pub_key,
   subscribe_key: sub_key
});
HTML File
The most important part here is your client-side JS code. You need your channel, PubNub publish and subscribe keys, the latitude and longitude of the center of the map, and variables for the websites to check.
After initializing your PubNub object like above, you will use JQuery to get the Muni location data, going through each of the sites (one per Muni bus), and picking out the latitude and longitude of each line.
$(document).ready(function () {
for(var i = 1; i <= 3; i++) {
   if(busNum == 1) {
       siteToCheck1 = firstSitePart + busNum + secondSitePart;
       console.log(siteToCheck1);
       sitesToCheck.push(siteToCheck1);
   }
   else if (busNum == 2) {
       siteToCheck2 = firstSitePart + busNum + secondSitePart;
       console.log(siteToCheck2);
       sitesToCheck.push(siteToCheck2);
   }
   else if (busNum == 3) {
       siteToCheck3 = firstSitePart + busNum + secondSitePart;
       console.log(siteToCheck3);
       sitesToCheck.push(siteToCheck3);
   }
These will fill your latitude and longitude arrays, which are what is published to your channel and your EON map. Then, you need to retrieve and publish the data.
$.each(sitesToCheck, function (index1, value ) {
  $.get(value, function (xml) {
      $('vehicle', xml).each(function (index, vehicle) {
          totalStops[i] = {'lat': $(vehicle).attr('lat'), 'lon': $(vehicle).attr('lon')};
          latArr[index1] = {'lat': $(vehicle).attr('lat')};
          longArr[index1] = {'lon': $(vehicle).attr('lon')};
      }); //each
      setInterval(function() {
          pb.publish({
              channel:  chan,
              message: [
                  {"latlng": [latArr[0].lat, longArr[0].lon ] },
                  {"latlng": [latArr[1].lat, longArr[1].lon ] },
                  {"latlng": [latArr[2].lat, longArr[2].lon ] }
              ]
          });
      }, 1000);
  });
});
Before it can be displayed on the EON map, you will also need to get your own mapbox token. This can be done here on the MapBox API Access Token page. Then, you can create your map object, subscribe to the channel, and embed the map like so:
var map = eon.map({
   id: 'map',
   pubnub: pb,
   mb_id: 'mapbox.streets',
   mb_token: 'pk.eyJ1IjoibGl6emllcGlrYSIsImEiOiJjaXFpZWk4d2cwNjd2ZnJtMXhiaTRmbXNpIn0.N2u0leIXpKQSC6Er0YkAjg',
   center: [pubnub_lat, pubnub_long],
   channel: chan,
   rotate: true,
   message: function (data) {
       map.setView(data[1].latlng, 13); //13 = zoom, set location
   }
});
Next, you need to load this web page into your Android Activity.
Android WebView
After creating your webview and connecting it to the XML file, you need to set the following attributes:
webView.setInitialScale(1);
WebSettings webSetting = webView.getSettings();
webSetting.setBuiltInZoomControls(true);
webSetting.setJavaScriptEnabled(true);
webSetting.setUseWideViewPort(true);
webSetting.setLoadWithOverviewMode(true);
webView.setScrollBarStyle(WebView.SCROLLBARS_OUTSIDE_OVERLAY);
To create your own WebViewClient, you create a private class extending android.webkit.WebViewClient, with a lone boolean function shouldOverrideUrlLoading.
private class WebViewClient extends android.webkit.WebViewClient {
   @Override
   public boolean shouldOverrideUrlLoading(WebView view, String url) {
       return super.shouldOverrideUrlLoading(view, url);
   }
With that, all you need to do is set the WebViewClient and load your URL (HTML file), and then you’re all done embedding your EON map in an Android WebView! Now it’s on to working with your external APIs.
Getting Started with the Uber API
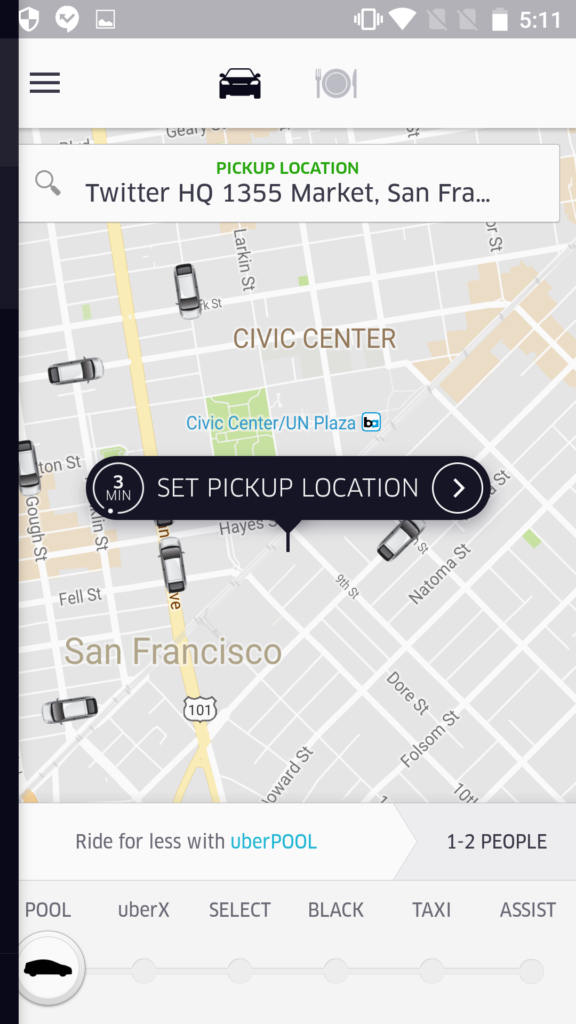
To get started with the Uber API, you will need your own API keys, which can be obtained here on your developer dashboard once you register a new application. If you have any questions or want to delve deeper into working with the Uber API, check out their documentation here.

Add mavenLocal() to your buildscript repositories in your Gradle file, and then add the following to your Gradle file dependencies.
compile 'com.android.support:multidex:1.0.1'
compile 'com.uber.sdk:rides-android:0.5.3'
You will also need to note your Client ID, your Redirect URI, and your Server Token. Though I reference them like so in defaultConfig of the main gradle file:
buildConfigField "String", "CLIENT_ID", "\"${loadSecret("UBER_CLIENT_ID")}\""
buildConfigField "String", "REDIRECT_URI", "\"${loadSecret("UBER_REDIRECT_URI")}\""
buildConfigField "String", "SERVER_TOKEN", "\"${loadSecret("UBER_SERVER_TOKEN")}\""
They must be declared in gradle.properties. Add this function to that same Gradle file:
def loadSecret(String name) {
   return hasProperty(name) ? getProperty(name) : "MISSING"
}
Adding the Uber Ride Button
Your Activity (in this case, MainActivity), must implement RideRequestButtonCallback. You will have variables like latitude, longitude, and address for both pickup and dropoff locations and a RideRequestButton, among others.
In onCreate(), you will create a new instance of SessionConfiguration, setting your clientId, redirect URL, and serverToken. This instance then is passed to your ServerTokenSession.
config = new SessionConfiguration
.Builder().setRedirectUri(redirectUri)
       .setClientId(clientId)
       .setServerToken(serverToken)
       .build();
ServerTokenSession sesh = new ServerTokenSession(config);
This is how you get authenticated to access data from the Uber API, like the endpoints needed for available products at a location, such as cost estimates for moving between locations.
Next for your RideRequestButton, you will need your RideParameters. These include setting pickup and dropoff locations with their respective latitudes, longitudes, and addresses like this:
RideParameters rideParams = new RideParameters.Builder()
       .setPickupLocation(pickupLat, pickupLong, pickupAka, pickupAddress)
       .setDropoffLocation(dropoffLat, dropoffLong, dropoffAka, dropoffAddress)
       .build();
Then, you create your actual button, setting the ride parameters, the session, and the callback.
rideReqButton = (RideRequestButton) findViewById(R.id.uber_req_button);
rideReqButton.setRideParameters(rideParams);
rideReqButton.setSession(sesh);
rideReqButton.setCallback(this);
rideReqButton.loadRideInformation();
What happens if there is an error, or success? You decide what to do in these functions, like onError and onRideInformationLoaded. In this case, I use Toast to say whether or not there was an error.
Twitter Fabric for Android
Ever wanted to quickly and efficiently tweet directly from your Android app? Separate from the Uber API, Twitter Fabric makes it easy to do just that!
Going back to your main Gradle file, you need to add classpath 'io.fabric.tools:gradle:1.+' to your buildscript dependencies, and maven { url 'https://maven.fabric.io/public' } to buildscript repositories. To your root dependencies, you need these lines:
compile('com.twitter.sdk.android:twitter-core:2.0.0@aar') {
   transitive = true;
}
compile('com.twitter.sdk.android:tweet-composer:2.0.0@aar') {
   transitive = true;
}
Twitter Login
The first screen, coming before the EON map, is a Twitter login. You will need to generate your own Twitter API keys after logging into your Fabric account. You will pass these into an instance of TwitterAuthConfig, and then use that to incorporate Fabric into this Activity:
TwitterAuthConfig authConfig = new TwitterAuthConfig(twitterKey, twitterSecret);
Fabric.with(this, new TwitterCore(authConfig), new TwitterCore(authConfig));
The TwitterLoginButton needs a callback function, defining what it will do on login success and on login failure. Once you have logged in, the button will take you to the EON map.
Tweeting from the App
From the EON map screen, you have a tweet button that, on button click, will tweet a pre-composed tweet.
This function needs another TwitterAuthConfig, which, unlike the last one, includes the TweetComposer kit. Then, using the Builder(), you create the TweetComposer that will be called when the Tweet button is clicked.
Fabric.with(this, new TwitterCore(authConfig), new TweetComposer());
TweetComposer.Builder tweetBuilder = new TweetComposer.Builder(this).
       text("Checking @sfmta Muni buses w/ @PubNub EON.js on my Android phone. May call an @Uber, though");
tweetBuilder.show();
Lastly, set this onClickListener like so:
composeTweetButton.setOnClickListener(new View.OnClickListener() {
   @Override
   public void onClick(View v) {
       composeTweet();
   }
});
Conclusion
There you have it! You can find the complete code on GitHub. Hopefully you got some ideas on how to use PubNub’s Project EON on Android, and how to incorporate Twitter Fabric and the Uber API into your Android app.
