Displaying iOS Location Data w/ Swift and Google Maps API
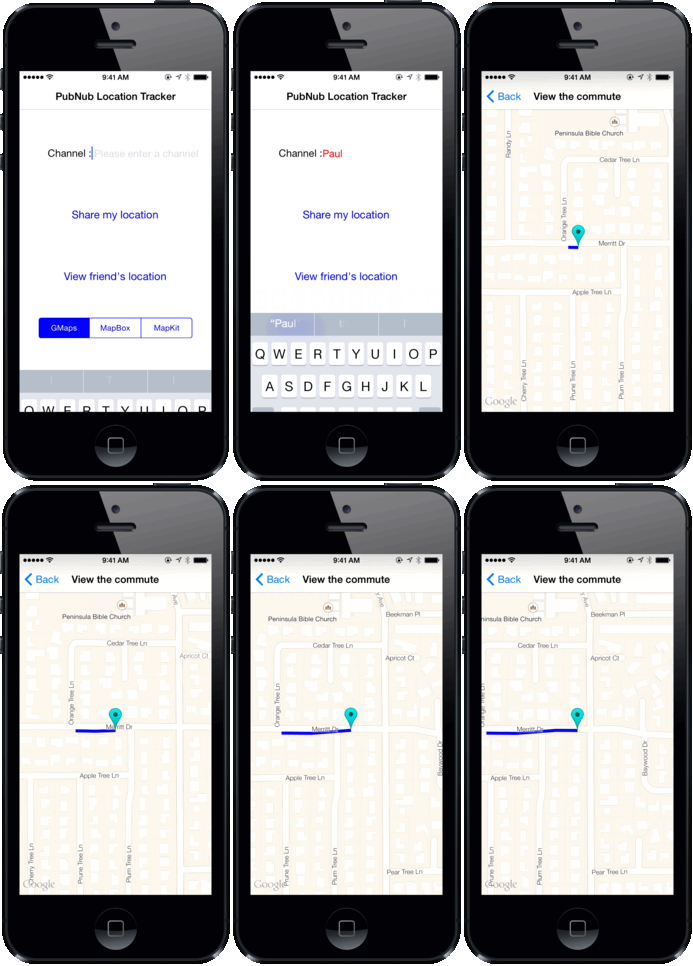
In this tutorial, we're going to use the Google Maps API to receive and publish iOS location data on a live-updating map. We'll cover two things:
- Using PubNub to listen to a channel with Swift
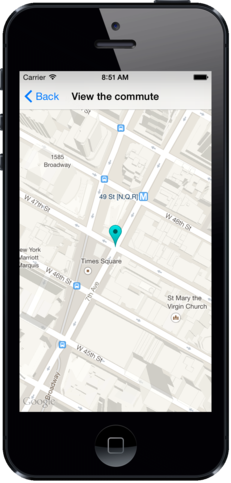
- Using the Google Maps API to draw locations on a map in real time
Click to download the full source code for the entire project here.
If you haven't already, check out our first tutorial on how to retrieve and broadcast location coordinates with iOS.
If you'd rather use a different mapping SDK, we've got you covered! Check out our same tutorial using the MapBox API or MapKit API.
**NOTE: Since we wrote this tutorial, we’ve released a new, completely-redesigned version of our iOS SDK (4.0). We rebuilt the entire codebase and took advantage of new features from Apple, simplifying and streamlining the SDK.
The code from this tutorial still works great, but we recommend checking out our new SDK. We've included a migration guide to help you move from 3.x to 4.0, and a getting started guide to help you create a simple Hello World application in minutes.**
Let’s go for it!
Getting Started
Let’s start by setting up our project properly! We will want to use the PubNub SDK for iOS. To do so we will be using cocoapods. If you don’t use it yet, you’re missing out. Easy installation and starter’s guide here!
In your project’s root directory:
Your podfile should look like:
You can make sure you are using the latest version of PubNub here.
Now you just need to type:
Close Xcode, and open the YourProject.xcworkspace.
That wasn’t too hard right? It’s not quite over though.
Use Objective-C Libraries in Swift
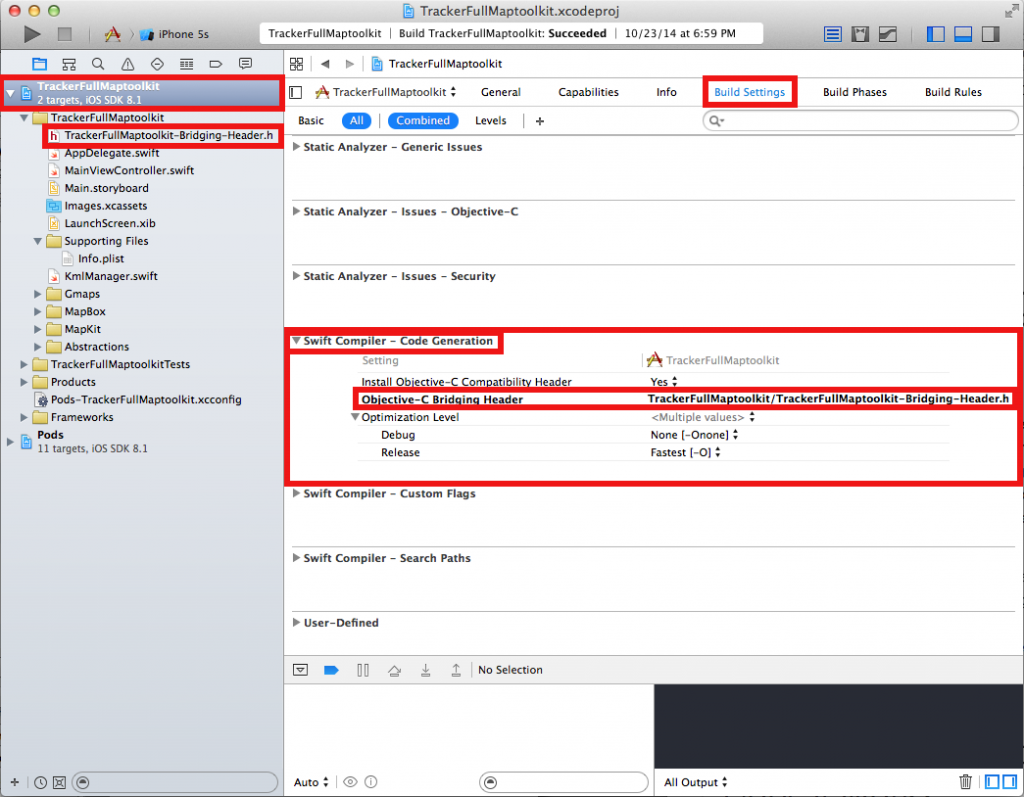
The PubNub library is written in Objective-C, but we are coding in Swift. All you need to do now is to build a bridging header. Create a new Objective-C header in your project called YourProject-Bridging-Header.h for good practice, and type:
Now in your project’s configuration panel, go to build settings and scroll down to the “Swift Compiler – Code Generation” section. Set the “install Objective-C Bridging Header” to Yes and in “Objective-C Bridging Header” type the path from your project’s root directory to your bridging header. It’ll be something like “YourProject/YourProject-Bridging-Header.h”
At this point, we should be all set! We can finally start coding! Let’s roll.
Use PubNub to Know Where Your Friends Are in Real time
You can picture a PubNub channel like a room. When you want to say something to the people in the room, you publish a message. On the other hand, if you want to listen to what people are saying in the room, you simply subscribe to the channel. Whenever something happens in the room, such as people leaving or entering, you will be notified by using callbacks. This is exactly what we will be doing in this app!
In our app, we will be listening to a friend who will be sending us frequent information on his current position. This broadcasting of the location has been described in a previous blog entry we encourage you to read! In this article, we will describe the process of getting this information via PubNub and drawing your friend’s commute on a map.
Now that you got the gist of it, let’s get into the coding!
Setting The View Controller’s Variables
Let’s first look into some of our class' variables:
The first variable represents the PubNub channel to which we will subscribe. The other sets configuration variables in order to connect to PubNub. When a user connects to PubNub, he is identified with the content of this PNConfig object.
To get your unique pub/sub keys, you’ll first need to sign up for a PubNub account. Once you sign up, you can get your unique PubNub keys in the PubNub Developer Dashboard. Our free Sandbox tier should give you all the bandwidth you need to build and test your messaging app with the web messaging API.
Starting The Connection To PubNub
For the sake of simplicity, we will put most of our code in the viewDidLoad method of a single view controller. It’ll be up to you to rearrange it anyways you want to fit your needs!
We start by setting our current view controller class as the PubNub delegate. This means that our view controller will be holding overridden methods that will be called every time an event occurs. As a result, there is a long list of callbacks we can implement. Look here for more information. To keep it simple they are methods called when the connection succeeds, fails, or more interestingly when a message is sent on the channel we are subscribed to.
So we must also define our view controller as being a PubNub delegate:
The second line sets the configurations we had already defined. The third finally connects to PubNub. The following one defines our channel based on its name. Feel to choose any name you want! Finally we subscribe to the channel. This channel must be the same as the one where your friend’s location information is being broadcasted.
Implementing a PubNub Callback
Now let’s implement our callbacks. Every time our friend has a new position, he will send a message on the channel. On our side we need to implement the callback which will be listening for his messages. These messages are JSON objects. In our case, the JSON is a simple dictionary holding three values: the longitude, latitude and altitude.
There it is! We have a method which simply extracts the key informations from the messages being sent! We are going to modify this callback in order to map the data.
Let’s get right to it!
Use Google Maps to Draw a Polyline
We will get into using Google Maps to view your friend’s location on a map. You will need to get an API key for your project. Get your Google Maps API key here!
Adding Variables To The View Controller
In this tutorial, we will not focus on the user interface. It’s up to you to make your own. Filling the frame with a map may suffice, feel free to make whatever you want out of it. We have done this very simply programmatically:
Again, feel free to do whatever you want with the interface, this is just a simple example.
In our viewDidLoad method, we will add a simple line to set the mapview delegate. The process is the same as previously.
Modifying PubNub’s Callback
We will simply divide the process in three parts, so we simply add 3 lines calling a different method for each part:
We simply extract the location data from the message, store this information into a locations array holding our data.
We finally use this data to update the map view. This takes 3 steps:
- Drawing the line of your friend’s commute
- Centering the map on your friend’s current location
- Placing a marker in order to identify your friend’s current location
Note that when we receive the first message, we initialize the polyline:
This step allows us to set the polyline’s appearance and add it on our map!
Updating The Overlay
The approach here is to add points to the path object. We update the polyline by replacing its path with the new updated one.
Centering The Map
Updating The Marker
Last but not least, we update the position of the marker point at your friend’s current location. To do so, we remove the existing marker from the map, create a new marker with a new location, set its icon and bring it back up on the map!
We’re already done! How does it feel being able to make a real-time tracking application? If the MapBox API or the MapKit API is more you cup of tea, we have a tutorial for that too!


