Create a Multiplayer AR Game with Magic Leap and Unity
Augmented reality is a fresh new layer for gaming that promises new experiences for users and more revenue for game studios. However, AR brings new challenges to traditional game design when you start to build multi-user games and need to sync content between them. Even in single player games where there's no content to sync, there's a significant demand from users to add social experiences like chat and leaderboards.
This is Part three of our Magic Leap series. Check out the other posts Getting Started with Magic Leap and PubNub and Controlling Internet-connected Devices with Magic Leap Hand Gestures.
Why PubNub and Magic Leap?
Developers have been building multiplayer games and other multi-user experiences with PubNub for years, and we definitely see AR as next on the horizon. PubNub is a natural fit in the AR world. Our technology can power the real-time interaction between AR headsets or physical objects in the same location, or even across the Earth.
For instance, when a Magic Leap user throws a ball in the virtual world, that motion is synchronized in real time across every other connected user. Or if a user uses a hand gesture to turn on a light, PubNub is sending the message to that light to turn on. Multi-user experiences, or the relationship between the AR headset and the physical world around us, is where PubNub is required and excels.
Getting Started
The objective of Cube Fight is to take cubes from other players by using the Magic Leap Eye Gaze feature to select a cube and the trigger on the controller to take it. PubNub will handle the transmission of messages regarding the ownership state of each cube.
Before continuing with this tutorial, you need to read the Getting Started with Magic Leap and Unity tutorial first to familiarize yourself with Unity Video Game Engine development for Magic Leap and setup your development environment.
There are a few requirements before you can get started:
- Become a Magic Leap Creator.
- Install Lumin SDK and Unity Magic Leap Test Preview.
- Know how to use the Magic Leap Remote and Play Mode.
- A Magic Leap One (or you can use the simulator).
- A PubNub account (always free).
- Once you sign up, you can get your unique PubNub keys from the PubNub Admin Dashboard.
Configure the Project
Clone or download the repo for the Cube Fight multiplayer game. If you haven't already, Install the Lumin SDK and Unity Magic Leap Test Preview.
Open up Unity, click “Open” and select the “Cube Fight” directory. It will take some time to load the project in Unity.

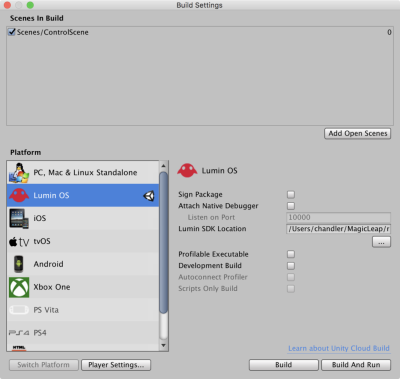
You'll need to change the build settings for the game to target Magic Leap and Lumin OS:
- Click “File” and then “Build Settings.”
- In the “Platform” section:
- Close the window.
- See the Configuring a Magic Leap Project in Unity guide from Magic Leap for more information on building a Unity app for Magic Leap.
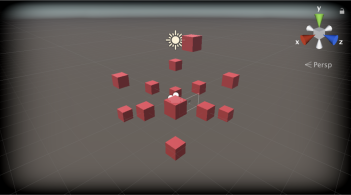
Next, open up the “Assets” folder in the “Project” tab and double-click on the “ControlScene” Unity Scene. You should see the cubes for the game in the scene.
How it Works
This game uses Magic Leap Eye Gaze to select game objects (the cubes) and the trigger on the controller to take them. Additionally, there's an eye position indicator to aid the user in knowing where the device thinks they are looking.
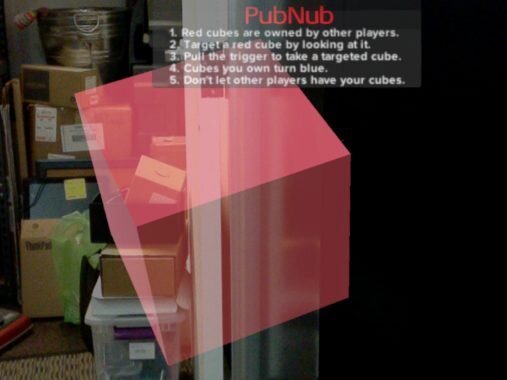
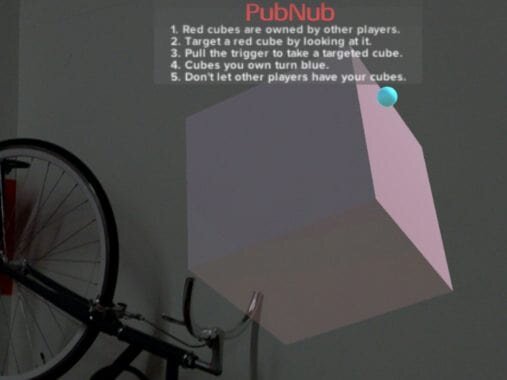
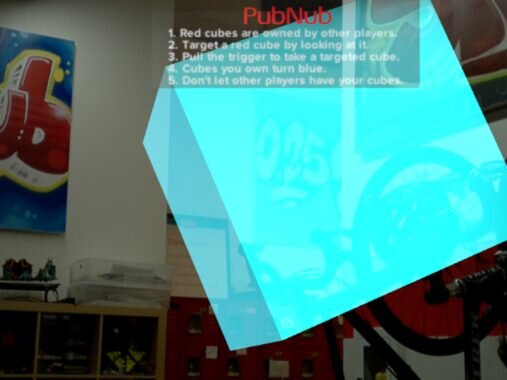
There are three states/colors each cube can be in:
- Not Focused (red) – The user is not looking directly at the cube, has not taken the cube, and another player owns the cube.
- Focused (dark red) – The user has looked at, but not taken the cube and another player owns the cube. Notice the eye position indicator is on the cube (the blue sphere).
- Owned (blue) – The user has looked at and took the cube by pulling the trigger.
Each cube has the script “EyeSelection” as a component. This script handles eye tracking and controller events. When the player looks directly at a cube and pulls the trigger a message is published to PubNub to inform other players of the ownership change. When the players receive a message the cube color is updated to reflect the current state of the cube.
using System.Collections;
using System.Collections.Generic;
using UnityEngine;
using UnityEngine.XR.MagicLeap;
using PubNubAPI;
// Tracks the fixation point of the users eyes and selects a game object when user gazes at it.
// When the controller trigger is pulled a message is published to a channel that is used to determine the ownership of the game object.
public class EyeSelection : MonoBehaviour {
    public GameObject Camera;
    public Material FocusedMaterial, NonFocusedMaterial, OwnedMaterial; // User looking, user not looking, and user owns.
    public static PubNub pubnub;
    private MeshRenderer meshRenderer; // The game object.
    private bool looking; // Is the user looking at the game object?
    private bool owned; // Does the user own the game object?
    private string pn_uuid; // The UUID is unique to the PubNub client used for each game object and is used to determine who owns the game object.
    private Vector3 _heading; // Where the user looking.
    void Start () {
        MLEyes.Start(); // Start eye tracking.
        MLInput.Start(); // Start input controller.
        MLInput.OnTriggerDown += HandleOnTriggerDown; // Get trigger down event.
        meshRenderer = gameObject.GetComponent<MeshRenderer>(); // Get the game object.
        PNConfiguration pnConfiguration = new PNConfiguration(); // Start PubNub
        pnConfiguration.PublishKey = "YOUR-PUB-KEY"; // YOUR PUBLISH KEY HERE.
        pnConfiguration.SubscribeKey = "YOUR-SUB-KEY"; // YOUR SUBSCRIBE KEY HERE.
        pubnub = new PubNub(pnConfiguration);
        pn_uuid = pnConfiguration.UUID; // Get the UUID of the PubNub client.
        pubnub.Subscribe()
            .Channels(new List<string>(){
                meshRenderer.name // Subscribe to the channel for the game object.
            })
            .Execute();
        pubnub.SusbcribeCallback += (sender, e) => {
            SusbcribeEventEventArgs message = e as SusbcribeEventEventArgs;
            if (message.Status != null) {
                    switch (message.Status.Category) {
                    case PNStatusCategory.PNUnexpectedDisconnectCategory:
                    case PNStatusCategory.PNTimeoutCategory:
                        pubnub.Reconnect();
                    break;
                }
            }
            if (message.MessageResult != null) {
                // Does the message equal the UUID for this client?
                if (message.MessageResult.Payload.ToString() == pn_uuid) { // Message and client UUID are the same.
                    meshRenderer.material = OwnedMaterial; // The user owns the game object, change material to OwnedMaterial to show.
                    looking = false;
                    owned = true;
                } else { // Message and client UUID are NOT the same.
                    if (owned) { // Only need to change color if the user owns the game object.
                        meshRenderer.material = NonFocusedMaterial; // Another user has taken the game object, change material to NonFocusedMaterial to show..
                        owned = false;
                    }
                }
            }
        };
    }

    void OnDestroy () { // Stop eye tracking and inputs.
        MLEyes.Stop();
        MLInput.OnTriggerDown -= HandleOnTriggerDown;
        MLInput.Stop();
    }
    void Update () {
        if (MLEyes.IsStarted) {
            RaycastHit rayHit = new RaycastHit();
            _heading = MLEyes.FixationPoint - Camera.transform.position;
            if (Physics.Raycast(Camera.transform.position, _heading, out rayHit, 10.0f)) { // Check for collisions of user's eye gaze with a game object.
                if (rayHit.collider.name == meshRenderer.name) { // Check if collision is with this game object.
                    if (!owned) { // Only highlight if the user does not own the game object.
                        meshRenderer.material = FocusedMaterial;
                        looking = true;
                    }
                }
            }
            else { // User is not looking.
                if (!owned) { // Only remove highlight if the user does not own the game object.
                    meshRenderer.material = NonFocusedMaterial;
                    looking = false;
                }
            }
        }
    }
    void HandleOnTriggerDown(byte controllerId, float value) {
        if (looking) { // Send a message to take the game object if the user is looking and the trigger was pulled.
            pubnub.Publish()
                .Channel(meshRenderer.name) // Send a message to the channel for the game object.
                .Message(pn_uuid) // Send the UUID for this client.
                .Async((result, status) => {
                    if (!status.Error) {
                        Debug.Log(string.Format("Publish Timetoken: {0}", result.Timetoken));
                    } else {
                        Debug.Log(status.Error);
                        Debug.Log(status.ErrorData.Info);
                    }
                });
        }
    }
}
Get your unique PubNub keys from the PubNub Admin Dashboard. If you don’t have a PubNub account, you can sign up for a PubNub account for free. Replace “YOUR-PUB-KEY” and “YOUR-SUB-KEY” with your keys.
The “EyeFocus” script is applied to a sphere as a component to indicate where the user is focusing. This is helpful for users who are having trouble identifying where the device thinks they are looking.
using System.Collections;
using System.Collections.Generic;
using UnityEngine;
using UnityEngine.XR.MagicLeap;
// This scripts moves a game object to the fixation point of the users eyes.
public class EyeFocus : MonoBehaviour {
  public MeshRenderer meshRenderer;
  // Start eye tracking.
  void Start () {
    MLEyes.Start();
        	meshRenderer = gameObject.GetComponent<MeshRenderer>();
  }

  // Update is called once per frame.
  void Update () {
    if (MLEyes.IsStarted) {
         	meshRenderer.transform.position = MLEyes.FixationPoint;
    }
  }
  // Stop tracking.
  void OnDestroy () {
        MLEyes.Stop();
    }
}
The “Rotator” script is applied to each cube as a component to randomly rotate each cube to make the game look more interesting.
using System.Collections;
using System.Collections.Generic;
using UnityEngine;
// Rotates a object at a random rate.
public class Rotator : MonoBehaviour {
  void Start()
    {
        GetComponent<Rigidbody>().angularVelocity = Random.insideUnitSphere * 0.3f;
    }
}
Run the Unity Project
You'll need two Magic Leap One devices, two simulator instances, or one of each to completely test the Cube Fight game. However, you can still test it with only one device or simulator if you're interested in seeing how it works.
There are three ways to run the app:
- Using the Magic Leap Remote and Play Mode to test on the simulator.
- Using the Magic Leap Remote and Play Mode to test on the device.
- Deploy to Magic Leap One (Recommended).
Using the Magic Leap Remote and Play Mode
See the Launch Magic Leap Remote and Play Mode with Magic Leap Remote guides from Magic Leap for more information about using the Magic Leap Remote.
-
You can change your code and see the results immediately while in play mode.
-
If you do not have a device, play mode simulates the Lumin SDK API layers and composites the graphics with input from a virtual room.
-
If you do have a device, play mode simulates the Lumin SDK API layers and then streams the rendered frames to the headset display.
Windows
- In Windows Explorer, navigate to the “VirtualDevice\bin\UIFrontend” directory inside your Lumin SDK location.
- Double-click “MLRemote.exe”.
macOS:
- In Finder, navigate to the “VirtualDevice/bin/UIFrontend” directory inside your Lumin SDK location.
- Double-click “Magic Leap Remote.app”.
Iterate on the Simulator
- Click “Start Simulator”.
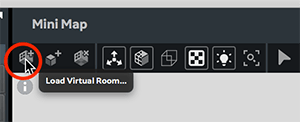
- In the Simulator window, click the “Load Virtual Room” button on the toolbar.
- Navigate to VirtualDevice\data\VirtualRooms\ExampleRooms and then open an example room file.
- Read the Magic Leap guide on simulating input on magic leap remote to simulate the eye position and controller input.
- For the best experience with the Cube Fight game, test on a device.
Iterate on Device
- Connect a device to your computer over USB.
- The device should appear in the Magic Leap Remote window.
- Click “Start Device”.
Start Play Mode
If you're using the simulator: Read the Magic Leap guide on simulating input on magic leap remote to simulate the eye position and controller input.
To use the Magic Leap Remote you will need to enable Magic Leap zero iteration mode. In Unity click “MagicLeap” and then “Enable Zero Iteration”. Restart the editor.
- Open the Cube Fight project.
- Click “Edit” and then “Play”.
- The app should start on the simulator or on the device.
Deploy to a Magic Leap Device
See Deploying a Unity App to the Device from Magic Leap for more information about deploying an app a device.
- You’ll first need to follow the steps from Magic Leap to set up your device for development.
- Connect a device to your computer over USB.
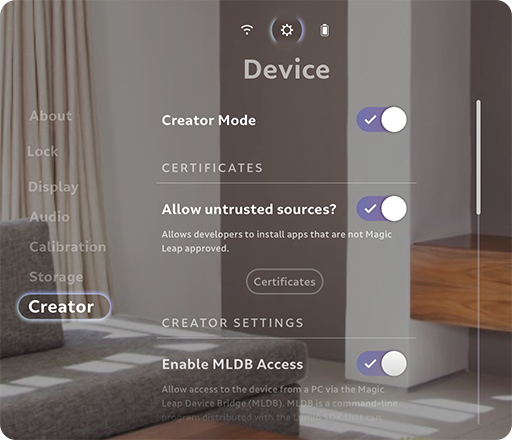
- On the device navigate to “Settings”, “Device”, and then “Creator Mode”.
- Select the following:
- Enable Creator Mode – Make Creator Mode options available for selection.
- Allow Untrusted Sources – Install apps signed with a development certificate.
- Enable MLDB Access – Allow Magic Leap Device Bridge to connect to your device.
- Navigate to the Magic Leap Creator Portal and click “Publish” and then “Certificates”.
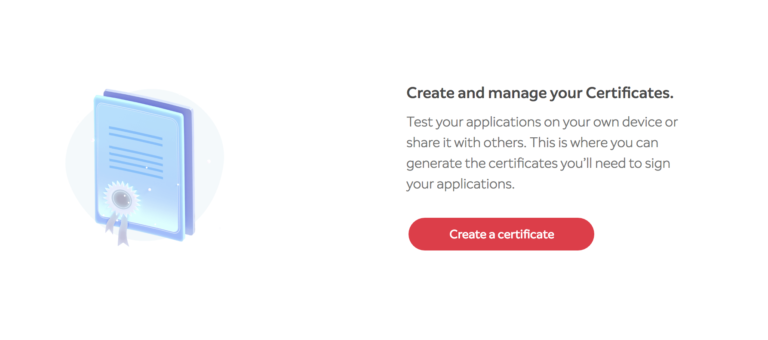
- Click “Create Certificate” or “Add New”.
- Enter a name for the certificate and click generate. The “privatekey.zip” file will download. You can only download the private key at this step. You must generate a new certificate if you misplace this file.
- The certificate takes a few minutes to generate. Refresh the page until the certificate status changes from “pending” to “active”.
- When the certificate has generated, click the download button next to your certificate to download the file.
- Extract the private key from the “privatekey.zip” file and move the “.privkey“ and “.cert” files into the same folder.
- Go back to your Unity project.
- Click “File” and then “Build Settings”.
- Check the box next to “Sign Package”.
- Close the window.
- Click “Edit”, “Project Settings”, and then “Player”.
- Expand “Publishing Settings” and set the path to “ML Certificate” to point to the certificate you downloaded.
- Connect your device to your computer.
- Click “File” and then “Build and Run”.
- Save the .mpk. Unity will transfer the app to the device when the build has completed.
- Put on the device.
- The first time you install an app with your Magic Leap developer certificate, you are prompted to accept the certificate on the device.
- If you do not accept the certificate, Cube Fight won’t install.
- If you take too long to put on the device, the prompt will dismiss itself, and Cube Fight won’t install.
- The app should start on the device.
What's Next?
The augmented world is your oyster with Magic Leap + PubNub. Here are a few ideas to get you started:
- Build a AR chess game.
- Create a AR zombie shooter.
- Use gesture recognition to control devices like a lamp or fan.
Have suggestions or questions about the content of this post? Reach out at devrel@pubnub.com.
This is Part three of our Magic Leap series. Check out the other posts Getting Started with Magic Leap and PubNub and Controlling Internet-connected Devices with Magic Leap Hand Gestures.
