Remote WiFi Setup with Arduino’s MKR1000
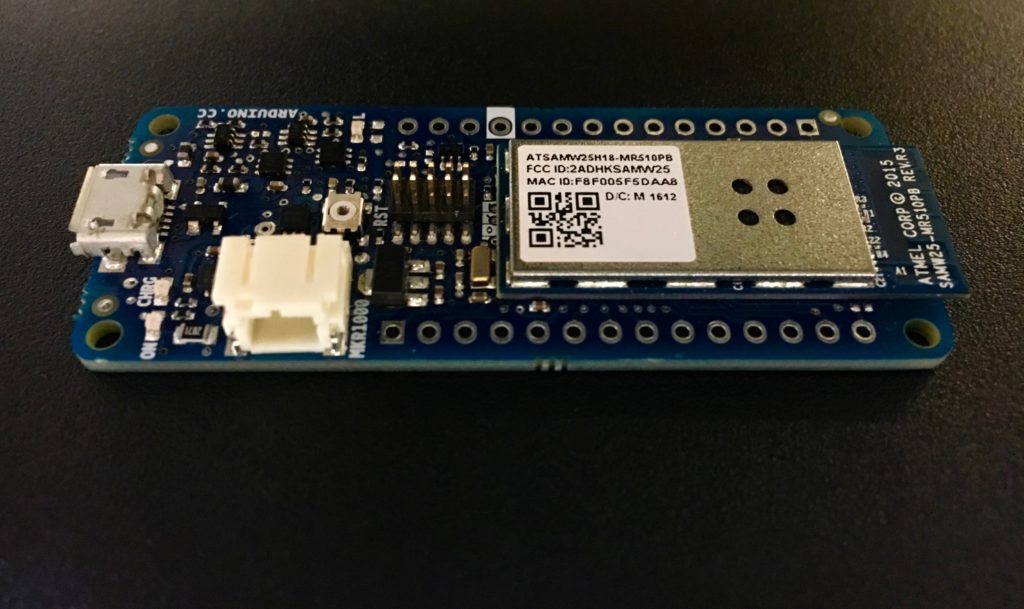
This tutorial walks you through how to turn Arduino's new board, the MKR1000, into an access point, process your WiFi credentials from a web browser, and connect your MKR to a WiFi network from a laptop or mobile device. As an added bonus, you'll also learn how to connect to PubNub and publish a real-time message in the same way.
One of the coolest features of the MKR1000 is the fact that it can act as an access point as well as actually connect to an existing WiFi network. When I heard that, I got to wondering: could someone use the access point connection to set up the Arduino’s WiFi credentials remotely? After all, hard-coding the WiFi credentials is all well and good when you’re sitting in front of a computer with a device that you own, but what if you want someone else to use your device, or you want to run a program from a location where you can’t re-flash the Arduino?
Well, lucky for you, after a few days of experimentation I found a way for you to remotely configure your MKR’s WiFi and more, without having to re-flash it. If this is the first time you’re uploading a sketch to your MKR1000, be sure to set it up properly, as outlined in Getting to Know Your MKR1000. Otherwise, it’s time to get started!

The full code repository is available on GitHub.
Initial Setup
Before you start diving into the code, you need to make sure you have the right libraries downloaded, and start setting up a framework for your sketch in order to avoid confusion later.
Download Libraries
For this sketch, make sure you have the most recent version of the WiFi101 library installed from Arduino’s Github page – it has functionalities you’ll need in order to compile your sketch properly. Also, make sure you’ve downloaded the PubNub library from the PubNub Arduino documentation page.
Outlining Sketch Organization
Because this sketch is a little complex, it’s important to first outline exactly how it will be executed before starting to churn out your code. To do this, you need to think through the logic of the program and set up an outline according to what needs to be done and in what order that needs to happen. So, in this sketch, you need to first establish an access point, then set up a method to receive data through that access point, interpret the data, disconnect the access point, and finally use that data to connect to an existing WiFi network and publish a message through PubNub. Going through those actions, you can set up an outline like the one below, using booleans to mark the transitions between tasks.
#include <SPI.h>
#include <WiFi101.h>
#include <PubNub.h>
boolean needCredentials = true;
boolean needWiFi = false;
boolean needPubNub = false;
void setup() {
  //Establish access point
}
void loop() {
  if (needCredentials) {
    getCredentials();
  }
  if (needWiFi) {
    getWiFi();
  }
  if (needPubNub) {
    getPubNub();
  }
}
void getCredentials() {} //Get information from access point
void getWiFi() {} //Establish a WiFi connection
void getPubNub() {} //Establish a PubNub connection
Now that you know roughly how you’re going to execute the sketch, it’s time to start filling in the blanks.
MKR1000 as Access Point
To configure an access point, you need to first define an initial WiFi status, an SSID, and a server, which will host the access point configuration web pages.
char apssid[] = "MKR1000AP";
int status = WL_IDLE_STATUS;
WiFiServer server(80);
Then you need to initialize your access point in void setup(), which you can do with just a couple lines of code.
void setup() {
    if (WiFi.beginAP(apssid) != WL_CONNECTED) {
        Serial.println("Creating access point failed");
        while (true);
    }
}
Next, you need to connect to the access point from your browser. The easiest way to do this is to print information to the console about how to get to the access point from another device using your MKR’s IP address. You should probably do this in a helper function, to keep your sketch organized. If you don’t have access to a serial monitor, you just need to know your MKR1000’s IP address to connect to the access point from your browser. Connect to the access point network and type the IP into the browser to load HTML data.
void printAPStatus() {
  Serial.print("SSID: ");
  Serial.println(WiFi.SSID());
  IPAddress ip = WiFi.localIP();
  Serial.print("IP Address: ");
  Serial.println(ip);
  Serial.print("signal strength (RSSI):");
  Serial.print(WiFi.RSSI());
  Serial.println(" dBm");
  Serial.print("To connect, open a browser to http://");
  Serial.println(ip);
}
The last things you need to do in void setup() are calling your helper function and initializing your server.
printAPStatus();
server.begin();
Great! Now you're ready to start sending data.
Sending and Receiving Data
Now that you’ve got the access point all set up, it’s time to figure out a way for you to get data through it. This process will take place in the getCredentials() function, and it’ll require some coding in HTML and, if you want, CSS.
Framework Setup
Like you did earlier, it’s best to set up an outline for executing this part of the sketch, as it can get a little complicated. First, you’ll need to establish a way of both sending and reading client data. Then, you’re going to need to check for five different pieces of specific data from the page: network SSID, password, publish key, subscribe key, and channel name.
You’ll read information from the client one byte at a time, and by printing that to the console you’ll be able to decode each piece of data coming from the client.
void getCredentials() {
  WiFiClient client = server.available();
  if (client) {
    String currentLine = "";
    while (client.connected()) {
      if (client.available()) {
        char c = client.read();
        Serial.print(c);
          if (currentLine.length() == 0) {
            //send HTML to client
          }
          else {
             //check for data
            currentLine = "";
          }
        }
        else if (c != '') {
          currentLine +=c;
        }
      }
    }
    client.stop();
  }
}
Creating the HTML Page
There are a couple different ways to print HTML data to the client. Personally, I like using individual print statements because it helps me to visualize the code better, but feel free to experiment with different methods. It might be easier to write this section of the sketch in a different editor and then copy it into the Arduino IDE, keeping in mind that the Arduino won’t check for errors in the HTML when compiling.

First, you need to tell the client what kind of content you’re sending.
if (c == '
') {
      if (currentLine.length() == 0) {
            client.println("HTTP/1.1 200 OK");
            client.println("Content-type:text/html");
            client.println();
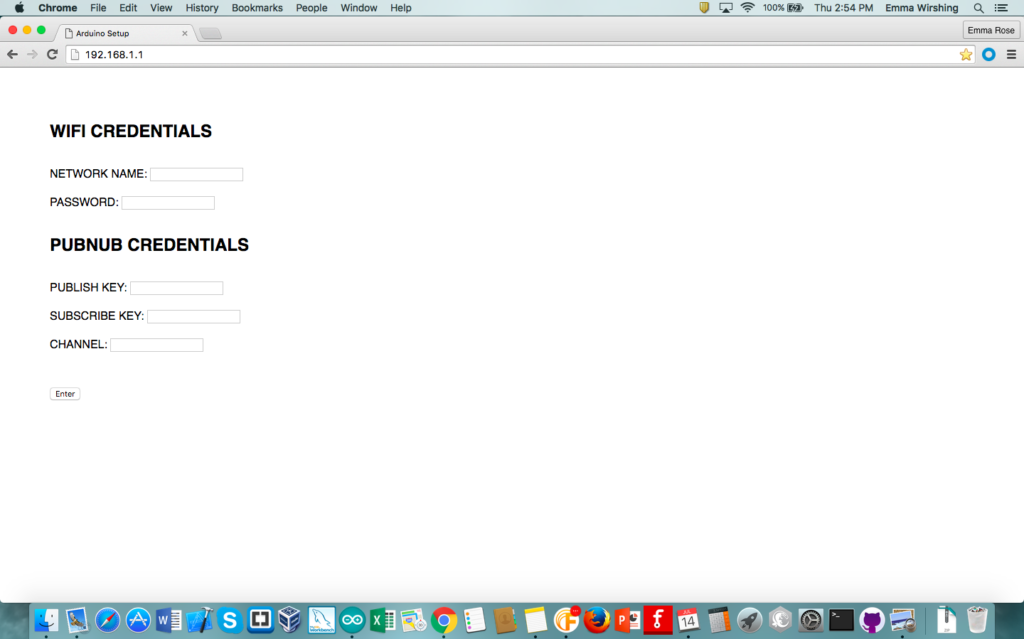
In the body of your HTML, you should create a GET request so that you can retrieve information from the client. Include several input boxes for the user to type in their different codes and keys, as well as a button for them to press once they’re done.
            client.println("<html>");
            client.println("<body>");
            client.println("<form method=get>");
            client.print("<input type=\"text\" name=\"network\"/><br>");
            client.print("PASSWORD: ");
            client.print("<input type = \"text\" name=\"password\"/><br>");
            client.print("PUBLISH KEY: ");
            client.print("<input type=\"text\" name=\"pubkey\"/><br>");
            client.print("SUBSCRIBE KEY: ");
            client.print("<input type=\"text\" name=\"subkey\"><br>");
            client.print("CHANNEL: ");
            client.print("<input type=\"text\" name=\"channel\"><br>");
            client.print("<input type=submit value=Submit></form>");
            client.println("</body>");
            client.println("</html>");
            client.println();
            break;
If you’d like to add in your own CSS, feel free. Just print another line to the client with any style data you want to include.
Reading the Data
To separate the entered data into different variables, you need to have the Arduino read all the bytes coming from the server and be able to sort out the different pieces of data that it’s collecting. To do this, you can separate the output of the GET request based on its delimiters. To make sure that you’re doing this at the right point in your program, include it in the else statement, before you set currentLine to a blank string.
else {
       if (currentLine.indexOf("?network=") != -1) {
         netIndex = currentLine.indexOf("?network=");
       }
       if (currentLine.indexOf("&password=") != -1) {
         passIndex = currentLine.indexOf("&password=");
       }
       if (currentLine.indexOf("&pubkey=") != -1) {
         pubIndex = currentLine.indexOf("&pubkey=");
       }
       if (currentLine.indexOf("&subkey=") != -1) {
         subIndex = currentLine.indexOf("&subkey=");
       }
Do this for each one of your input fields. Once you finish the last one, you need to manually stop the server, end the access point, and alter the appropriate booleans.
       if (currentLine.indexOf("&channel=") != -1) {
          chanIndex = currentLine.indexOf("&channel=");
          network = currentLine.substring(netIndex+9, passIndex);
          password = currentLine.substring(passIndex+10, pubIndex);
          pubkey = currentLine.substring(pubIndex+8, subIndex);
          subkey = currentLine.substring(subIndex+8, chanIndex);
          channel = currentLine.substring(chanIndex+9, currentLine.indexOf(" HTTP/1.1"));
          client.stop();
          WiFi.end();
          needCredentials = false;
          needWiFi = true;
        }
        currentLine = "";
}
Connecting to WiFi
Now that you’re done with the access point phase of your sketch, it’s time to use the data you collected to establish a connection to an existing WiFi network. All you need to do is call the WiFi.begin() function to connect to WiFi and input your SSID and password, converted so they work with the function. Then, change the appropriate booleans to move on with your program.
void getWiFi () {
    while (WiFi.status() != WL_CONNECTED) {
       Serial.print("Attempting to connect to SSID: ");
       Serial.println(network);
       WiFi.begin(network.c_str(), password.c_str());
       delay(10000);
    }
  Serial.println("WiFi connection successful");
  needWiFi = false;
  connectPubNub = true;
}
And there you go! If you run the code as is, you’ll be able to connect your device to a WiFi network from your laptop or phone.
Connecting to PubNub
You can follow a similar process to connect to PubNub and publish a message. To do this, you need to convert your PubNub credentials, initialize PubNub, and publish a message to the converted channel.
void getPubNub () {
  PubNub.begin(pubkey.c_str(), subkey.c_str());
  Serial.println("PubNub connection established");
  WiFiClient *client = PubNub.publish(channel.c_str(), "{\"Arduino\":\"Hello World!\"}");
  connectPubNub = false;
}
Now if you run the program, you should not only connect to WiFi, but you should also see a “Hello World!” message published to your specified PubNub channel. Cool, right?
Next Steps
Now that you know the basics about transitioning your MKR1000 between acting as an access point and connecting to a WiFi network, you can use this method to collect almost any kind of information you’d like, whether it’s user data or Arduino commands, URLs or memorable quotes. As a bonus, you could use the access point as a remote control for your Arduino. You could switch on LEDs, control servos, or facilitate virtually any process that the Arduino is capable of, all through your computer. Keep in mind going forward that the MKR1000 can’t connect to WiFi and be an access point simultaneously, but it can be a web server in both modes. So what are you waiting for? Start exploring!