We left off in the first part of our series by successfully detecting a Tessel RFID scan and sending RFID events in real time. Now, let's do something with that RFID event. Let's act on the event and trigger an action.
This entry goes into the detail required for receiving and interpreting those Tessel RFID events. Every time a message is sent with an RFID you would need to interpret the message, extract the data, and match it against known RFID codes.
In the case shown in the example we need to have a list of valid RFIDs, which includes the 026e9a03. Your RFID code will be something completely different, so please take note of that code and use it instead. The first step will be getting the Tessel set up.
Follow the instructions from our previous blog post and run the code!
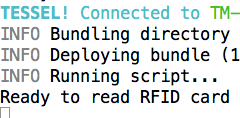
This puts the Tessel in a state where it is ready to read the RFID card. Now everytime we touch the RFID card to the module, it will read the UID and publish the UID to the tesseldemo channel. The question is how we use this information with a purpose.
The Code
You will use the source code from projects/streaming-camera/camera-ui.html. If you don’t already have the repository, clone the repository.
Navigate to the projects/streaming-camera folder. Next you need to open camera-ui.html with your preferred text editor. You need to keep much of the streaming-camera project code. First we will make some simple modifications to the HTML itself. Remove the img line as well as the lines regarding the timestamp. You also need to modify uuid and change every occurence to uid instead.
This leaves you with html, which will display all detected card uid’s. Now you need to change the AngularJS code. Once again just change uuid to uid for every occurrence.
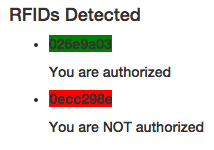
After refreshing the web page, the html should show you every unique uid number that has been sent to the channel.

This is cool. You can see everyone who has tried to access your secret Tessel vault. Now you need to add some code to allow or deny access based on the uid. You also want to add a string based on authorization. This is where you will edit the message event in the angular code. First you need to create a string, which contains the valid authorization code.
Next you need to check based on the string.
This code looks through each of the devices objects and matches them against the string. If the code matches, the device gets a green color and is authorized. If it is not authorized, it gets a red color and is not authorized.
Now switch back to the html to add the visuals.
The code could be further modified to contain an array of objects. Those objects could contain the owner’s name or other information pertinent to the service being provided.
That's it! We hoped you enjoyed our two-parter on building a real-time RFID app with Tessel and PubNub.