Building a React Native Chat App - Part Two: Message History
In our previous part of our ongoing tutorial series on building a React Native chat app, we set up basic messaging and our chat UI. In this part, we're going to add message history, which will allow you to store and fetch historic messages. When a user reboots their chat app, they'll be able to see previously sent messages.
Note, you'll need to complete Part One before going through this tutorial since we covered set up in that part as well.
In this part, we are going to cover two main areas of message history:
- Fetching message history
- Visually displaying which user sent a message
Fetching Message History
Currently, our chat app has a global chat interface. Chat messages appear in the global log for all connected users when someone sends a message. But when we close the app, all of the messages vanish. When we re-open the app, the message log is empty. This is because the message history is not stored on the device.
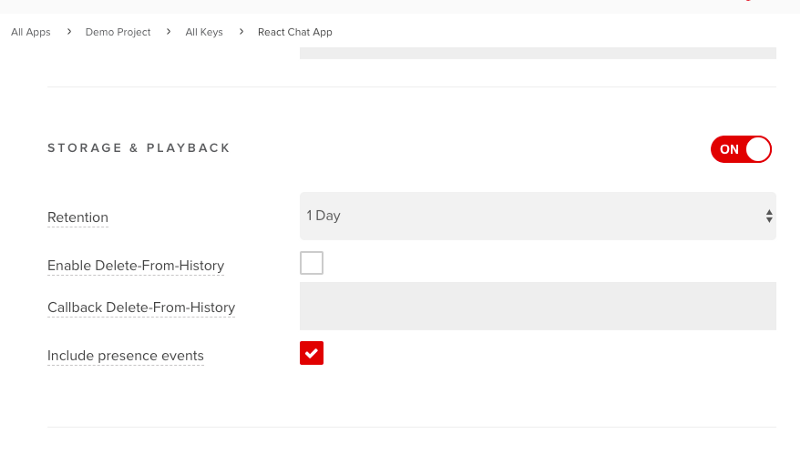
That's what we'll solve in this part – storing and fetching the message history. We'll use PubNub Storage & Playback (sometimes referred to as History or the History API) to do it.
Navigate to your PubNub Admin Dashboard, and activate the feature.
Once the Storage & Playback is activated, we need to fetch the stored message when the app is refreshed or resumed. For that, we need to return to the App.js file and then fetch the stored messages when the app gets started, using the componentDidmount() React callback function.
The following code snippet fetches message history from a PubNub channel:
this.pubnub.history(
  { channel: "MainChat", reverse: true, count: 15 },
  (status, res) => {
    console.log(newmessage);
  }
);
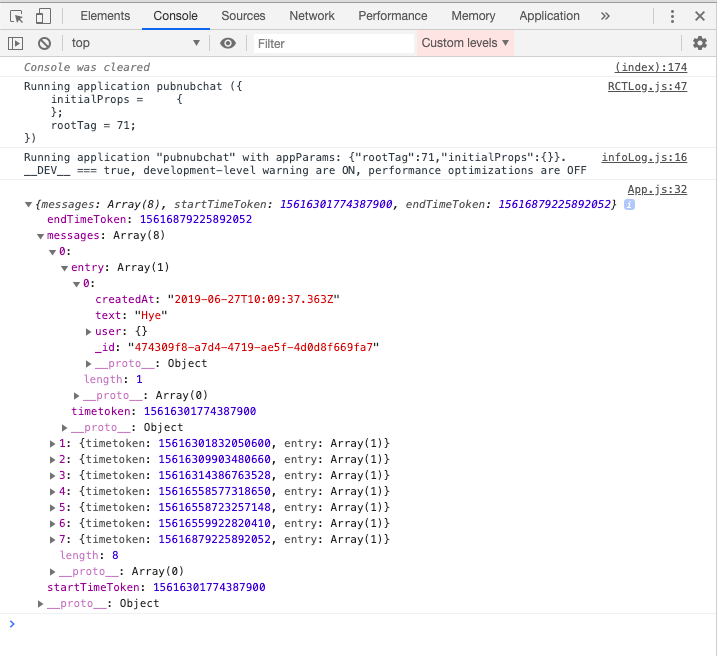
This function works by simply fetching 15 messages from a channel named MainChat. The fetched messages can be seen in the JavaScript developer console.
You can see that it works like a charm. But when we observe the default Gifted Chat message structure, it doesn't match our design. So we need to reconstruct the message before we append the new messages to the React state. You can use the code from the following snippet to construct a new message array which will match the message structure of the Gifted Chat:
componentDidMount() {
  this.pubnub.history(
    { channel: "MainChat", reverse: true, count: 15 },
    (status, res) => {
      let newmessage = [];
      res.messages.forEach(function(element, index) {
        newmessage[index] = element.entry[0];
      });
      console.log(newmessage);
    }
  );
}
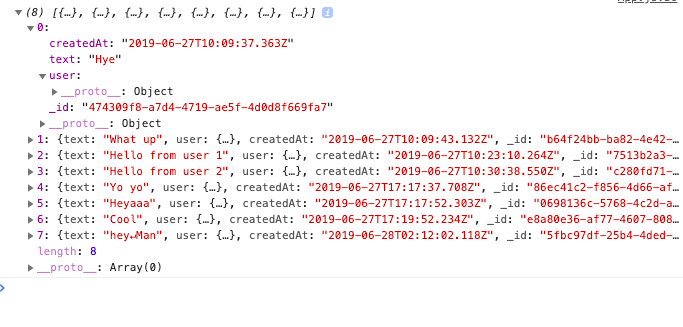
You can see that the message structures are aligned in the following screenshot.
Now, we need to append the new message array to Gifted Chat. For that, you can use the following code snippet:
componentDidMount() {
  this.pubnub.history(
    { channel: "MainChat", reverse: true, count: 15 },
    (status, res) => {
      let newmessage = [];
      res.messages.forEach(function(element, index) {
        newmessage[index] = element.entry[0];
      });
      console.log(newmessage);
      this.setState(previousState => ({
        messages: GiftedChat.append(
          previousState.messages,
          newmessage
        )
      }));
    }
  );
}
Now the message history will load even when the app is refreshed.
However, the messages are ordered in the opposite direction. So we need to reverse the array before we add the array to Gifted Chat. You can do this by using the following code snippet:
componentDidMount() {
  this.pubnub.history(
    { channel: "MainChat", reverse: true, count: 15 },
    (status, res) => {
      let newmessage = [];
      res.messages.forEach(function(element, index) {
        newmessage[index] = element.entry[0];
      });
      console.log(newmessage);
      this.setState(previousState => ({
        messages: GiftedChat.append(
          previousState.messages,
          newmessage.reverse()
        )
      }));
    }
  );
}
And with that, chat messages are now retrieved and displayed in the correct, chronological order that they were sent.
Associating Users to Messages in the Chat UI
You can observe that when you send a message and refresh the app, the messages are all displayed on the recipient side. Why does this happen? We've randomly created a user id when we load the app, to simulate multiple users.
We need to add a little user authentication so we can identify users in the chat. This will enable us to show the messages on the correct side of the chat interface. Then, users will be able to visually differentiate their chat messages from their friend's chat messages.
First, we need to create a couple of files in our app directory.
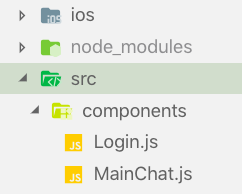
We need to move the code from our App.js file to MainChat.js and change the class name from App to MainChat as shown in the code snippet below:
import React, { Component } from "react";
import {
  View,
  Text,
  StyleSheet,
  TextInput,
  TouchableOpacity,
  Image
} from "react-native";
export default class App extends Component {
  render() {
    return (
      <View style={styles.container}>
        <View style={styles.logo}>
          <Image
            source={require("../img/react.jpg")}
            style={{ width: 66, height: 58 }}
          />
          <Image
            source={require("../img/pubnublogo.png")}
            style={{ width: 60, height: 60 }}
          />
        </View>
        <Text style={styles.welcome}>Chat with Pubnub</Text>
        <TextInput
          style={styles.input}
          placeholder="Username"
          autoCapitalize="none"
          autoCorrect={false}
          onChangeText={username => this.setState({ username })}
        />
        <TextInput
          style={styles.input}
          secureTextEntry={true}
          placeholder="Password"
          onChangeText={password => this.setState({ password })}
        />
        <View style={styles.btnContiner}>
          <TouchableOpacity style={styles.btn} onPress={() => this.login()}>
            <Text style={styles.btntext}>Login</Text>
          </TouchableOpacity>
        </View>
      </View>
    );
  }
}
const styles = StyleSheet.create({
  container: {
    flex: 1,
    justifyContent: "center",
    alignItems: "center",
    bottom: 66
  },
  welcome: {
    fontSize: 30,
    textAlign: "center",
    margin: 10,
    fontWeight: "300"
  },
  input: {
    width: "90%",
    backgroundColor: "skyblue",
    padding: 15,
    marginBottom: 10
  },
  btnContiner: {
    flexDirection: "row",
    justifyContent: "center",
    width: "80%"
  },
  btn: {
    backgroundColor: "orange",
    padding: 15,
    width: "45%"
  },
  btntext: { fontSize: 16, textAlign: "center" },
  logo: {
    flexDirection: "row"
  }
});
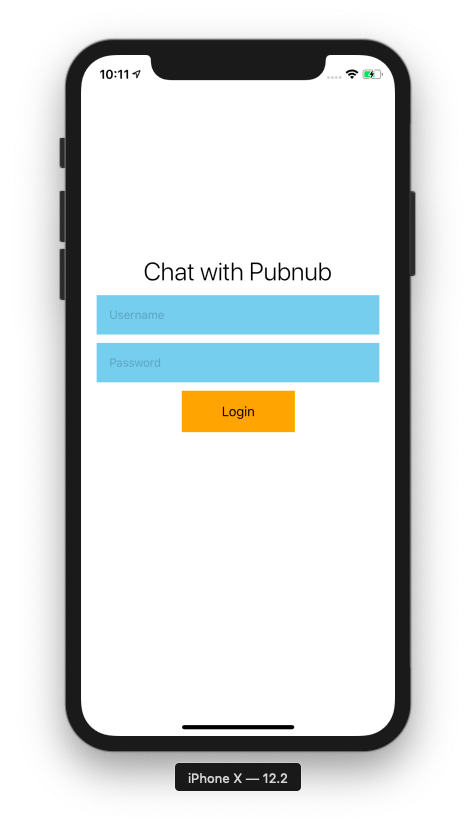
Now you can see the result of our login form styling.
Next, we'll add user authentication functionality. To do this, first, we create a state object with two variables username and password like in the code snippet below:
state = { username: "", password: "" };
When a user types in the text input field, we add the text data to state variables as shown in the code snippet below:
<View style={styles.container}>
  <Text style={styles.welcome}>Chat with Pubnub</Text>
  <TextInput
    style={styles.input}
    placeholder="Username"
    autoCapitalize="none"
    autoCorrect={false}
    onChangeText={username => this.setState({ username })}
    />
  <TextInput
    style={styles.input}
    secureTextEntry={true}
    placeholder="Password"
    onChangeText={password => this.setState({ password })}
    />
  <View style={styles.btnContiner}>
    <TouchableOpacity style={styles.btn} >
      <Text style={styles.btntext}>Login</Text>
    </TouchableOpacity>
  </View>
</View>
When the user clicks on the login button, it will trigger the login function.
For a simple and quick configuration, we create a const variable named user which contains username and password, as shown in the code sample below.
This is purely for demo purposes. Don't do this in your production application! Make a secure, server-marshaling authentication system.
const user = {
  0: { username: "user1", password: 1111 },
  1: { username: "user2", password: 1111 }
};
Now, we use this variable to represent a database and create a login function as shown in the code snippet below.
login() {
  if (
    (user[0].username == this.state.username &&
      user[0].password == this.state.password) ||
    (user[1].username == this.state.username &&
      user[1].password == this.state.password)
  ) {
    this.props.navigation.navigate("MainChat", {
      username: this.state.username
    });
  } else {
    console.log(this.state);
    alert("username or password is incorrect");
  }
}
Once done, you'll have something that looks like this.
We can see that our login authentication is successful. Now, we need to redirect the user to the chat room after the successful login.
Redirect After Login Success
Next, we need to use the react-navigation package to handle routes and redirects, like web pages. First, you need to follow the React Navigation installation instructions here. Then we need to move all the code from App.js to Login.js and change the class name. Then we need to make App.js compatible with route management with react-navigation.
import { createStackNavigator, createAppContainer } from "react-navigation";
import Login from "./src/components/Login";
import MainChat from "./src/components/MainChat";
const AppNavigator = createStackNavigator(
  {
    Login: {
      screen: Login
    },
    MainChat: {
      screen: MainChat
    }
  },
  {
    initialRouteName: "Login"
  }
);
export default createAppContainer(AppNavigator);
Now we can redirect users to the Main chat screen after login. The functionality will work after we add the navigate function.
login() {
  if (
    (user[0].username == this.state.username &&
      user[0].password == this.state.password) ||
    (user[1].username == this.state.username &&
      user[1].password == this.state.password)
  ) {
    this.props.navigation.navigate("MainChat", {
      username: this.state.username
    });
  } else {
    console.log(this.state);
    alert("username or password is incorrect");
  }
}
Here we need to specify screen name (i.e. MainChat) and parameter (i.e. username) that you want to use on the next page.
We configure MainChat.js by replacing random ID with a parameter value as shown in the following code snippet:
render() {
  return (
    <GiftedChat
      messages={this.state.messages}
      onSend={messages => this.onSend(messages)}
      user={{
        _id: this.props.navigation.getParam("username")
      }}
    />
  );
}
Let's try everything out!
You can see the login by user1 and then the sending of a new message. User1 will see the message from User2 on the proper side of the UI.
Wrapping Up
In this tutorial, we learned how to store and fetch historic chat messages, and display them in the order they were received. In our next part, we'll add Presence to power realtime user counters, showing how many users are currently connected to the chatroom.