This tutorial will guide you through how to add push notifications to a chat application using PubNub. The tutorial will focus on how to integrate mobile push notifications in a chat application that is already running on the PubNub network. If you would like to learn more about how the chat application was constructed, follow our Android Kotlin Simple Chat Application Tutorial.
Download the JetNews chat app from the GitHub Repository. You will be selecting the push-notifications branch which contains the completed chat application with mobile push notifications.
In a terminal, navigate to an empty folder of your choosing. Enter the following command to clone the Repository.
1
Checkout the push-notifications branch.
1
Watch the video or follow the steps below to set up your environment.
1
Download the latest, stable version of Android Studio for your operating system if you don't already have it. This download includes the IDE, Android SDK, and Android Emulator.
You will be using Google's Firebase Cloud Messaging (FCM) as the Service Provider to deliver mobile push notifications to the application. You will set up and configure a Firebase project that will be directly associated with your application.
Navigate to the Firebase console.
Press the Create a project button and enter in the name of your project. The Firebase console will automatically replace hyphens with spaces. Press continue.
Disable Google Analytics for your application by clicking on the blue slider as you will not need it for this project. Press create project.
After some time, the project will be ready. Press continue. You will be redirected to the Project Overview page.
In the center of the page, click on the Android App Icon in the "Get started by adding Firebase to your app" section to add an Android application to your Firebase project.
Register the Android app by providing the Android package name (in this case com.example.jetnews). You can find this package name by navigating to the app level build.gradle file (usually app/build.gradle), and looking at android -> defaultConfig -> applicationId. Click on Register App.
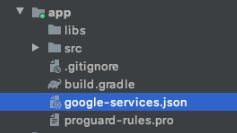
Download the google-services.json config file. This file is the bridge between your FCM project and your Android application. You will need to add this file to the application module root directory (app). This will be detailed shortly. Click next.
Do not add the Firebase SDK. You will be using the PubNub SDK and a different Firebase library. These dependencies have already been added to the application and will be discussed shortly.
Click next, and then click Continue to console.
You will need to now obtain the server key token necessary to have PubNub send push payloads to FCM to deliver mobile push notifications to devices. The steps are summarized below but please also see our documentation for Android Mobile Push Notifications for more information.
In the Firebase console, select the project previously created if you are not already in the Project Overview page for that project.
In the top left corner, click on the gear icon next to the Project Overview label and select Project settings. The Project settings page contains information about your application, and allows you to edit, configure, and obtain necessary information for your application. You can also re-download the google-services.json file in case you have lost it previously.
Click on the Service accounts tab at the top of the page.
Click 'Generate new private key'. It does not matter which Admin SDK configuration snippet you have selected.
Retain the downloaded key file - you will need to upload this to the PubNub admin portal in a future step.
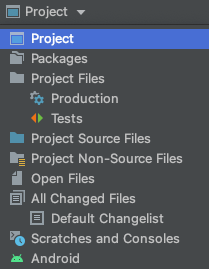
Open the application in Android Studio. Switch to the Project View instead of Android View in the top left corner, as this tutorial describes locations of files in this Project View.
The tutorial will be referencing this view frequently when adding files, and will refer to this window as the project file viewer. Please keep this side toolbar open when developing your project.

Move the google-services.json file that was downloaded earlier to the app-level module folder.

Create an android virtual device via the Device Manager to emulate the application in a virtual environment.
Open the project level build.gradle file. The Google Services plugin dependency is required to be able to have the app level build.gradle files apply the plugin to open the google-services.json file.
1
Open the app-level build.gradle file (app/build.gradle). The following dependencies are necessary to add mobile push notifications to an application using PubNub:
In the plugins block, the google-services plugin is used to load the google-services file to be able to communicate with FCM.
In the dependencies block, the Kotlin SDK and Chat components for Android dependencies are used for the PubNub API libraries for communicating with the PubNub network.
In the dependencies block, the Firebase Messaging dependency is used for the Legacy Cloud Messaging API functionality.
1
To receive messages from FCM in your application, a service that extends FirebaseMessagingService needs to be added to your Android application. This service is represented by the MyFirebaseMessagingService.kt class in app/src/main/java/com.example.jetnews/utils.
This class extends the onNewToken and onMessageReceived callbacks. onNewToken is called whenever FCM assigns the Android device a new or different token (when starting the application for the first time or when the old token expires). You would then register the device token on a channel in the PubNub network. onMessageReceived displays mobile push notifications once received from FCM based on the type of push message received. The functionality of the class will be detailed in the Build and run section of the tutorial.
1
This class has been added as a service to the app's AndroidManifest.xml to listen for and handle any FCM operations. The metadata for default_notification_channel_id, default_notification_channel_name, and default_notification_channel_description are also located below the service. A Notification ID is required to be set when creating a notification channel, and FCM will use this value whenever incoming messages do not explicitly set a notification channel. You can learn more about this metadata in Android's documentation. You'll learn more about creating notifications in the build and run section of this tutorial.
1
View the top of the application's AndroidManifest.xml file. The PubNub Network API requires internet permissions, otherwise you cannot connect to the PubNub Network. View the internet permissions in the manifest element, before the application block.
1