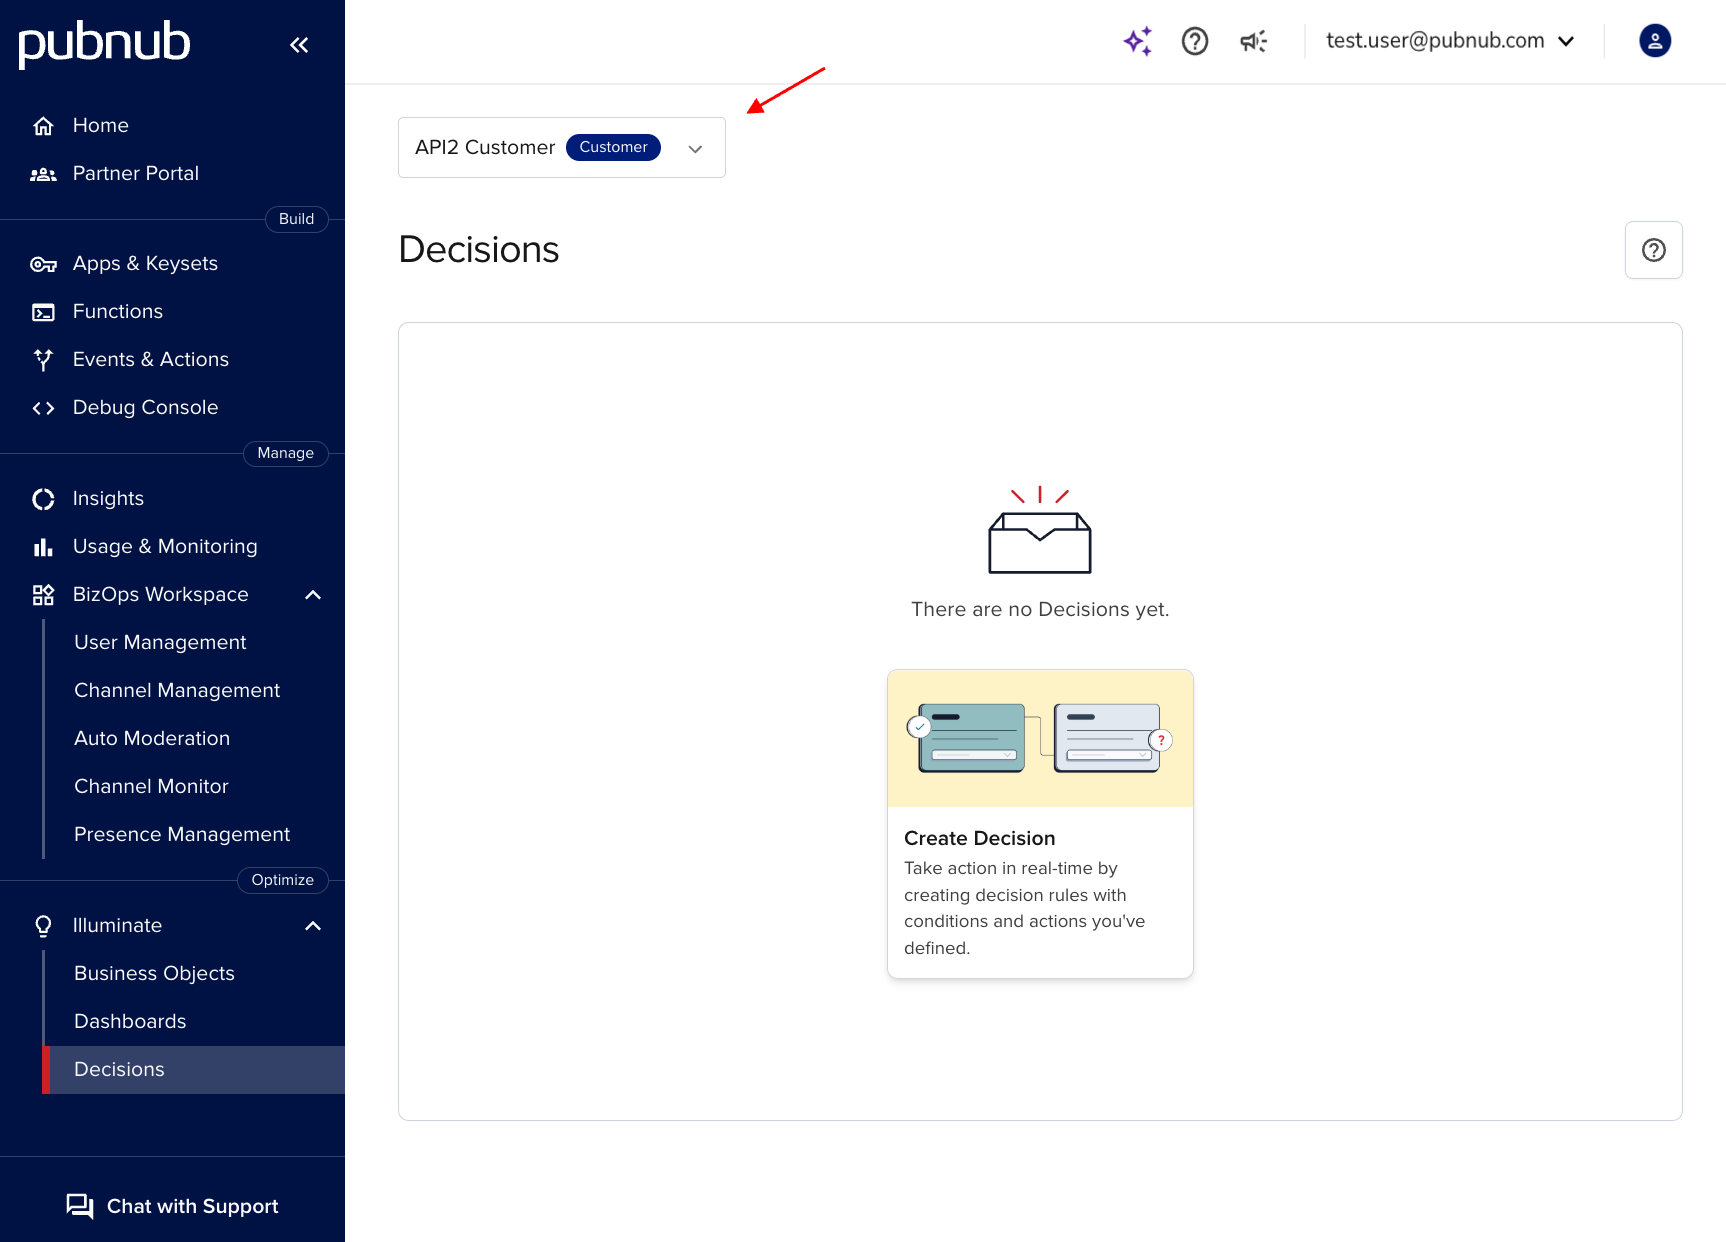
Create Decision
After you create a Business Object, start acting on it. Configure Decisions and related rules to evaluate metric data. When a condition is met, the Decision triggers the configured actions.
Creating Decisions for customers
If you are a PubNub partner with Illuminate embedded, create Decisions for yourself or your end customers in the Admin Portal. See Illuminate for PubNub Partners for details.
Use case
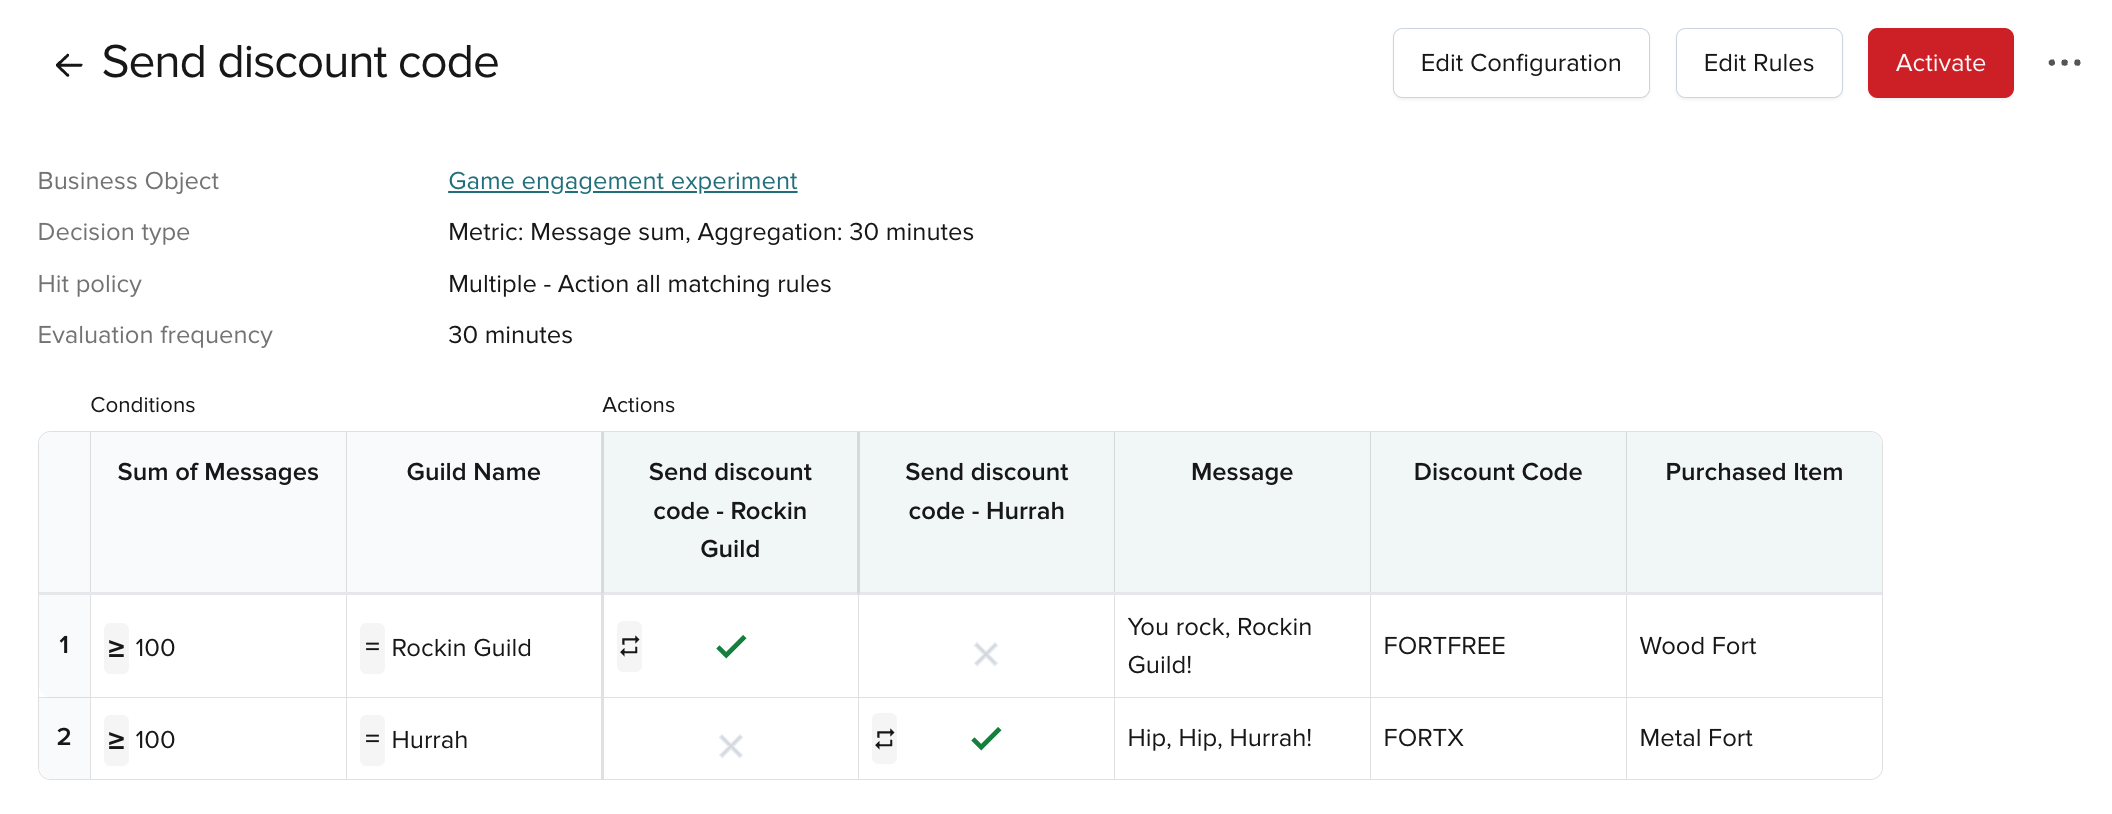
For our use case, create a Decision based on the previously created and activated Game engagement experiment Business Object and the Message sum metric.
Configure a Decision that sends a personalized message with a discount code to guilds when they publish 100 or more messages within 30 minutes.
Check configuration details
Steps
Follow these sections to configure a Decision with actions and rules.
Create actions
Create a Decision and define actions.
- Watch video
- Step-by-step guide
-
On the Decisions home page, click Create Decision. The Create new Decision modal opens.

-
Enter the Decision name (
Send discount code) and an optional description. -
Click Select Business Object and choose the previously created
Game engagement experimentBusiness Object. -
Select
an aggregationand choose theMessage Summetric from the list.After you select the metric, Conditions auto-populate from the metric’s data fields.
You also see an empty Decision table preview with the conditions as columns.
Event-based Decisions
This guide uses the Metric Decision Type with metric-based conditions. For your scenario, you can use the Event Decision Type and add conditions from Business Object data fields or Query Decision Type and add conditions from the query. For guidance on creating Queries and Decisions, refer to Query Builder.
-
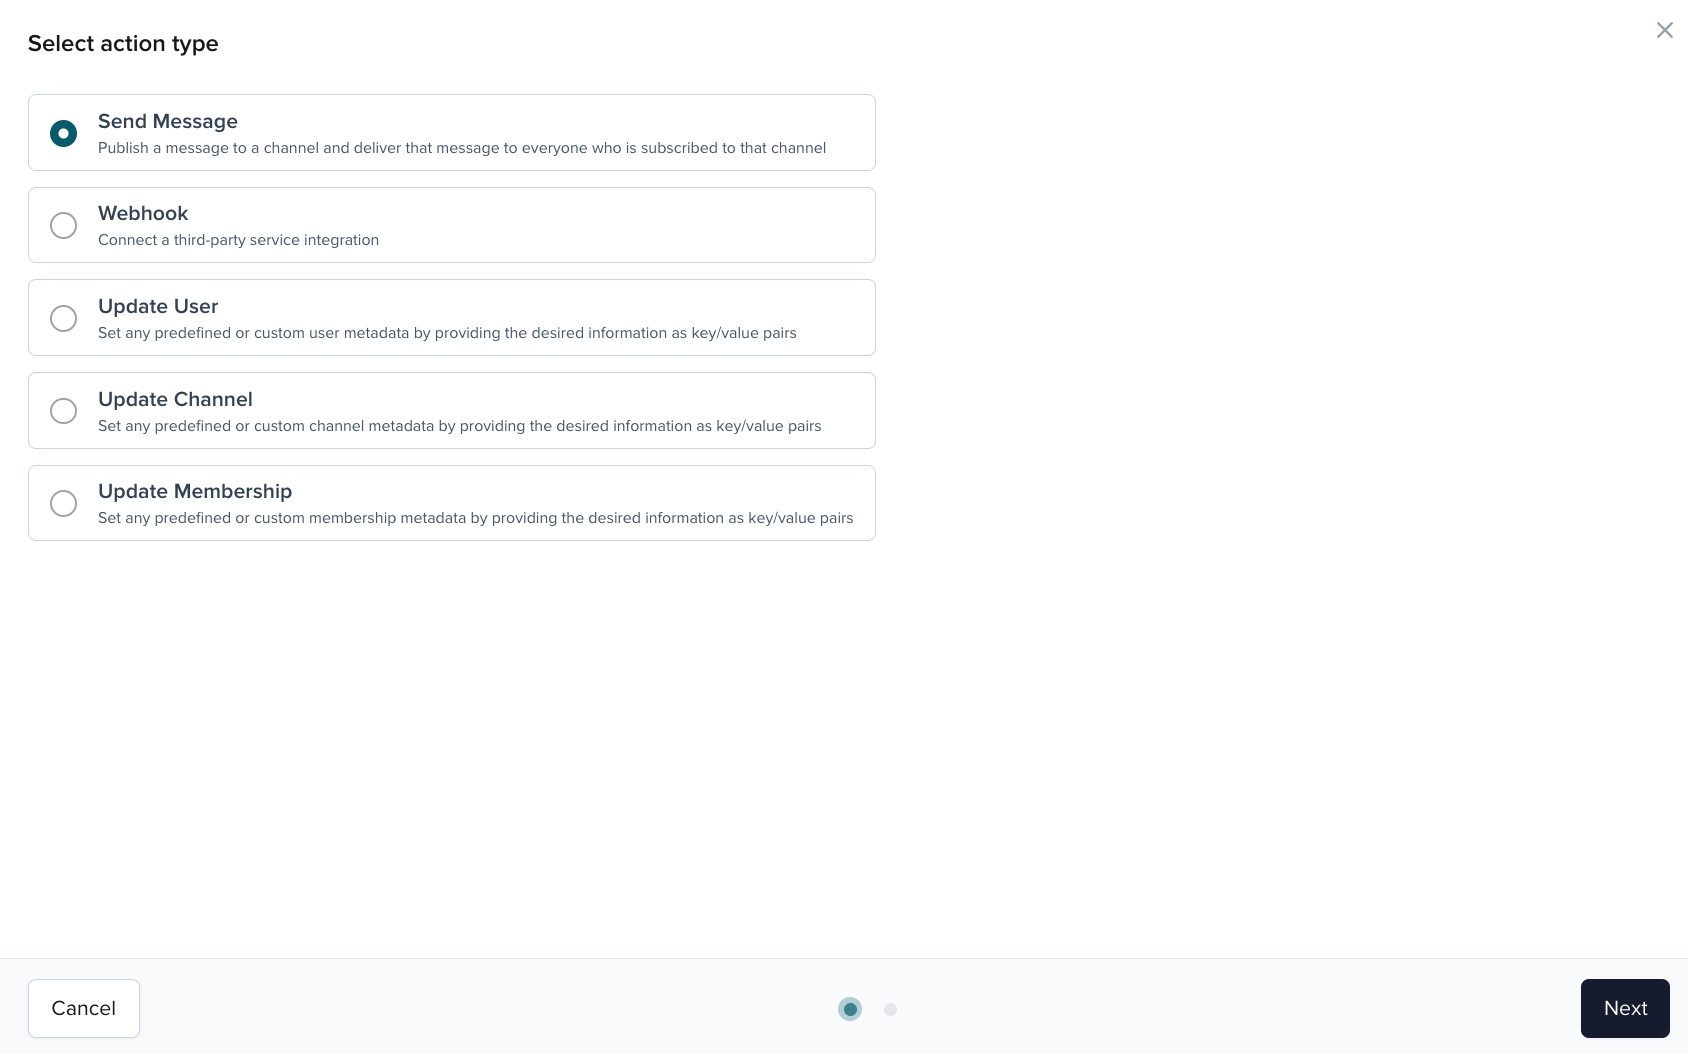
Choose an action to run when rules are met. Select + Add action, enter the action name (
Send discount code - Rockin Guild), add an optional description, and click Configure.
-
Choose the Send Message action type to send a personalized message with discount codes to guild members.
-
Select publish and subscribe keys for the guild channel ID. Enter the message Body (
"${message}. Use ${discountCode} to buy ${purchasedItem}.").Define variables in two ways. For dynamic values from real-time data, use conditions or add the data field as a condition. For static strings or values, create variables and set them in the decision table. You set static variables in later steps.

-
Optionally add Headers or Documentation / Notes, then click Save.
-
Variables in the action payload appear as new columns in the Decision table preview. You can update their values.

-
Repeat steps 5-9 to create the
Send discount code - Hurrahaction for the Hurrah guild.
-
Select Create to finalize the Decision.

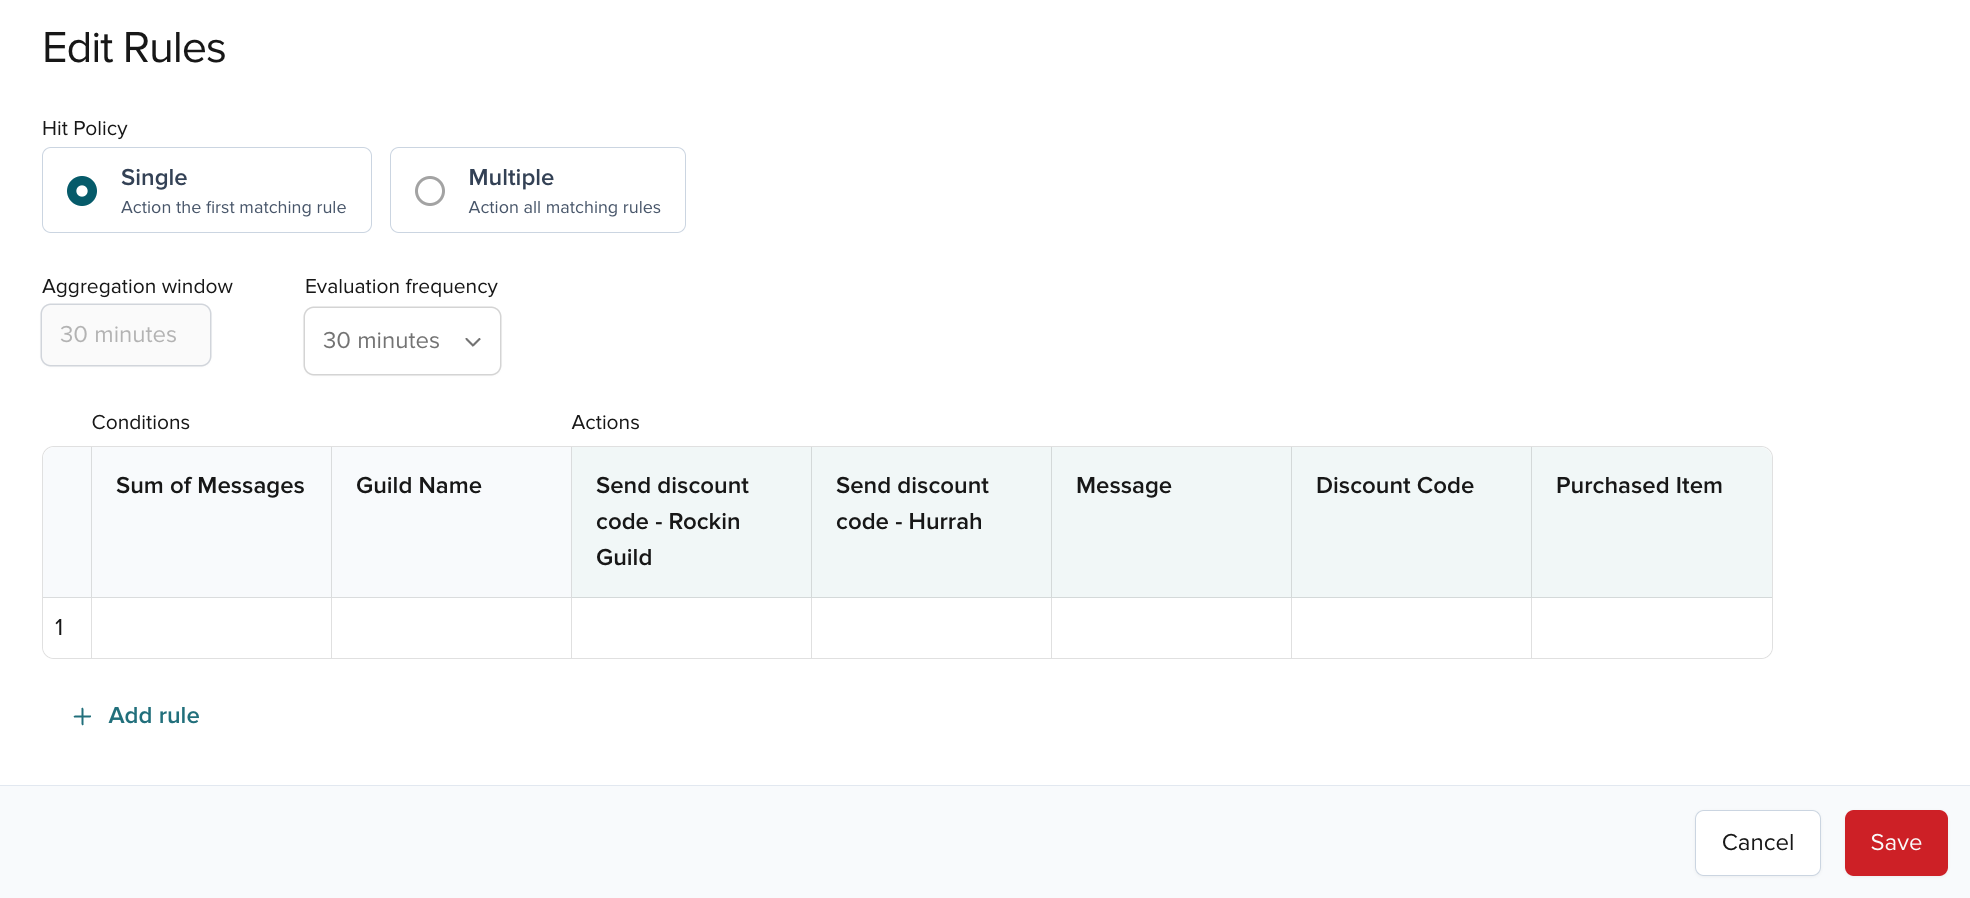
Add conditions and rules
Create rules that trigger actions when conditions are met.
- Watch video
- Step-by-step guide
-
Start from the link that appears after creation, or open the Decision and click Edit Rules.
-
Click + Add rule and define two rules for your Decision. Set Hit Policy to
Multipleand Evaluation frequency to30 minutes.
Set action frequency with the Action Execution Limit icon for each rule.
-
When you’re done, Save the changes.
After you configure and save the Decision, activate it.
Activate Decision
Activate the Decision to evaluate rules and run actions.
Conditions for activating a Decision
Head to the Additional details section for details on conditions that must be met to activate a Decision.
- Watch video
- Step-by-step guide
Click Activate.
Choose one option:
- Activate until manually deactivated.
- Set dates when the rule is active (uses your browser’s time zone).
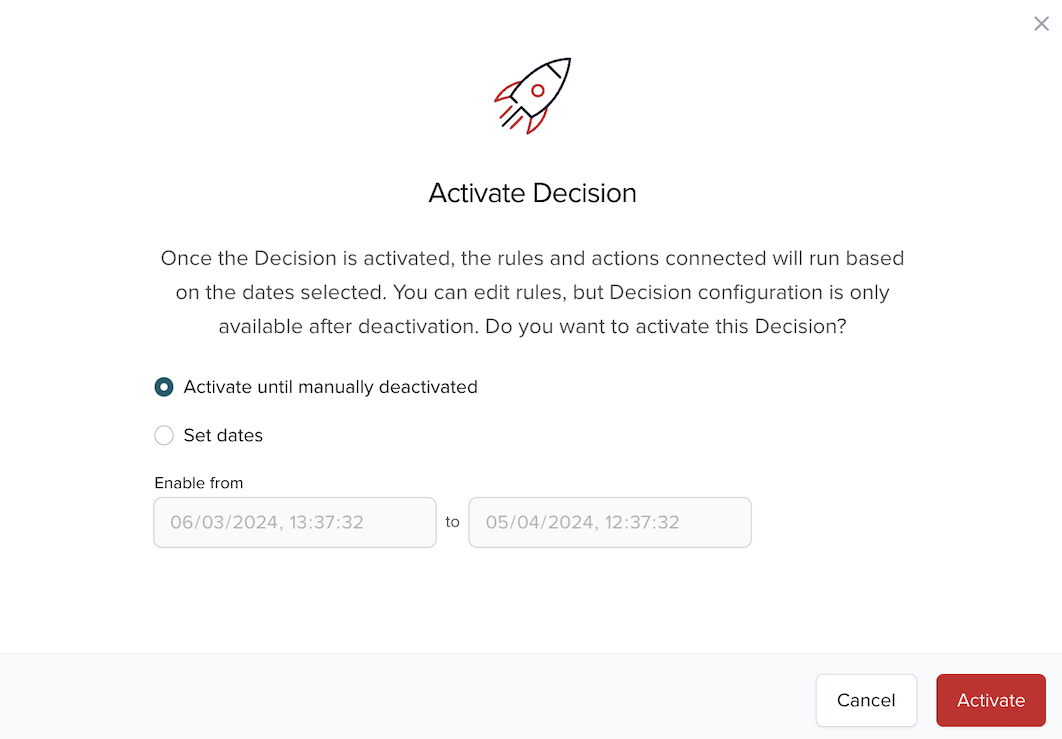
After activation, you can still edit values in rules.
After activation, rules run and actions can trigger. View results on a Dashboard with a chart for the same metric.
Illuminate for PubNub partners
If you’re a PubNub partner, you see a drop-down to choose who you work on in Illuminate.
- Select your own company name at the top of the drop-down if you’re creating Decisions for yourself.
- All customers to see which customers have been set up with Illuminate.
- A customer name to see only their Decisions and start creating or editing only for this one customer.
- All internal and customers for your own Decisions and those of the customers.
The Customer column shows whether a Decision belongs to a customer or your organization.
- If you don’t see a customer in the drop-down menu, go to the Partner Portal section of the PubNub Admin Portal and make sure you’ve created the customer in PubNub and assigned a keyset to them.
- If, after selecting the customer, you don’t see apps or keysets for selection, assign keysets for this customer in the Partner Portal.