Create Business Object
Before creating decisions and visualizations, you must define and activate a Business Object — a model of the data you want to process.
Creating Business Objects for customers
If you are a PubNub partner who has embedded Illuminate into your own website as part of your offering, you can create Business Objects for your own use or for your customers (end customers) in the Illuminate section in the Admin Portal. Read Illuminate for PubNub Partners for additional information.
Use case
For our use case, we’ll create a Business Object that captures data such as the guild name, message sent, purchase item, and purchase item value.
We’ll capture that data as data fields — either a numeric measure (message sent and purchase item value) or a qualitative dimension (guild name and purchase item).
This is a sample of the JSON structure we’ll use to map the defined data fields with our app’s data.
1[
2 {
3 "chatMessage": 1,
4 "guildName": "Rockin Guild",
5 "purchasedItem": "Wood Fort",
6 "purchaseValue": "5",
7 "discountCode": "FORTFREE"
8 },
9 {
10 "chatMessage": 1,
11 "guildName": "Hurrah",
12 "purchasedItem": "Metal Fort",
13 "purchaseValue": "8",
14 "discountCode": "FORTX"
15 },
We’ll later create metrics (one for each measure) to aggregate the data and activate the Business Object at the end to let Illuminate start capturing data.
Check configuration details
Steps
Follow the sections to prepare a Business Object — create and map data fields, add metrics, and activate it.
Create and map data fields
Start by defining what data you want to track and how.
- Watch video
- Step-by-step guide
-
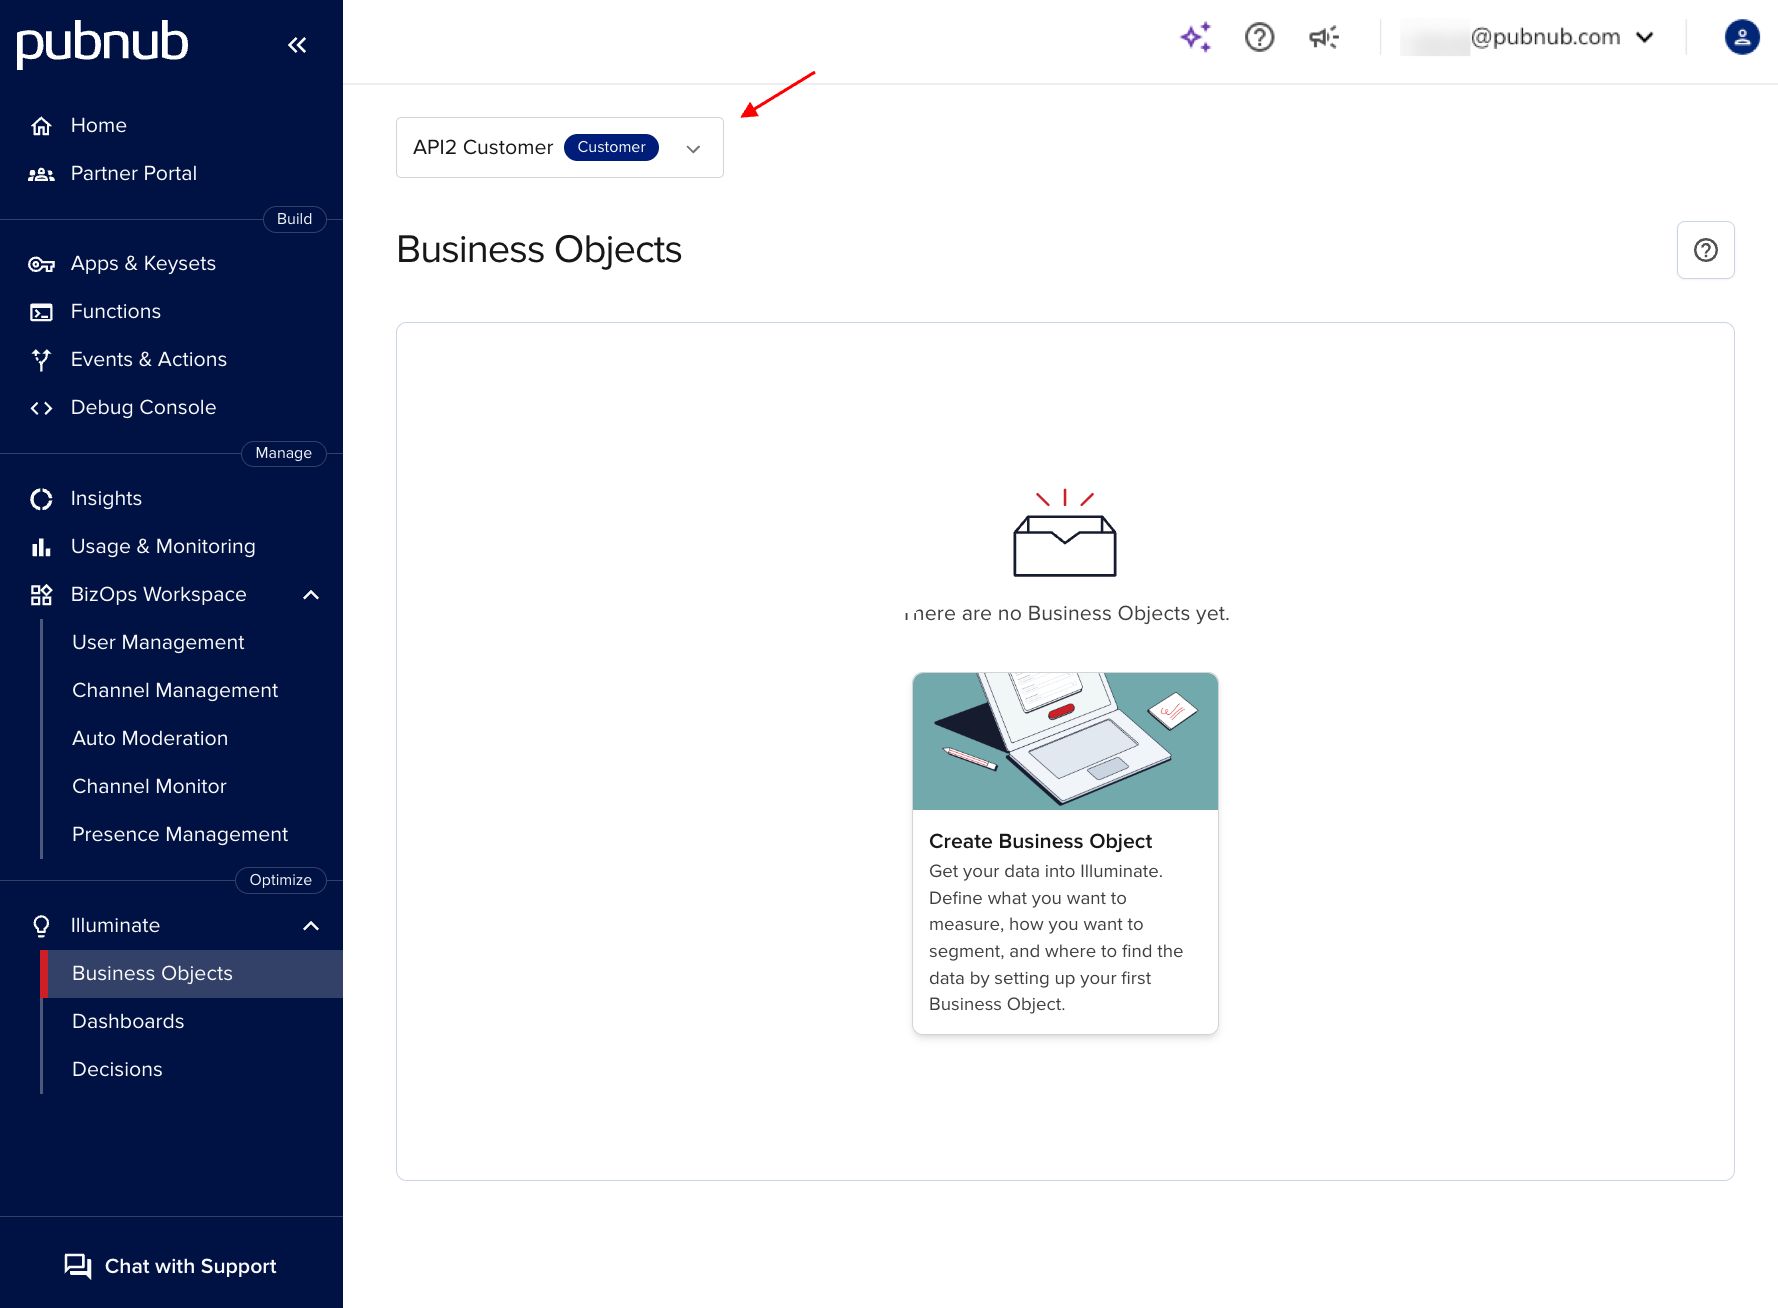
On the Business Objects home page, click Create Business Object. The Create new Business Object modal opens.
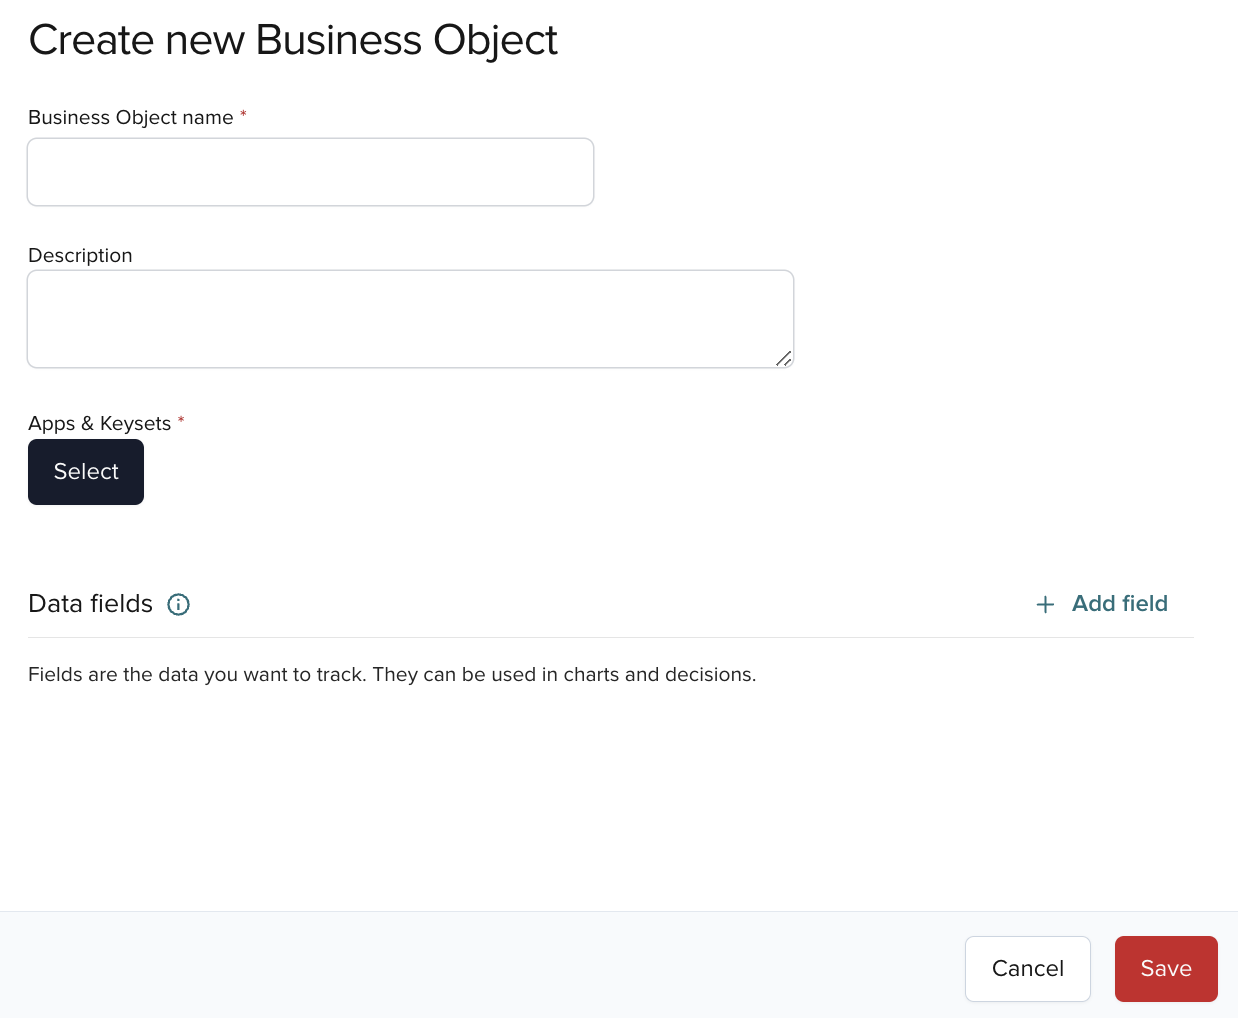
-
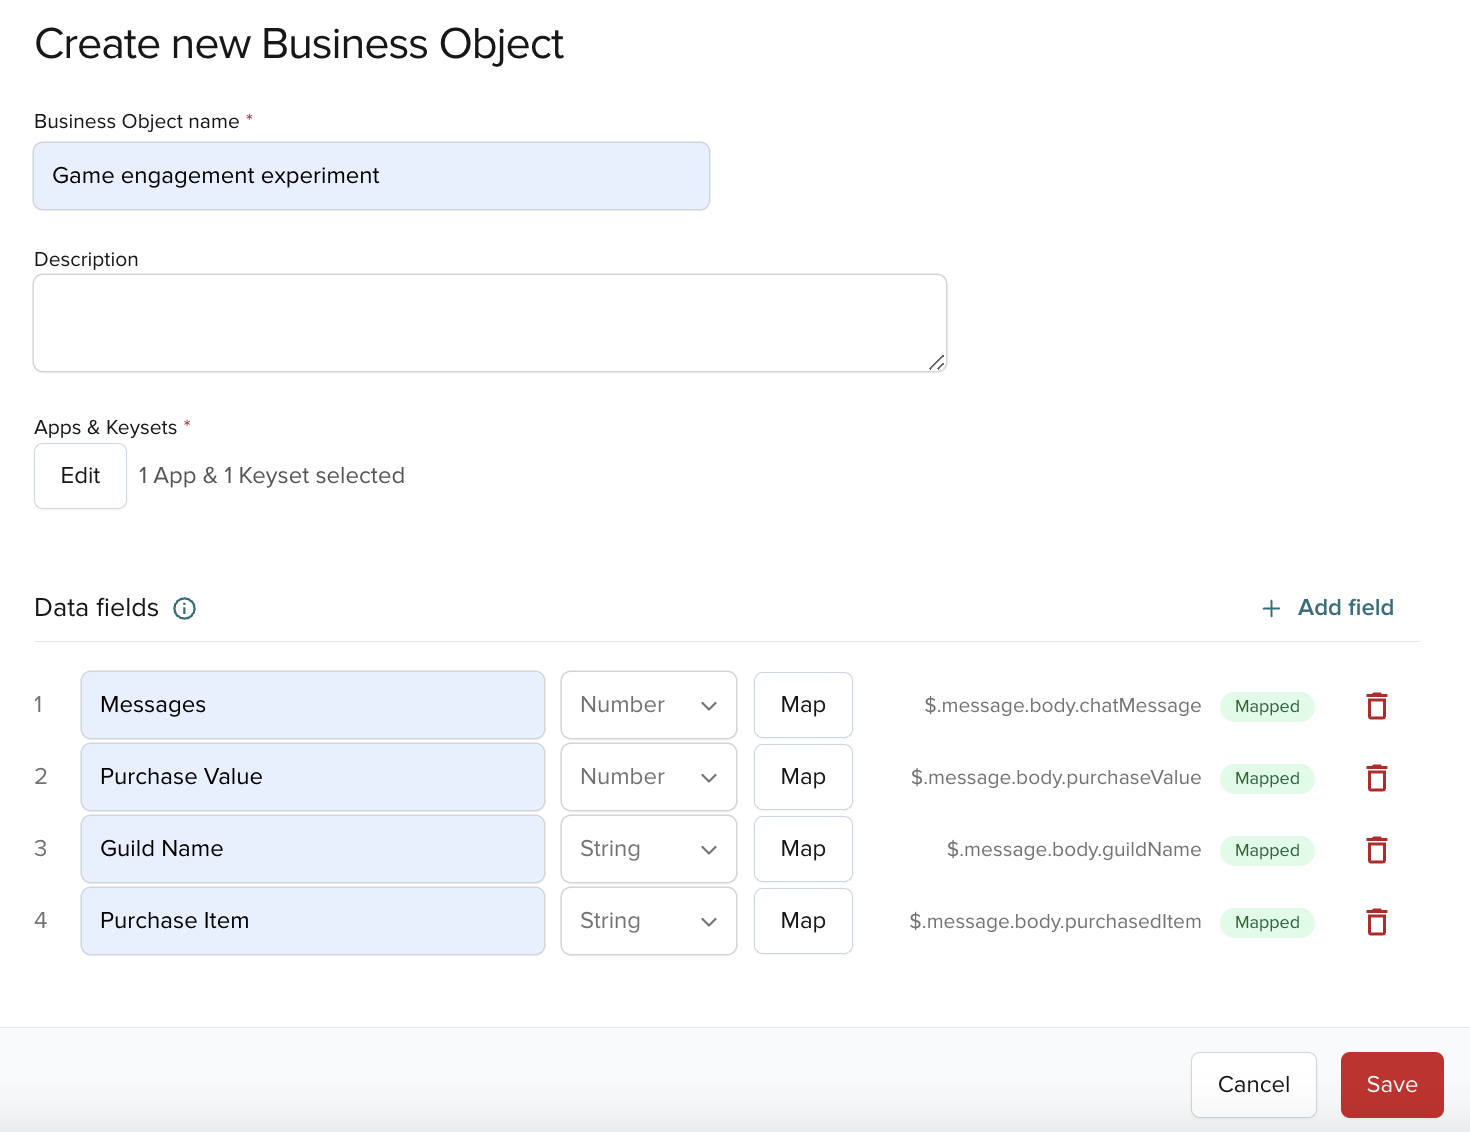
Enter the name (
Game engagement experiment) and an optional description. Click Choose Apps & Keysets to assign at least one app and keyset, which is required to activate the Business Object. -
Add four separate data fields. Click + Add field.
a. By default, the following data fields are automatically added and mapped from PubNub publishes: Channel (
$.message.channel), User ($.message.userId), Message Type ($.message.body.type), Message ($.message.body.text), and Publish Timetoken ($.timetoken). You can edit the names or the JSON paths, where applicable.b. To add a new data field, click + Add field. Enter a field name (for example,
Messages,Purchase Value,Guild Name, orPurchase Item). Then choose its type:NumberforMessagesandPurchase Value;StringforGuild NameandPurchase Item.c. Map the measures to data sources. Click Map. Select
messagein Category,bodyin Subcategory, then enter the key in JSON path:chatMessage(Messages),purchaseValue(Purchase Value),guildName(Guild Name),purchasedItem(Purchase Item).d. Save the changes by clicking the Map button.
-
When you’re done, click Save to create the Business Object.
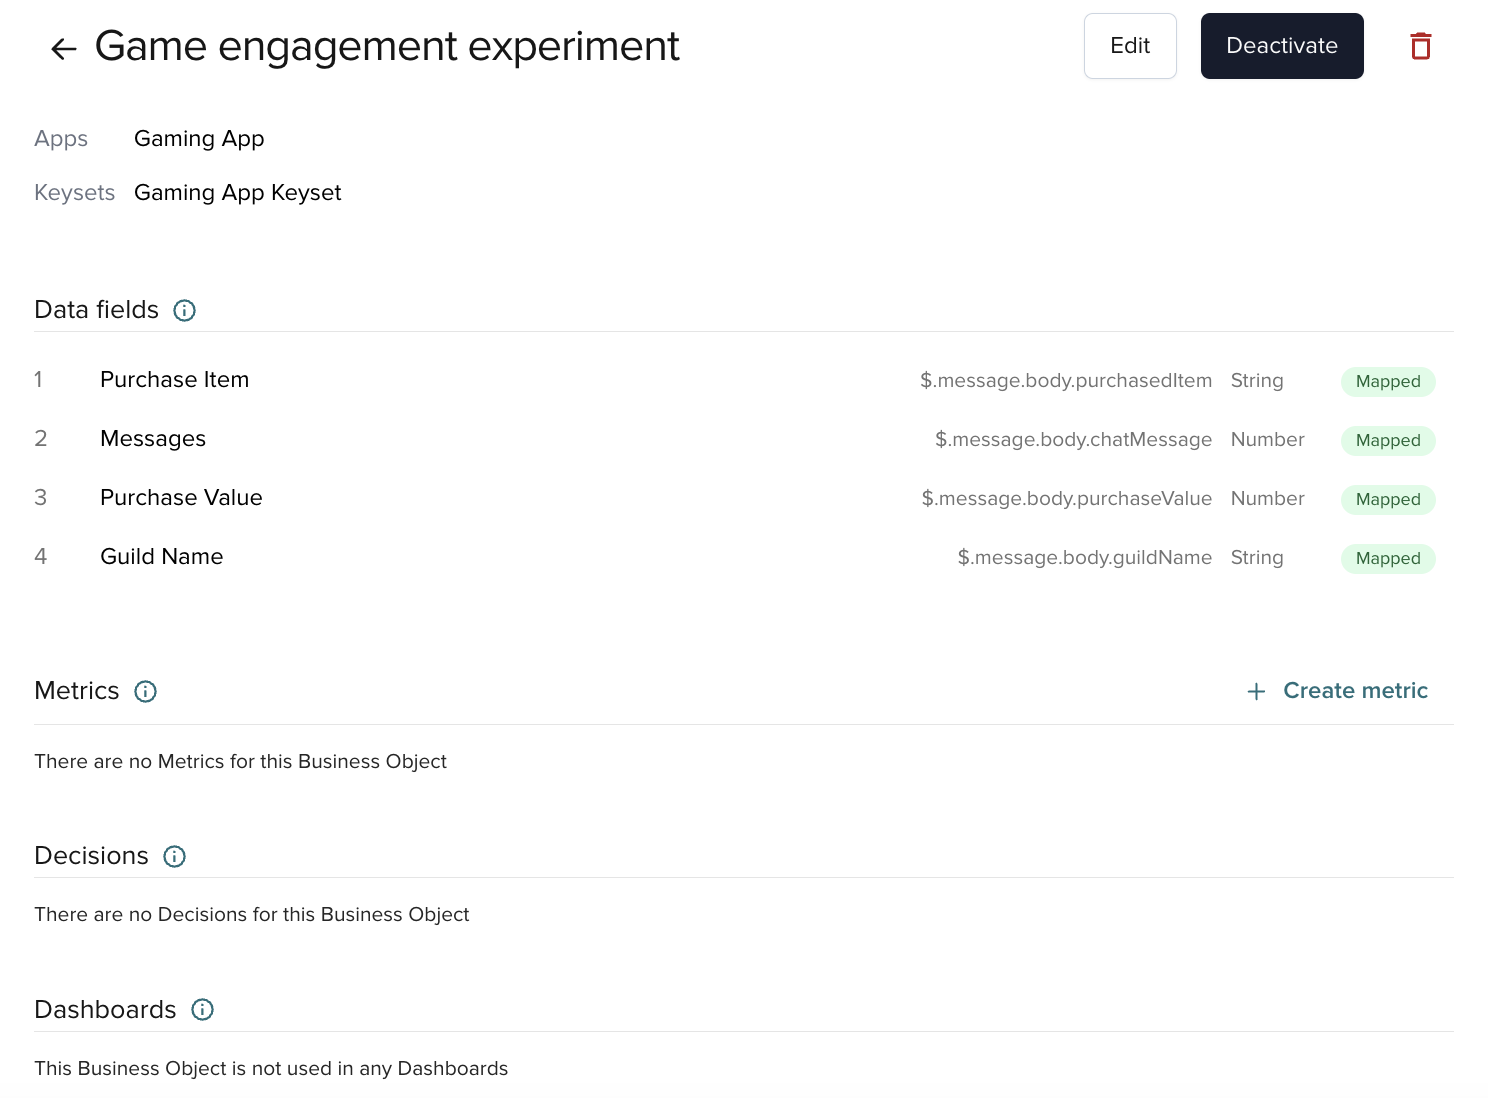
Your Business Object is created. You can activate it or add metrics in any order. After activation and at least one metric, create a Decision or a Dashboard.
Order of steps
You can add metrics even before data fields are mapped.
Create metrics
Add calculations to your data fields.
Order of steps
You can add metrics before data fields are mapped.
- Watch video
- Step-by-step guide
-
On the Business Objects home page, click the Business Object row. The details view opens.
-
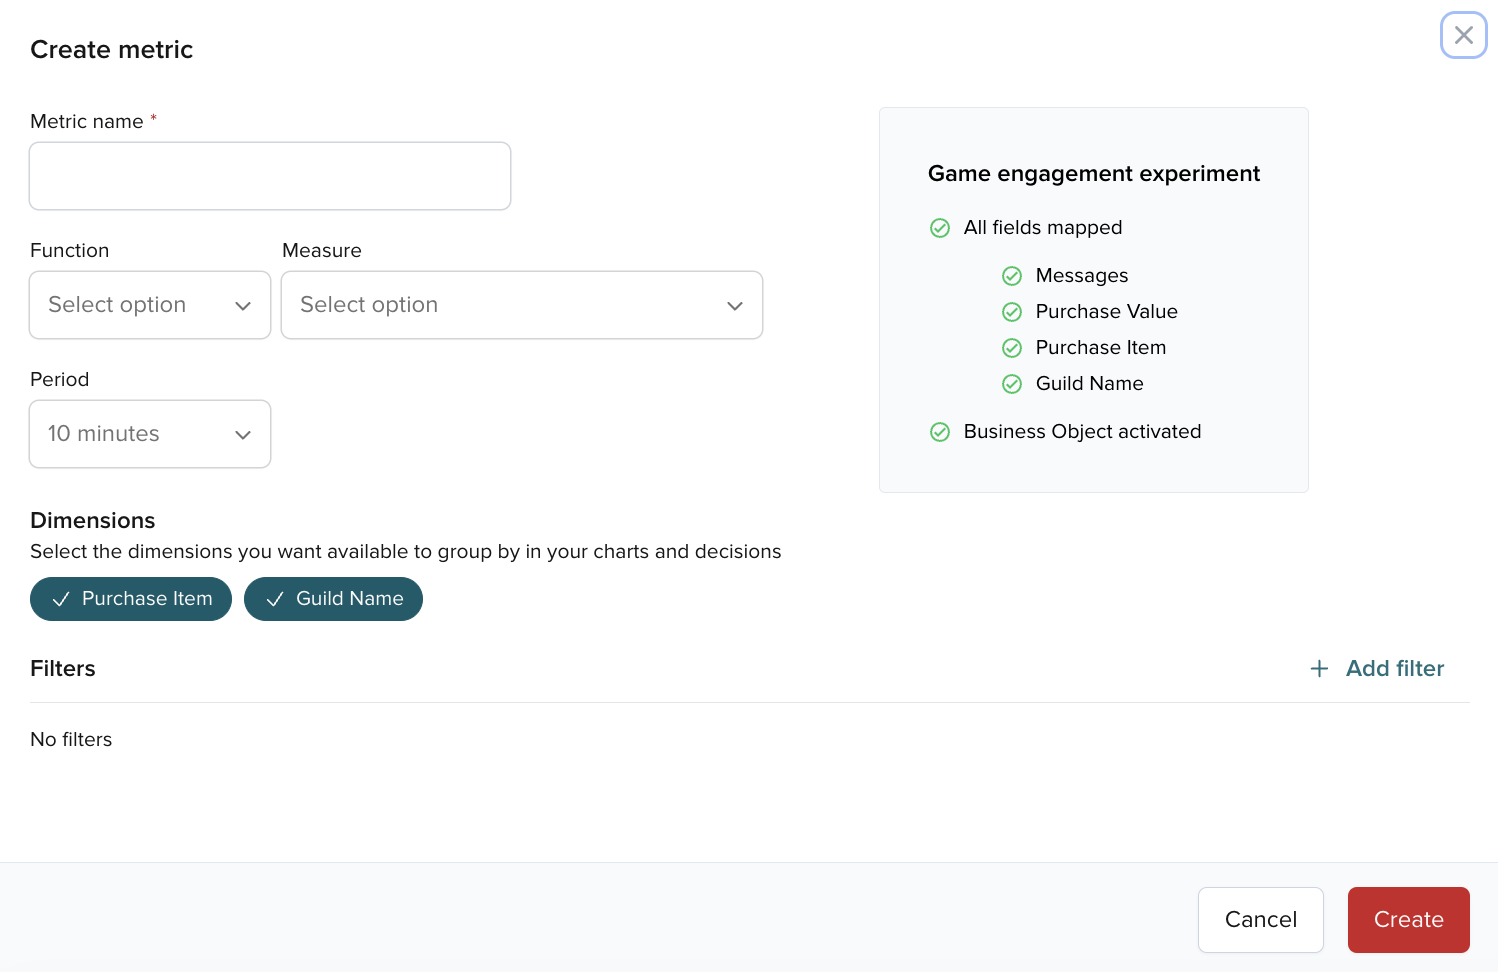
In the Metrics section, click the + Create metric button and the Create metric modal opens.
-
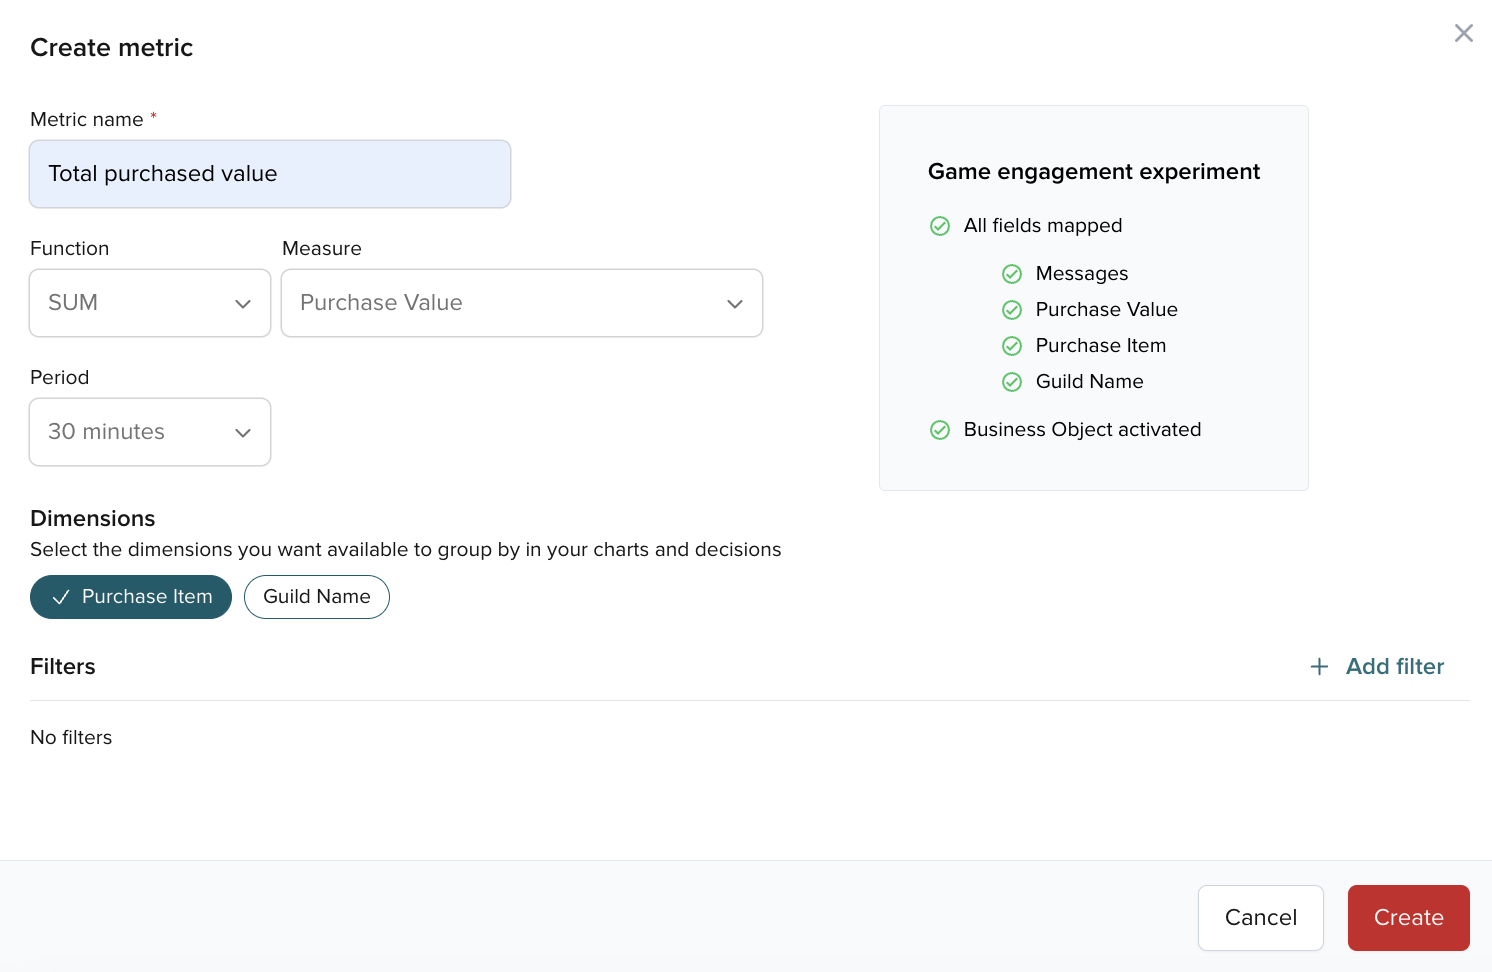
Provide these details for the
Message summetric:a. Enter the metric name (
Message sum).b. Select the aggregation Function (
Sum).c. Choose Measure
Messages.d. Set Period to
30 minutes.e. Select Dimension
Guild Nameyou added as a data field.Dimension selection
To use a metric as a criterion in decisions or dashboards, select a dimension.
f. Don’t set any Filters for our use case.
-
When you’re done, click Create.

-
Repeat steps 2–4 to create the
Total purchased valuemetric:a. Type in the metric name (
Total purchased value).b. Select the aggregation Function (
Sum).c. Choose
Purchase Valueas a Measure.d. Set Period to
30 minutes.e. Select the
Purchase ItemDimension you previously added to the Business Object as a data field.f. Don’t set any Filters.
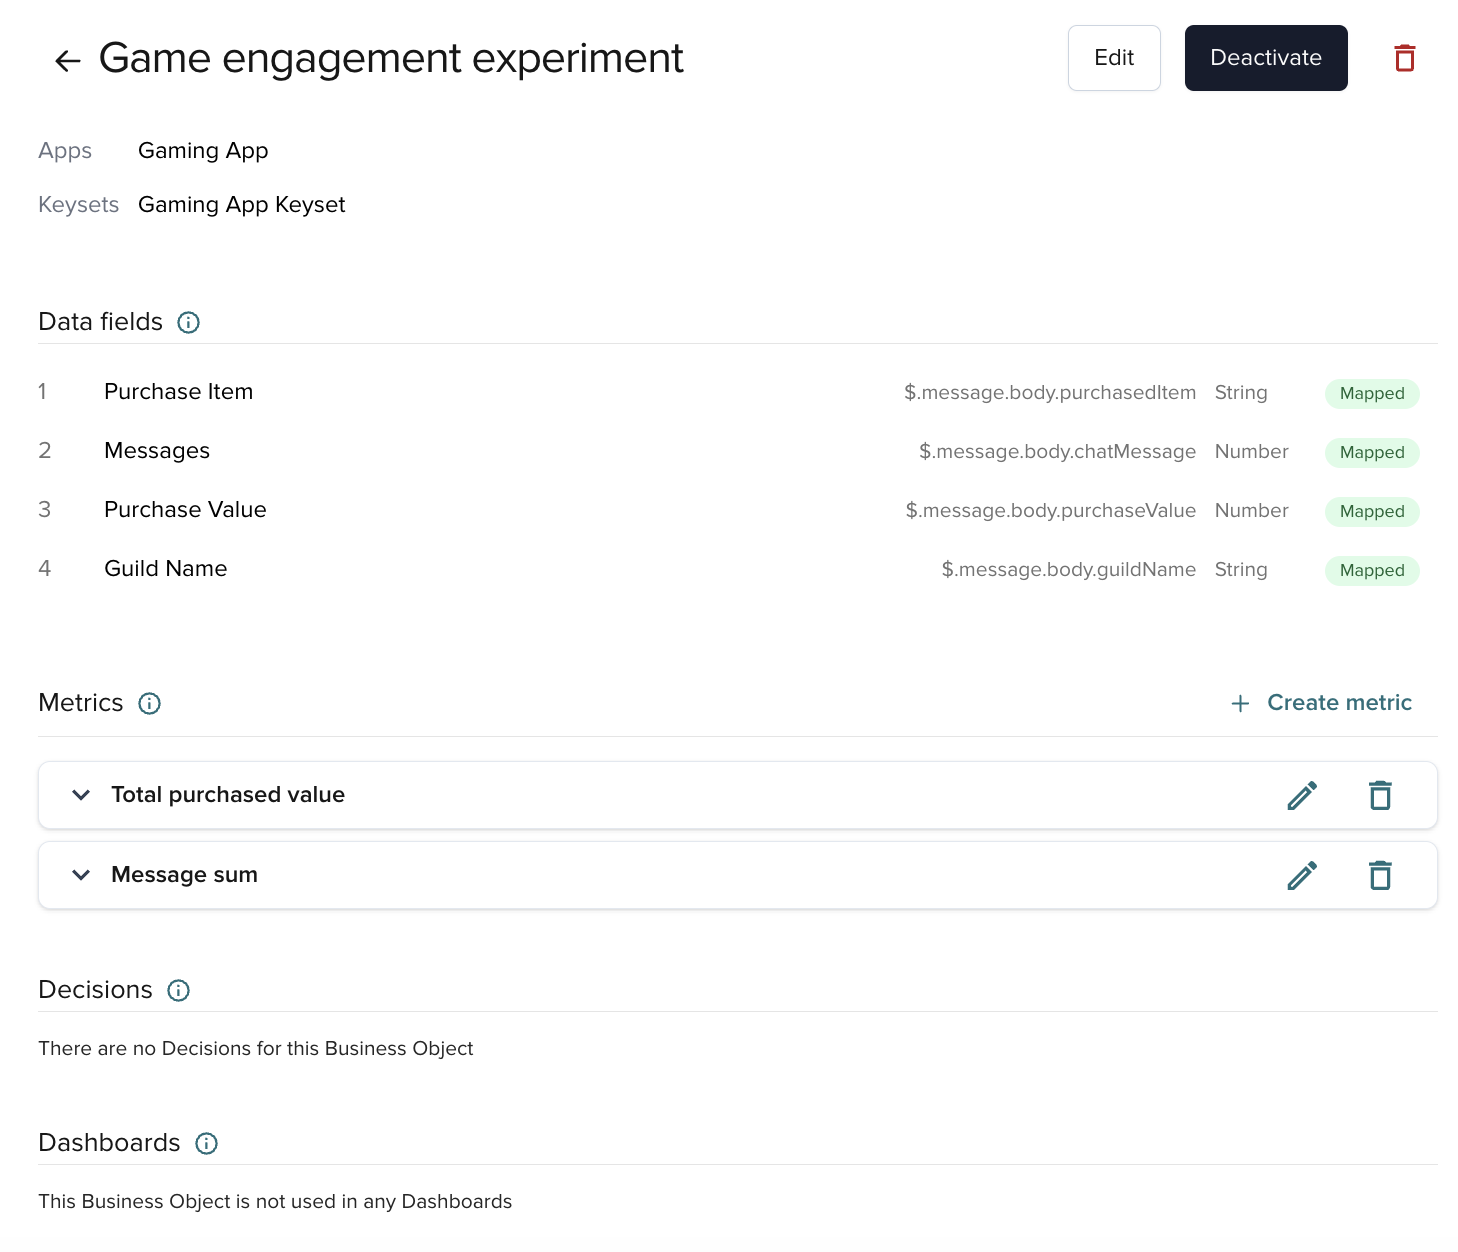
A ready and activated Business Object with metrics looks as follows.
Activate Business Object
To start capturing and storing data, activate the Business Object.
Conditions for activating a Business Object
Head to the Additional details section for details on conditions that must be met to activate a Business Object.
- Watch video
- Step-by-step guide
Open the Business Object and click Activate.
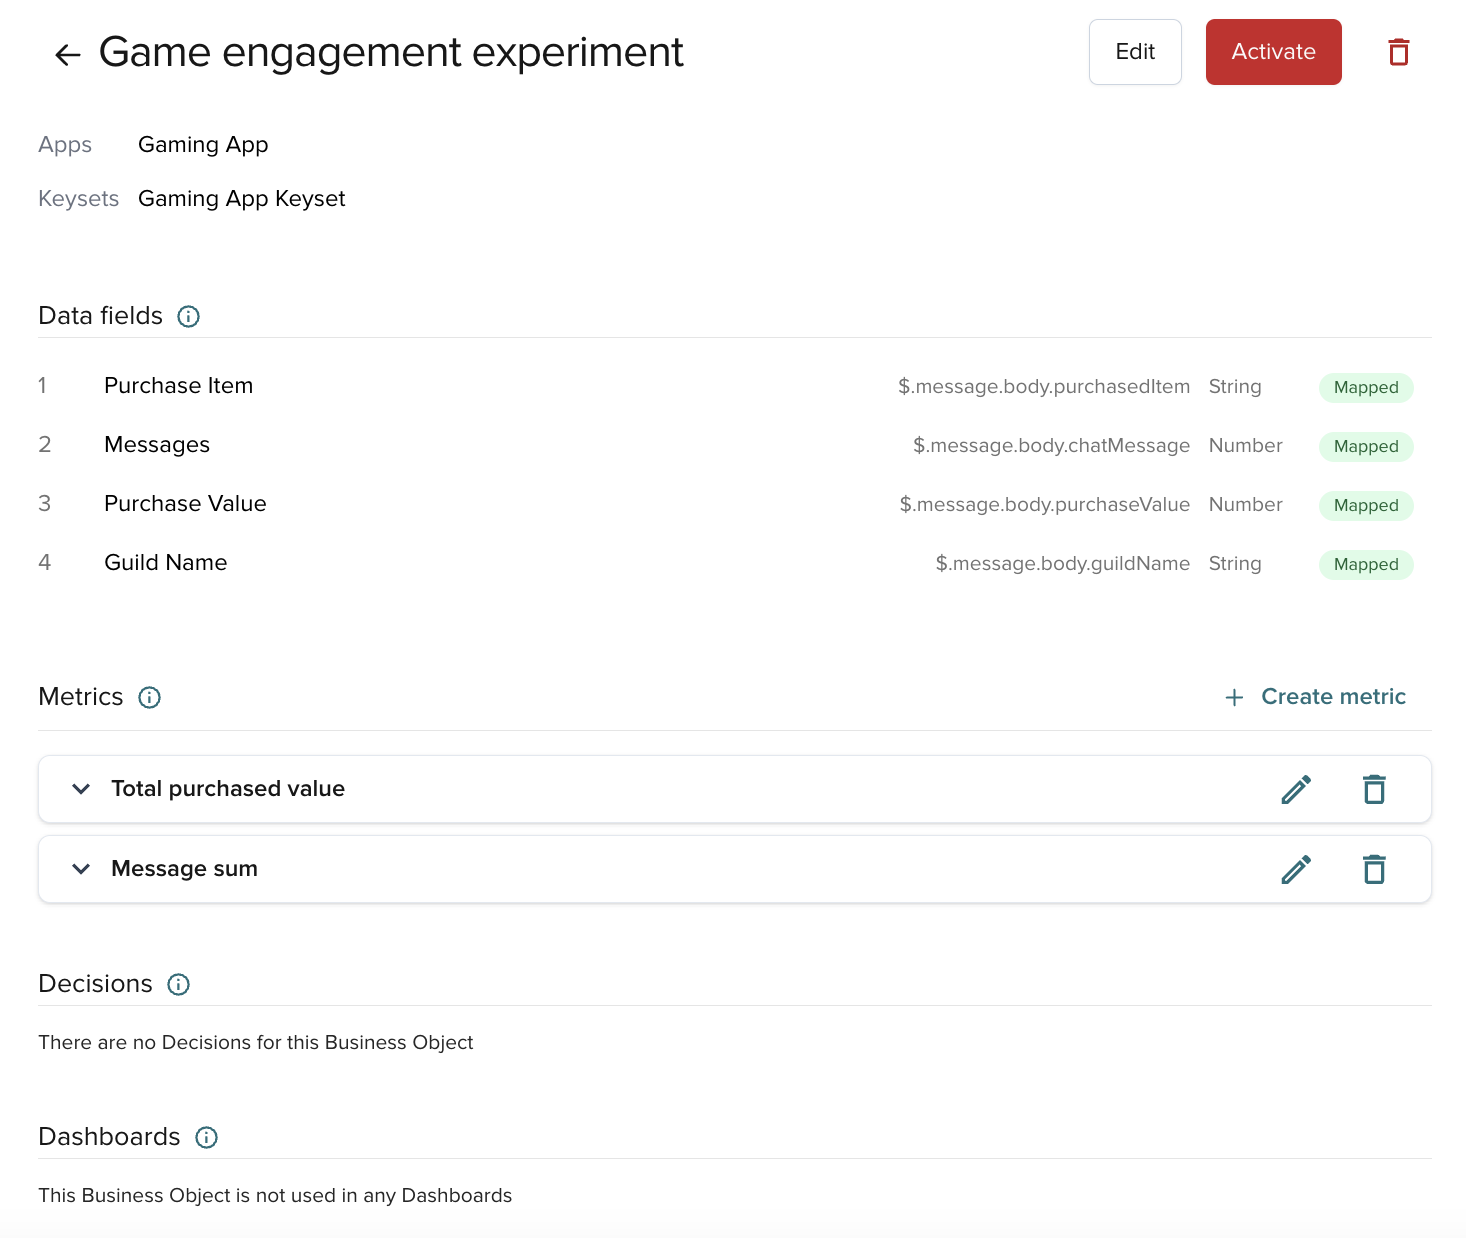
After activation, Illuminate captures data until you deactivate or delete the Business Object. To ensure consistent capture, the field structure stays fixed. You can still add metrics.
Captured data remains available for 90 days.
With the Business Object that is configured and active, you can create a Decision or a Dashboard.
Illuminate for PubNub partners
If you’re set up as a PubNub partner, you’ll see a drop-down menu that allows you to select who you’re creating or working on Illuminate for.
- Select your own company name at the top of the drop-down if you’re creating Business Objects for yourself.
- All customers to see which customers have been set up with Illuminate.
- A customer name to see only their Business Objects and start creating or editing only for this one customer.
- All internal and customers for your own Business Objects and those of the customers.
Depending on what you’ve selected from the partner drop-down menu, you’ll see a Customer column that provides information on who a Business Object belongs to – a customer or your own organization.
- If you don’t see a customer in the drop-down menu, go to the Partner Portal in the PubNub Admin Portal and make sure you’ve created the customer in PubNub and assigned a keyset.
- If, after selecting the customer, you don’t see apps or keysets for selection, assign keysets for this customer in the Partner Portal.