Query Builder (preview)
Now available for preview
Query Builder is currently in preview. Features and functionality may change.
About
Query Builder extends metrics by adding flexibility and richer logic. It lets you define conditions and relationships in a more natural, visual way.
For example: Get the top 10 users who are most engaged by the count of messages. Get users posting duplicate messages to many channels.
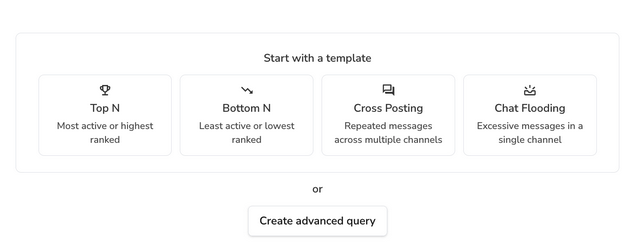
Use the predefined Queries and Decisions in Query Builder to quickly set up ranking and spam detection use cases, view results, and automate the actions you want to trigger. Alternatively, create an advanced query for full control over how data is transformed and returned.

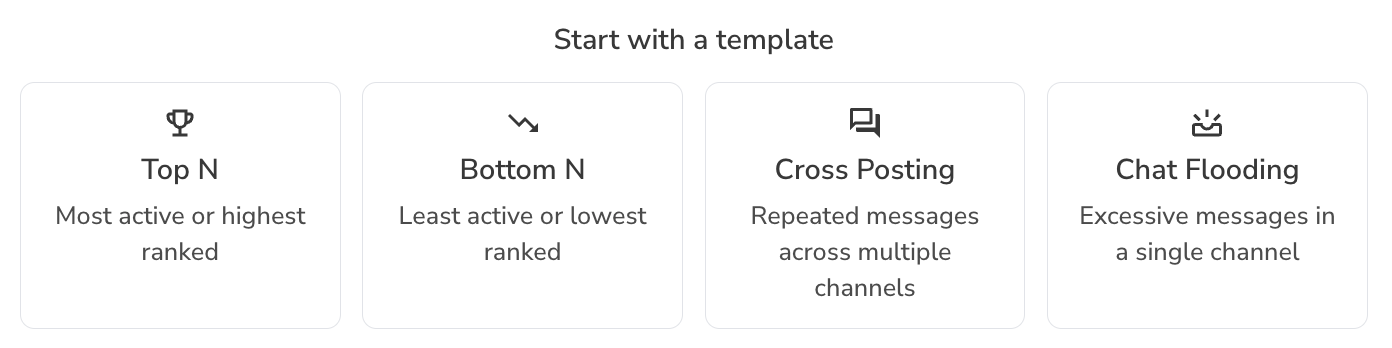
Predefined queries
In this initial preview release, Query Builder includes four predefined queries and Decisions with default configurations:
| Predefined Query | Purpose / Predefined Decision |
|---|---|
| Top N | Reward the top 10 users who are most engaged: 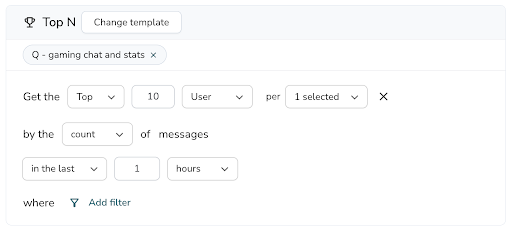 Predefined Decision: 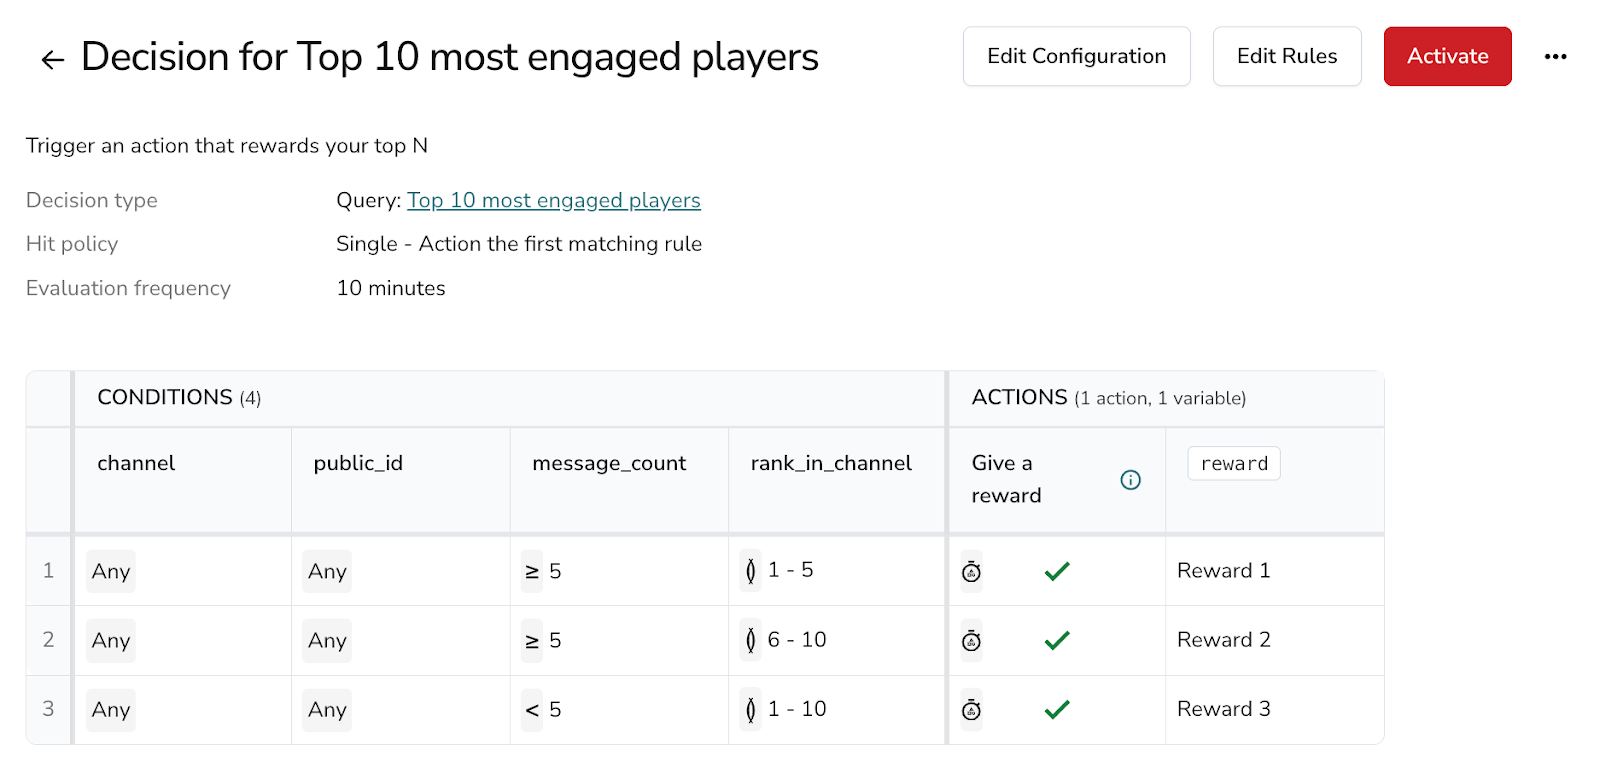 |
| Bottom N | Incentivize users who are least engaged: 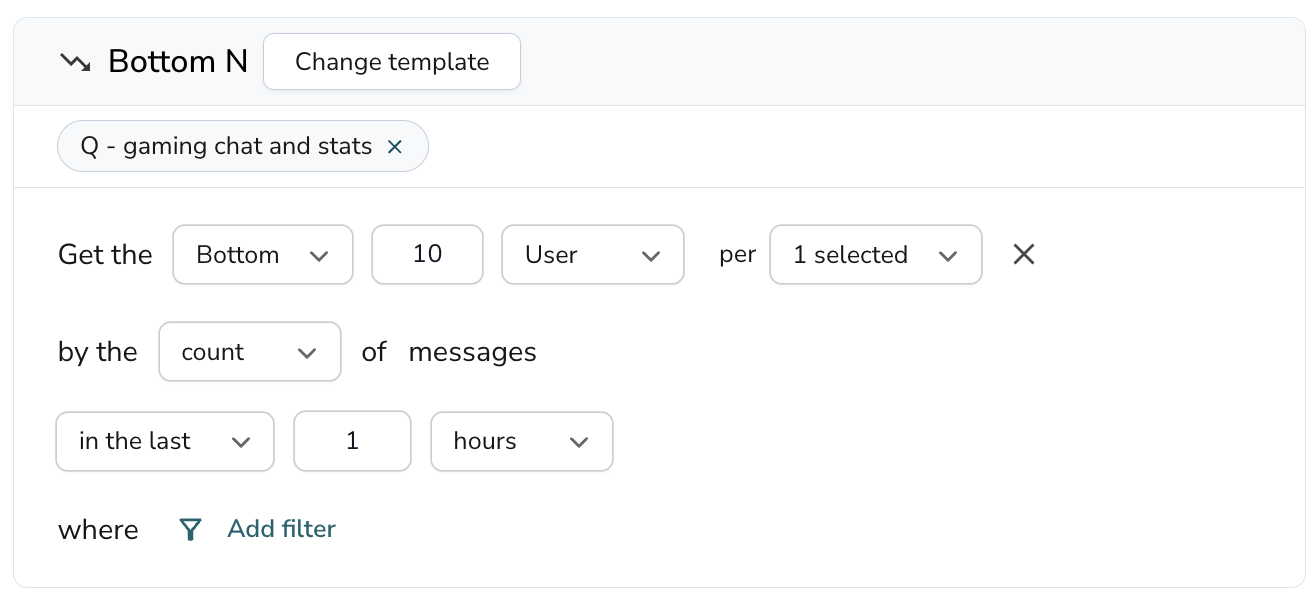 Predefined Decision: 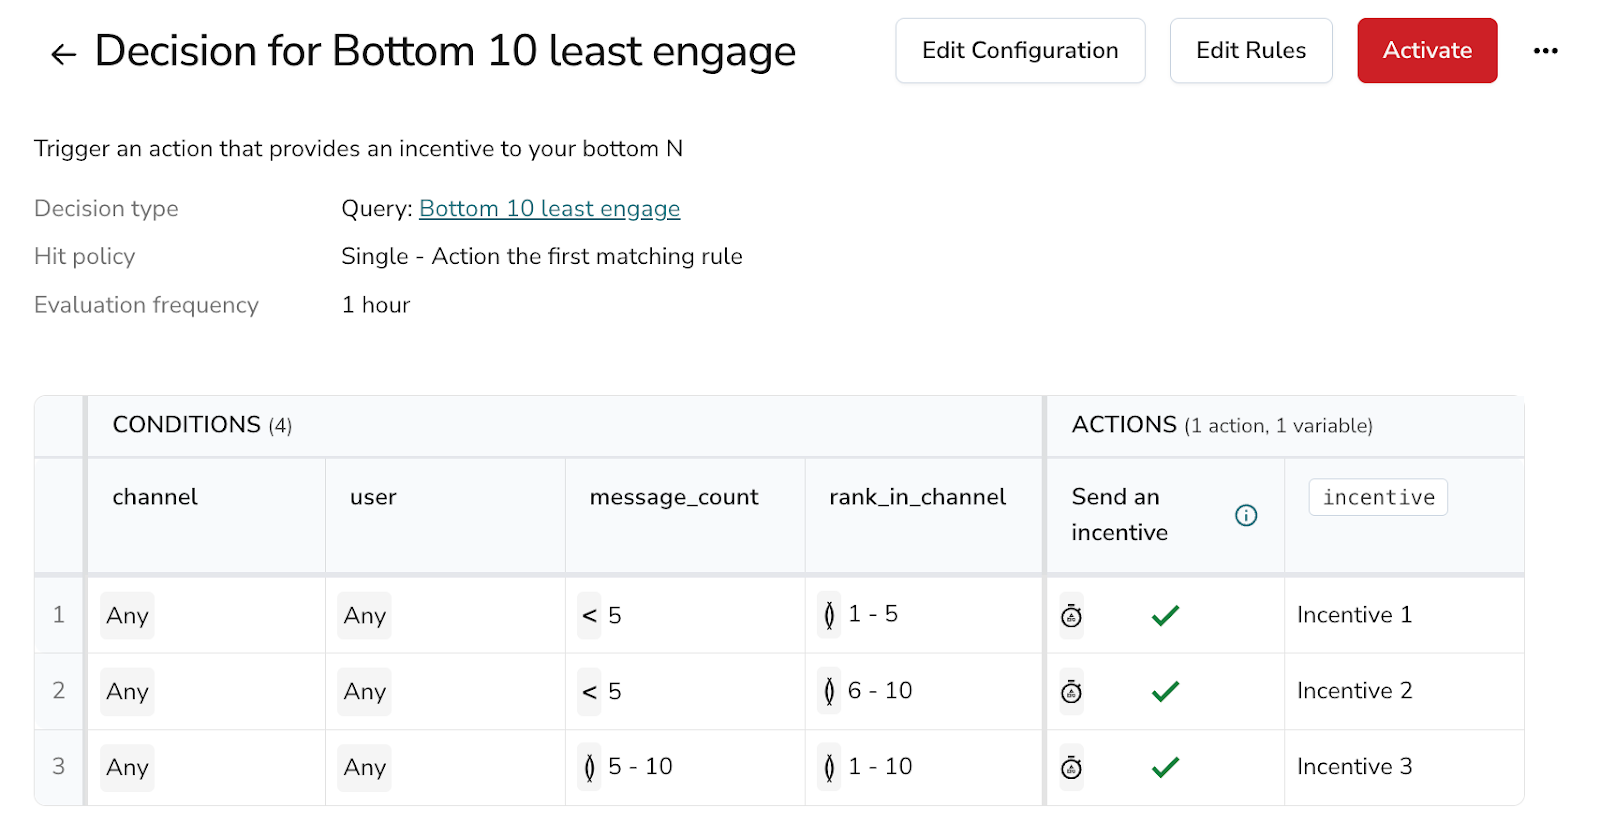 |
| Cross-posting spam | Detect users sending duplicate messages across multiple channels: 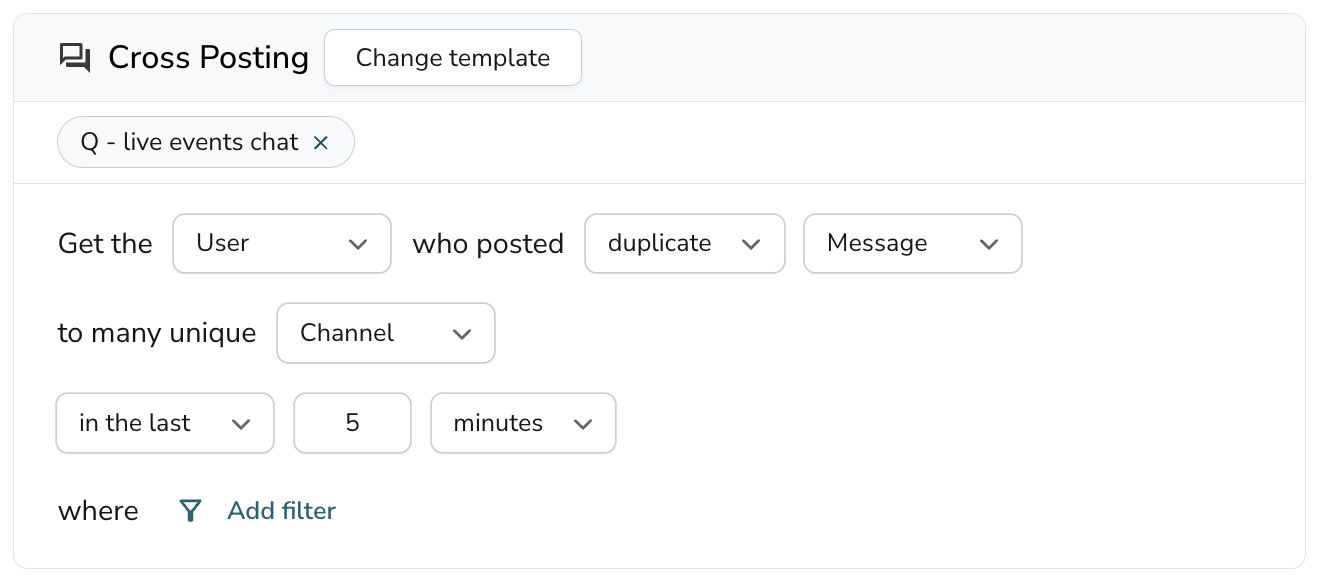 Predefined Decision: 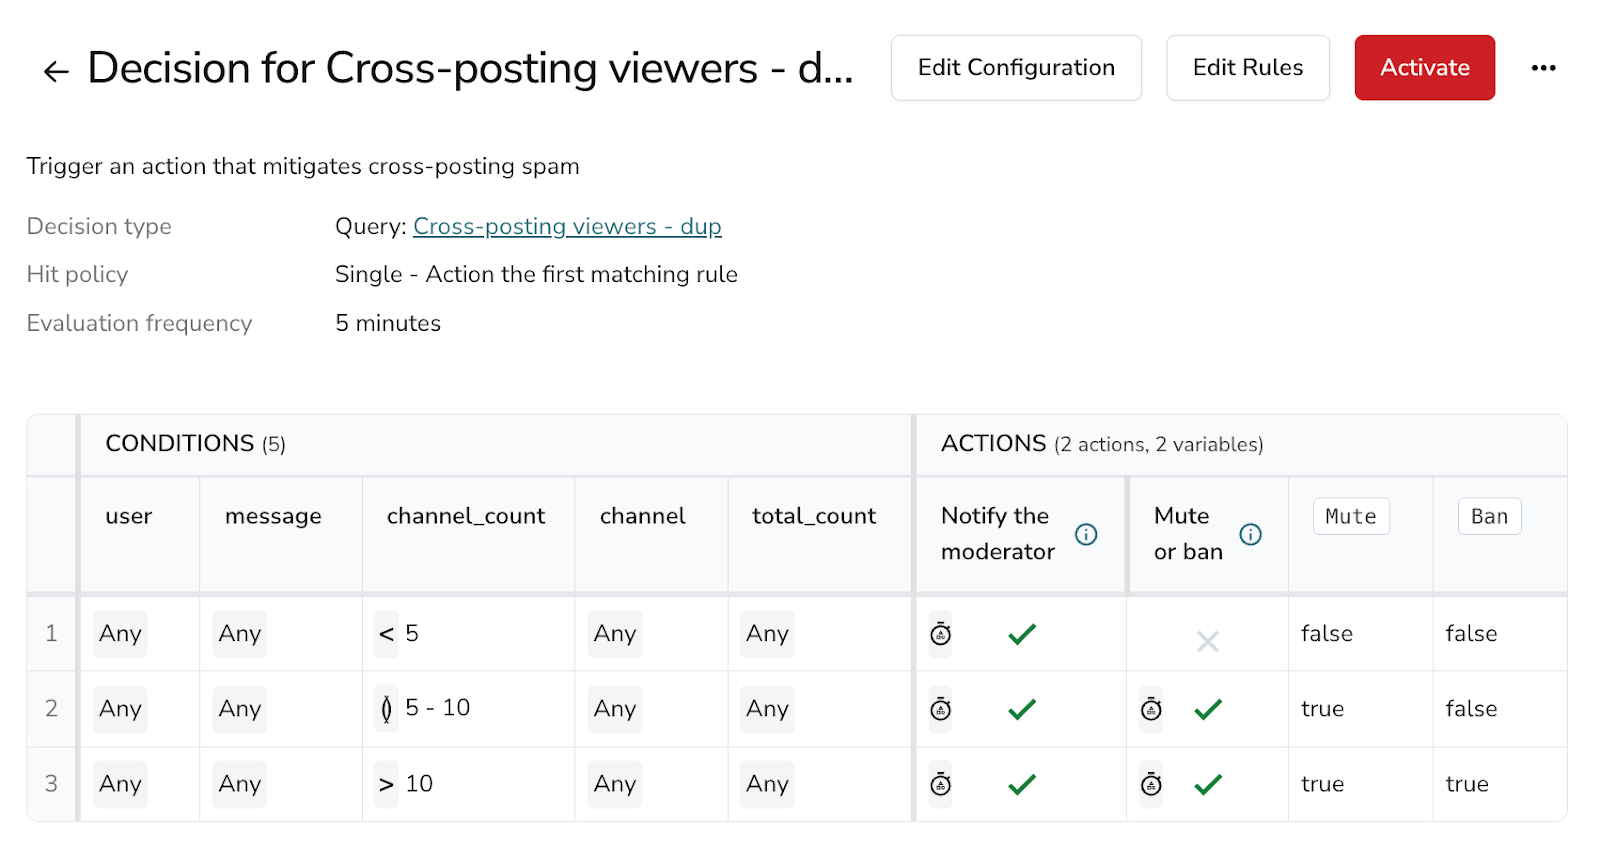 |
| Chat flooding spam | Detect users posting excessive or repetitive messages in a single channel. 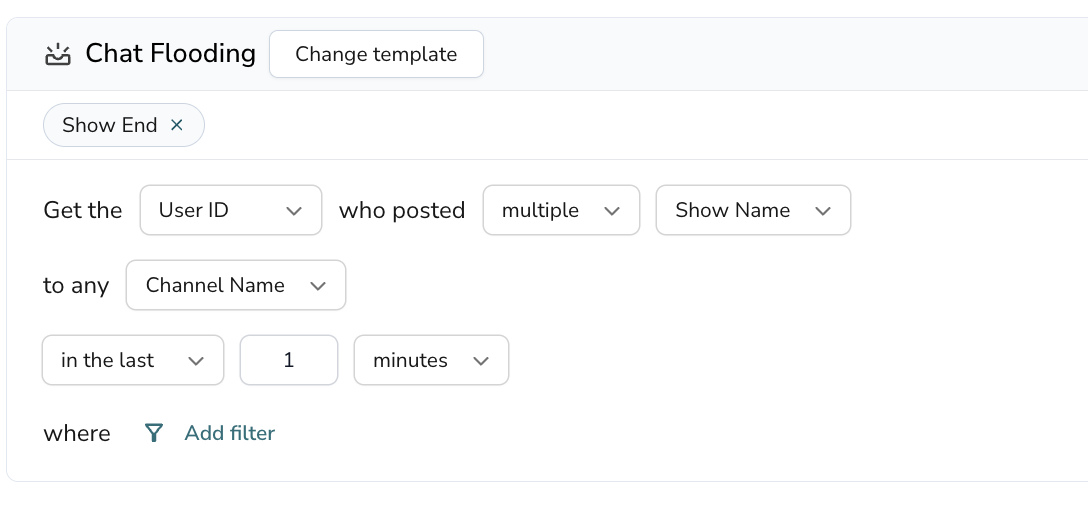 Predefined Decision: 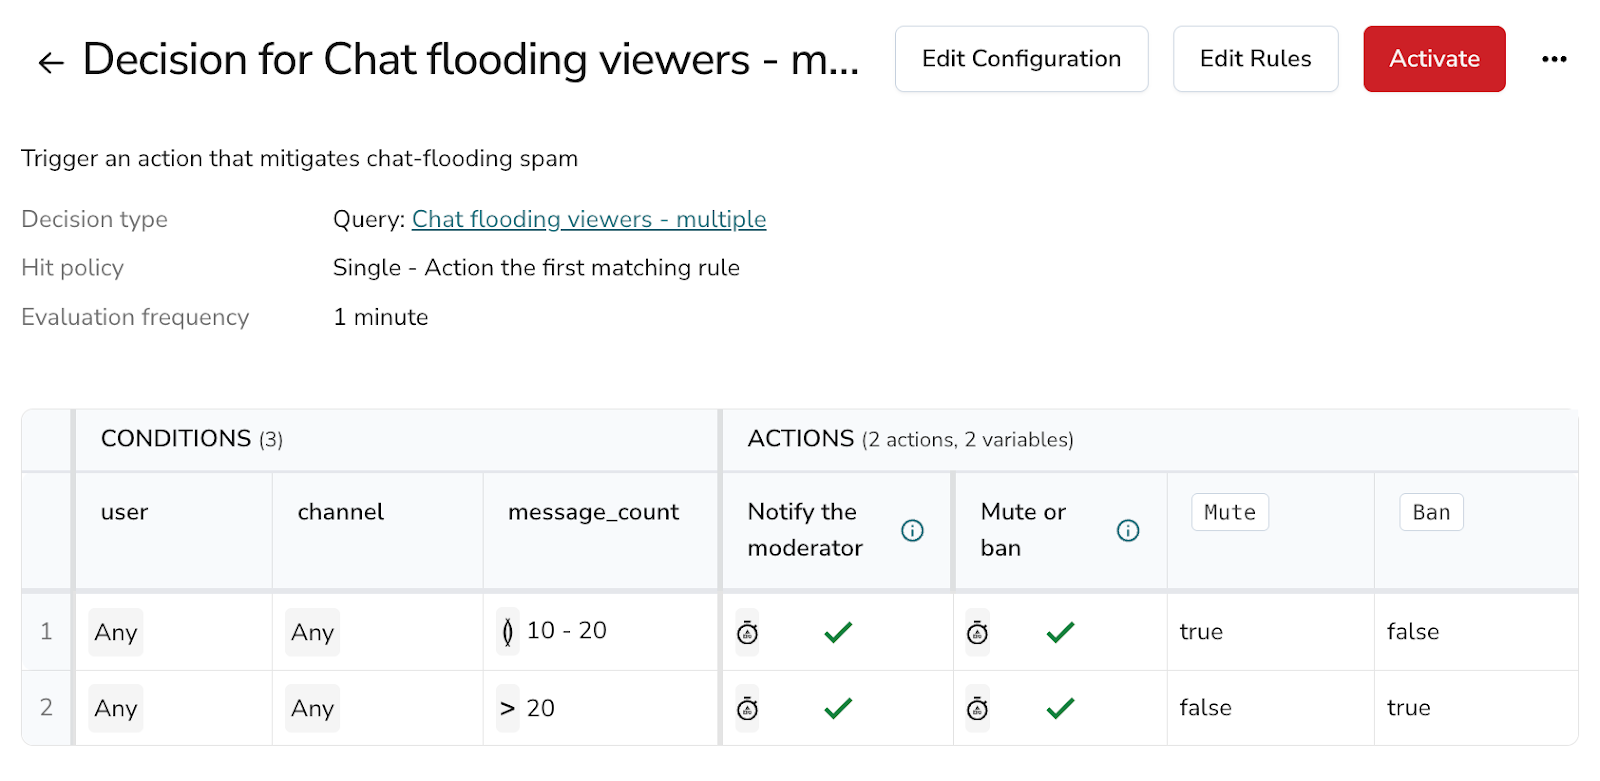 |
Create a query from a predefined query
-
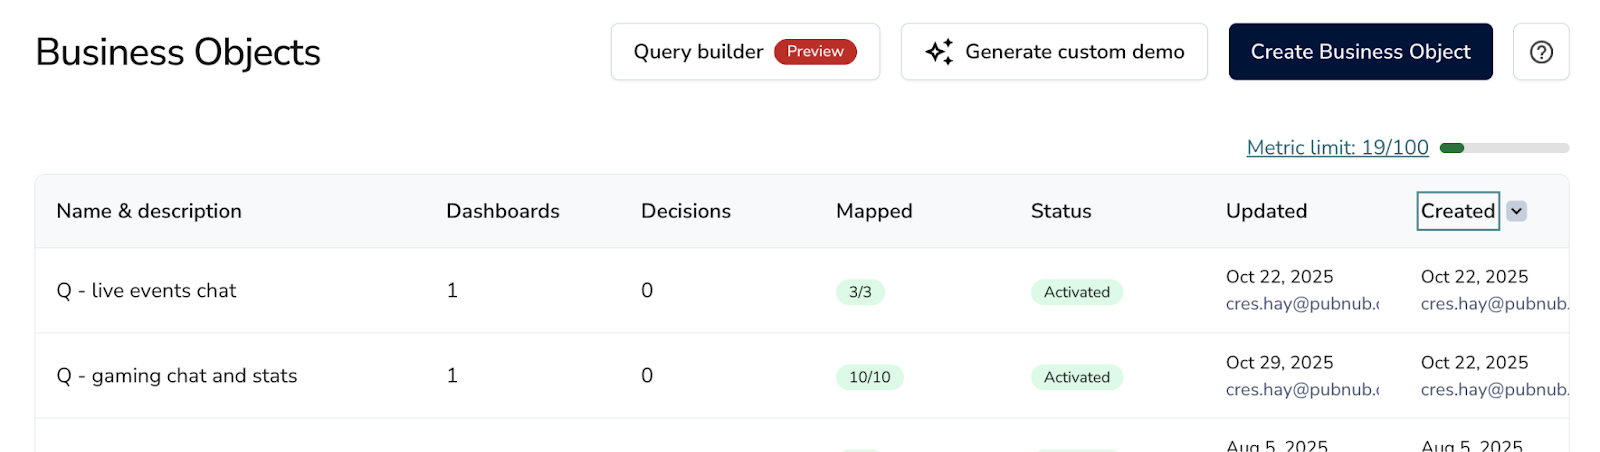
Click Business Object. Query Builder can be found at the top of the main page of the Business Object when at least one Business Object has been created.
-
Choose one of the available predefined Queries. If you don't see the list, click New query.
-
Provide a name for your query.
-
Add a data source by selecting an active Business Object that is already capturing data.
You can also select an inactive Business Object, but note that you won't see any data when you run the query.
Once a Business Object is selected, the predefined query automatically preselects the data fields from that object that best match the selected use case. Typically, these fields include User, Channel, and Message Text (or Chat).
You can edit the query to meet your use case. The Top N users or Bottom N users can be adjusted to be based on the
count of recordsor rows captured, thecountof a specific data field like message chats, theaverage,sum,maxorminof a number data type like purchases or game points. -
Choose the time period or window you'd like to use for this query (for example, last 1 minute, last 10 minutes, last 1 hour).

-
After selecting the aggregation window, click Save again to store your configuration.
-
Optionally, add filters to refine your results. You can also do this after you run the query.

Available filters include:
equals, does not equal, greater than, less than,
greater than or equal to, less than or equal to,
is empty, is not empty, between, not between,
contains, does not contain, starts with,
ends with, min length, max length -
Click Run to execute the query and view results.

No data appears
If no data appears, extend the time window (for example, to 1 hour or more) and click Refresh to run the query again. Don't save the extended time window unless that's the aggregation window you actually want to use.
-
Check the query results to verify your setup, add or adjust filters, or refine the query as needed. When used in a Decision, each row displayed in the query results represents a condition that can trigger an action.
Advanced queries
Advanced queries give you full control over how your data is queried and transformed. Instead of starting from a predefined template, you build the query from scratch by choosing a data source, setting limits, and adding query operations such as aggregations, filters, grouping, sorting, and field selection.
Use an advanced query when the predefined templates don't cover your use case or when you need more granular control over the results.
Create an advanced query
-
Click Business Object. Query Builder can be found at the top of the main page of the Business Object when at least one Business Object has been created.
-
Click Create advanced query.
-
Provide a name for your query.
-
Add a data source by selecting a Business Object, if the Business Object isn’t activated, you won’t see any data.
-
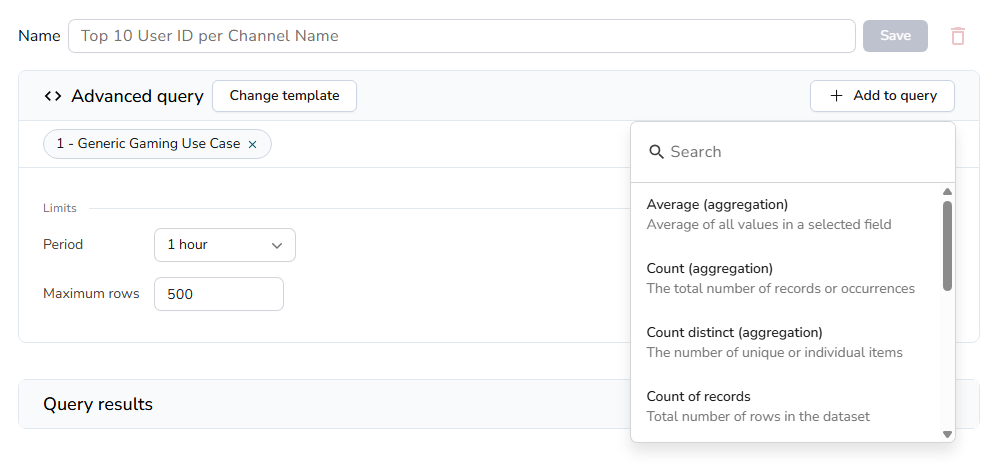
Configure the default limits:
- Period — How far back in time the query looks at data from your data source. The default is
1 hourand the maximum is1 day. - Maximum rows — The maximum number of rows the Query can return. The default and maximum is
500.
- Period — How far back in time the query looks at data from your data source. The default is
-
Optionally, click Run to preview the data.
-
Click Add to query to add one or more query Operations. You can add multiple query operations to shape the results to your needs.
-
Click Save to store your query configuration.
Query operations
Query operations let you shape and refine the data returned by your query. Click Add to query to open the list of available query operations and select one or more to apply.
| Query Operation | Description |
|---|---|
| Aggregation | Calculates a summary value across data, such as an average, count, count distinct, sum, minimum, or maximum. For example, get the total number of messages sent. |
| Filter | Narrows results to only include data that match specific criteria. For example, only show data where the channel name equals "general". |
| Group By | Groups data that share the same value in a chosen field, so that aggregations are calculated per group. For example, count messages grouped by user. |
| Sort By | Orders the results by a chosen field in ascending or descending order. |
| Selection | Chooses which specific fields to include in the Query results, rather than returning all available fields. |
Create a Decision from a query
Once you've configured and saved a query, you can create a Decision that uses the query results to trigger actions. You can create a Decision using a predefined Decision template for predefined queries or start from scratch.
Both options are available directly from the Query Builder.
To create a Decision:
-
Save your query.
-
Click Create Decision.
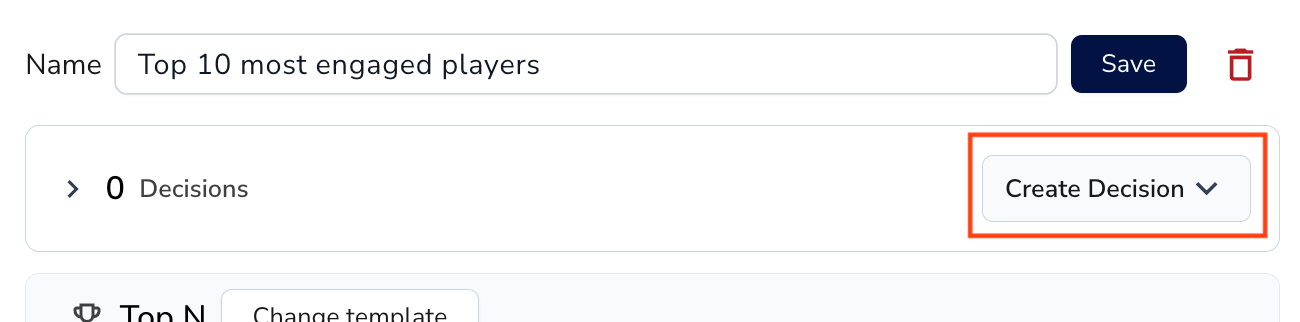
Save the query before creating a Decision
The Create Decision button is only visible after the query is saved.
-
Choose either Predefined or Create from scratch. Depending on the option you choose, the Decision creation flow is different.
Use a predefined Decision
Selecting Predefined automatically creates a Decision tailored to the selected query template.
What happens automatically:
- A Decision table is created for the query
- Conditions are preconfigured using the query output
- Default actions are added based on the use case
You can immediately:
- Edit rules, thresholds, and adjust actions
- Edit the action configurations
- Activate the Decision
To return to the query at any time, click the Query name displayed at the top below the Decision title.
Create a Decision from scratch
Selecting Create from scratch opens a blank Decision configuration.
-
Select Create from scratch.
-
Provide a Decision name (with an optional description).
-
Configure conditions by selecting one of your saved queries. The available data fields correspond to those defined in the query (for example:
user,message,channel_count,total_count).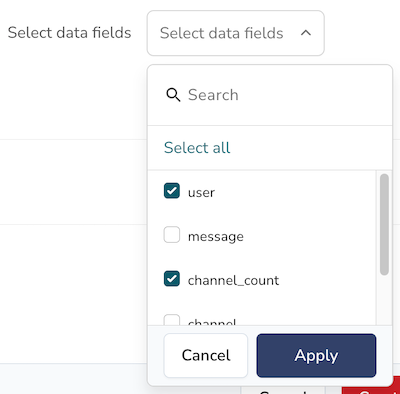
-
Add and configure the desired action. Refer to steps 5-11 of Create Decision to learn more.
-
Create rules that trigger actions when conditions are met. Refer to add conditions and rules.