User Management
The User Management module provides a preview of all user metadata on an application's keyset and lets you:
To start managing your user and membership data, follow these steps:
- Log in to the Admin Portal.
- In the left sidebar, go to BizOps Workspace.
- Select User Management.
- Choose an app and keyset to manage users.
- If needed, configure your keyset following on-screen instructions.
Create users
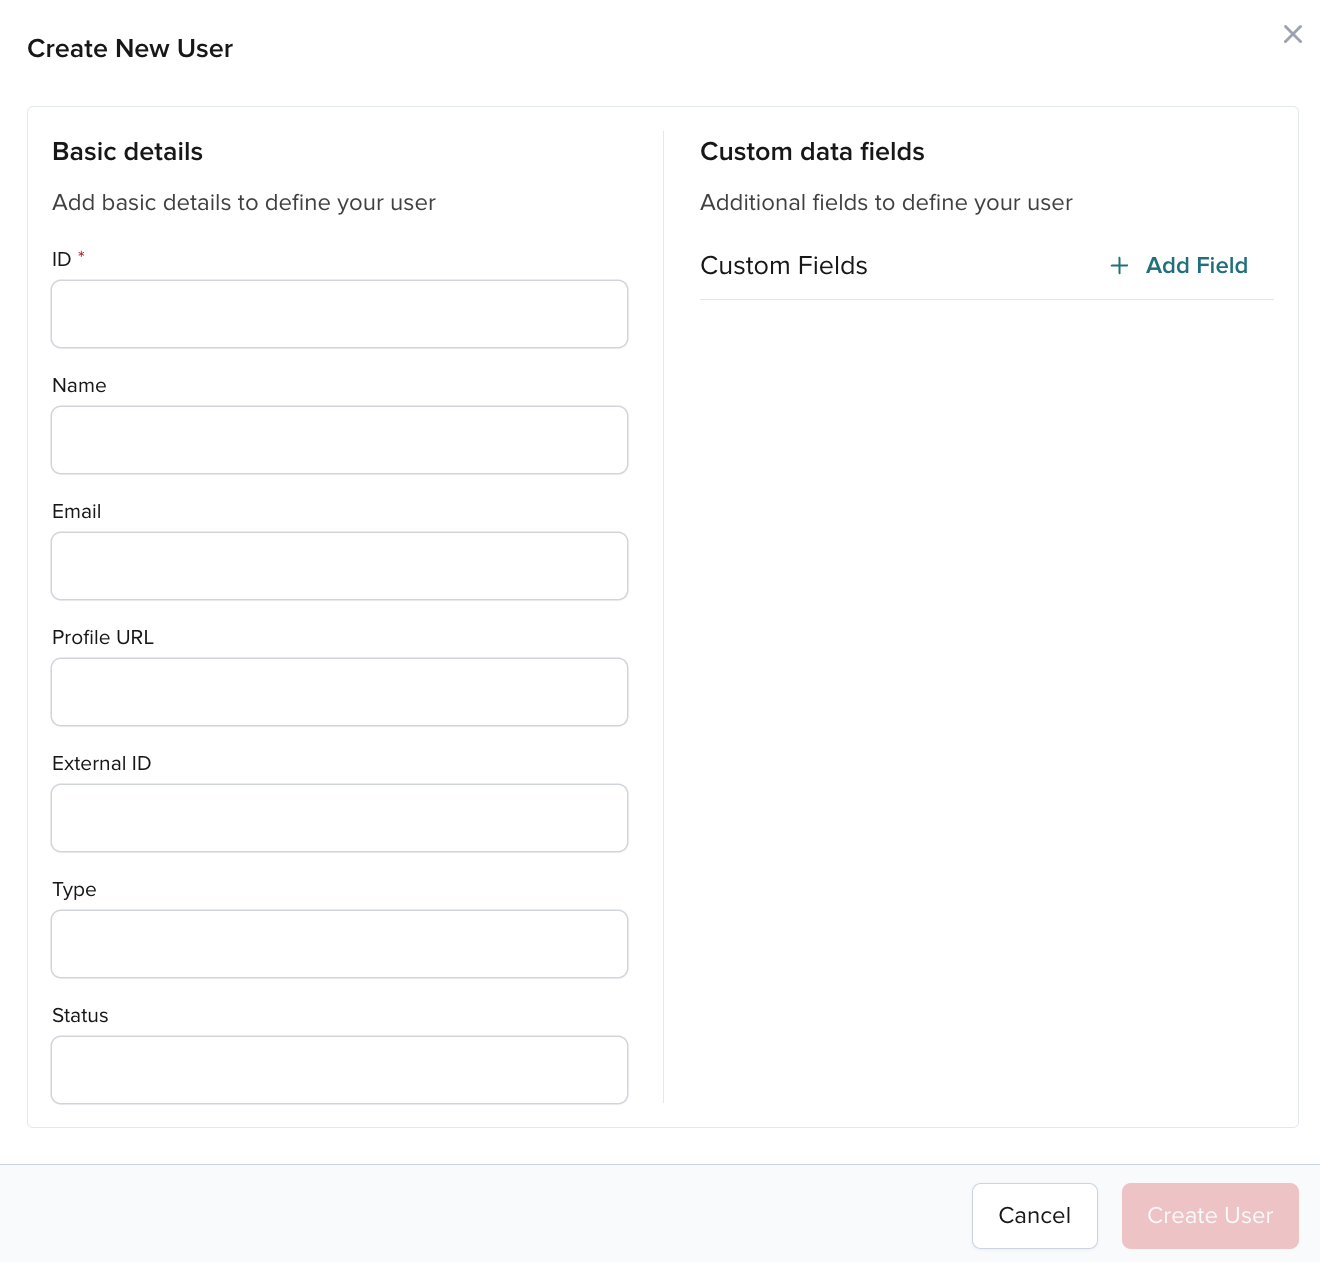
Follow these steps to create a user:
-
In the User Management interface, click the Create User button.

Persistent table settings
In the User Management section, you can modify the way tables are displayed through the table settings icon in the top-right corner of each table. For example, you can pin columns, order or hide them, or change row heights. These settings are stored in local storage, which allows them to persist across page refreshes and browser restarts on the same device.
The user creation modal opens.
-
Fill in the details. Only the User ID is required. Click Create User.
The new user appears in the list.

Time zone
The Updated field displays time in your local time zone.
To learn more about the user fields, refer to App Context methods.
Read-only objects
BizOps Workspace uses the JavaScript Chat SDK. Some features, like user moderation or message reporting, rely on technical channels and users. These names use prefixes such as PUBNUB_INTERNAL or REVIEWED. An "eye" icon marks these objects and their memberships. You can view details, but you can't edit or delete them.
Import users
You can test User Management with sample data without creating users manually.
If you have access to Insights, you can preview user data on your app's keyset even if you don't use App Context to store it.
You can import that Insights data into User Management as sample users.
Click Import from Insights to fetch up to 20 users from your keyset who published the most messages in the last day with the requested data. If no messages were sent yesterday, the import uses the previous day.
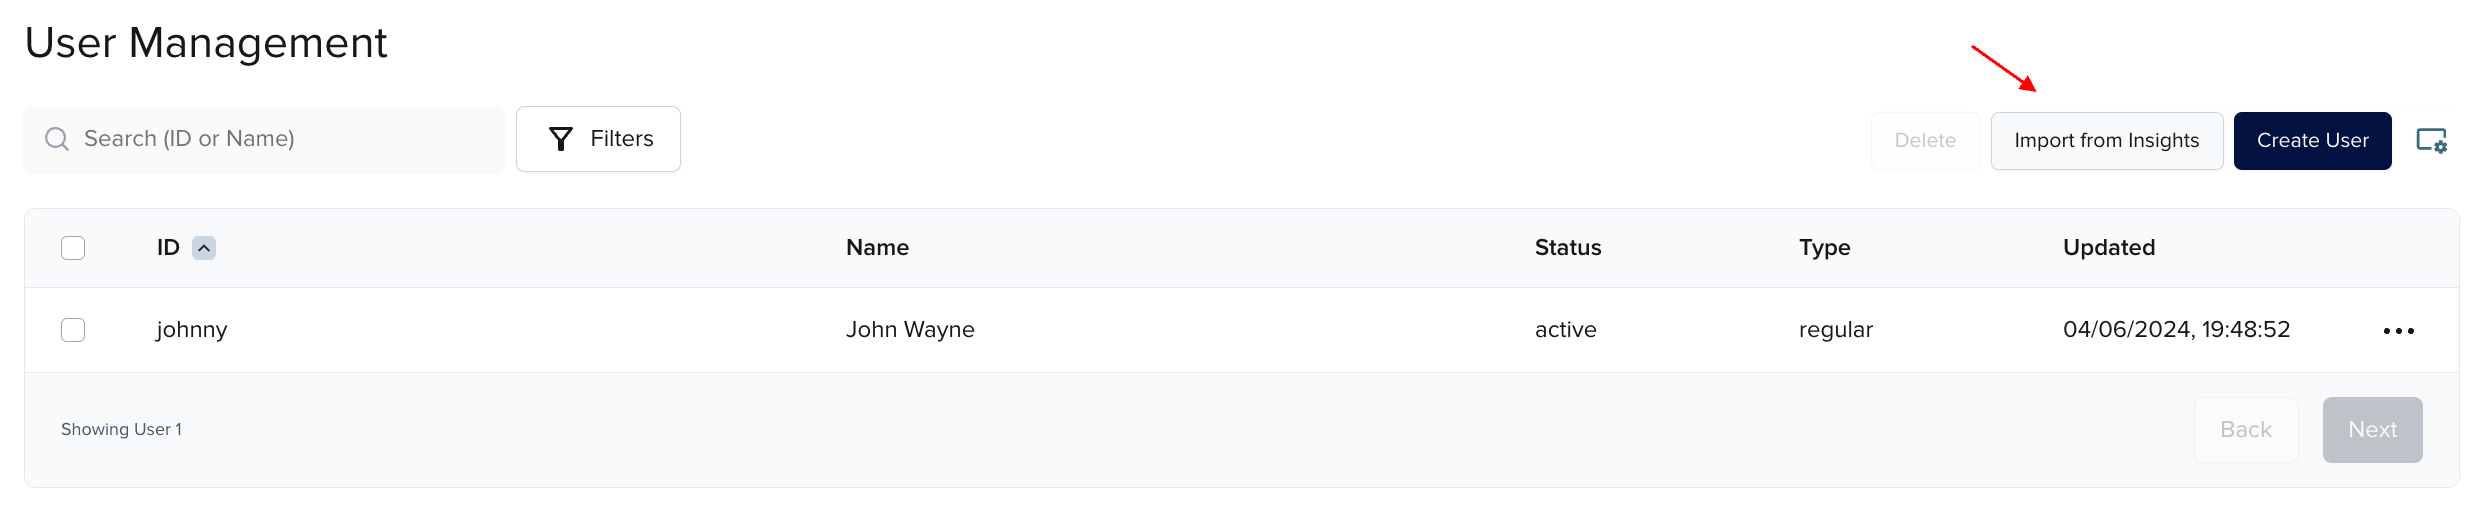
After import, the data is stored in App Context and user objects appear in User Management. The imported users have:
- The name that matches the ID imported from Insights
- The
importedtype - The
sent_messagescustom field with the number of messages at import time (used to select the top 20 users)
If some imported user data already exists in App Context, the importer skips it.
Under the hood
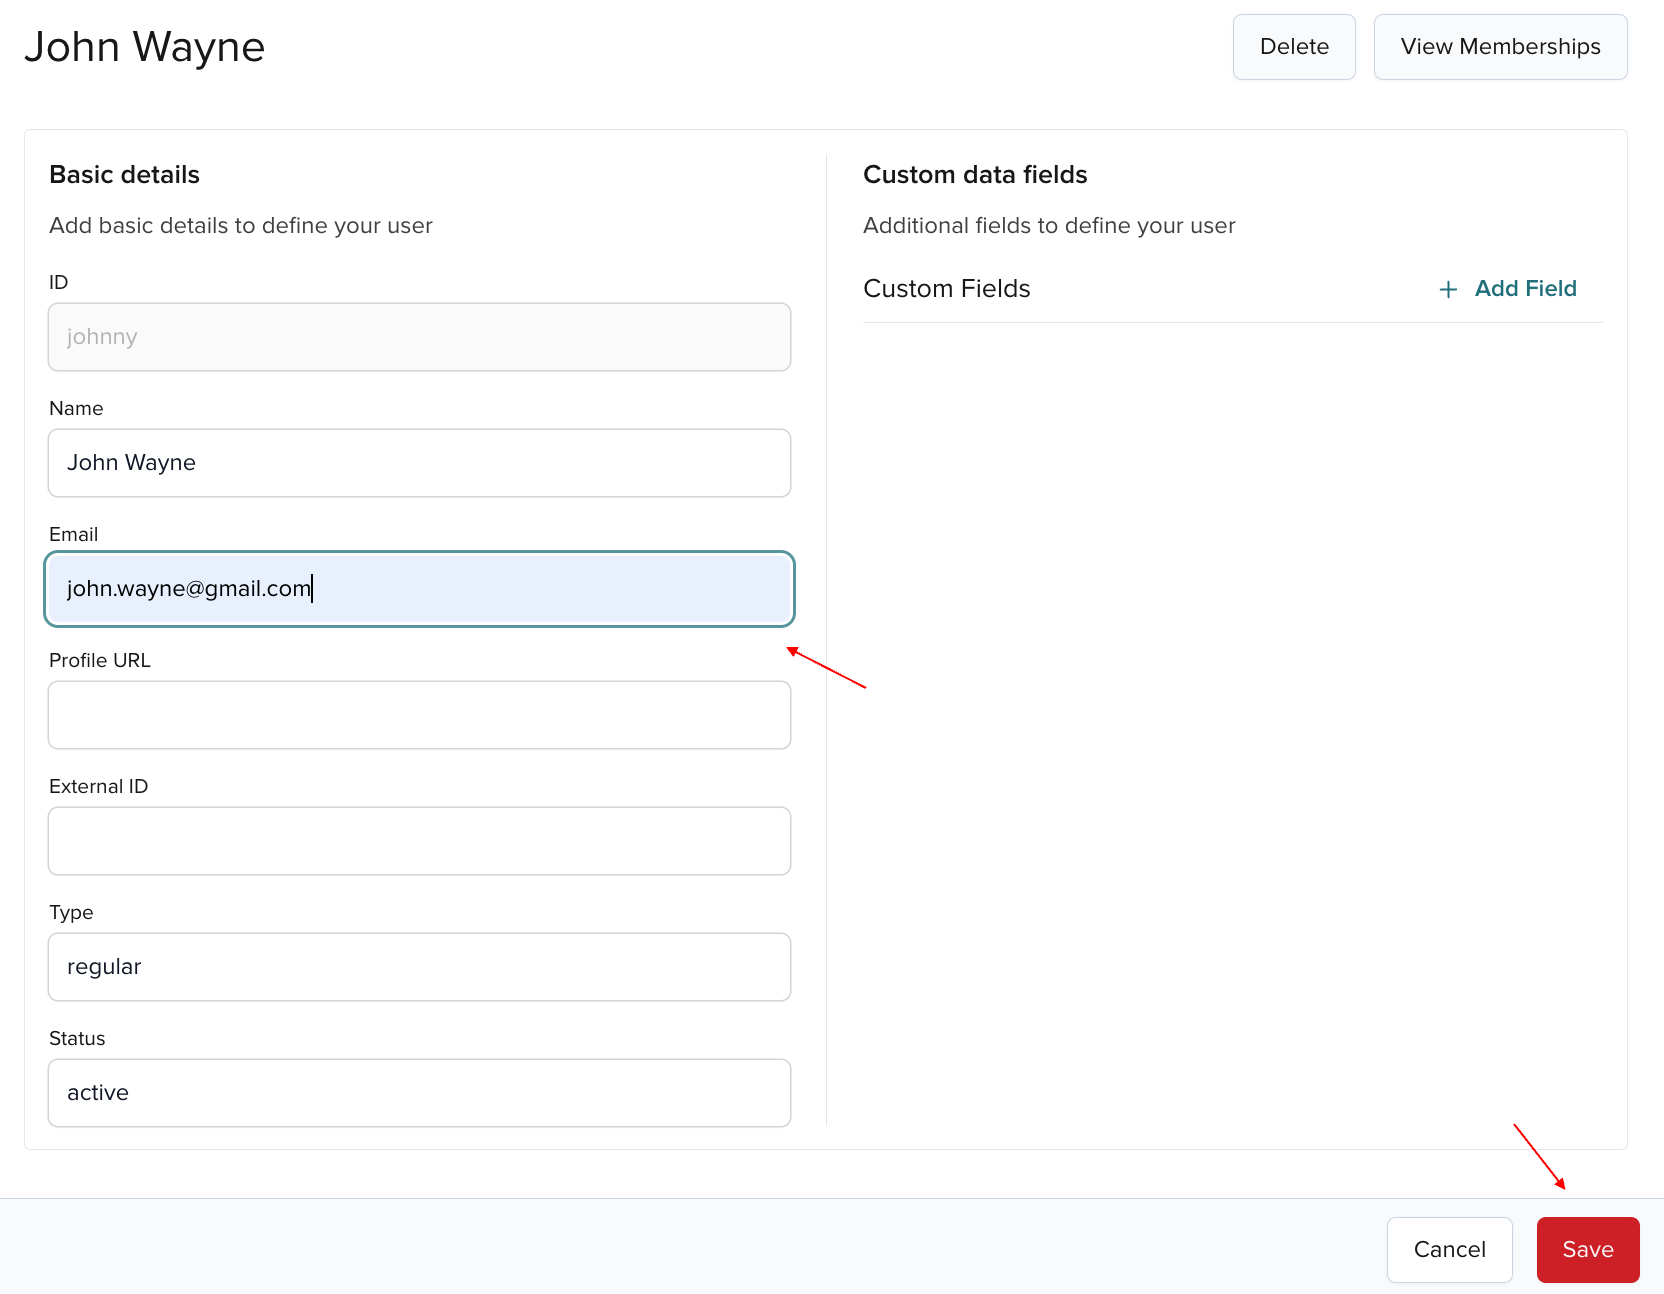
Update users
Follow these steps to update the metadata of an existing user.
-
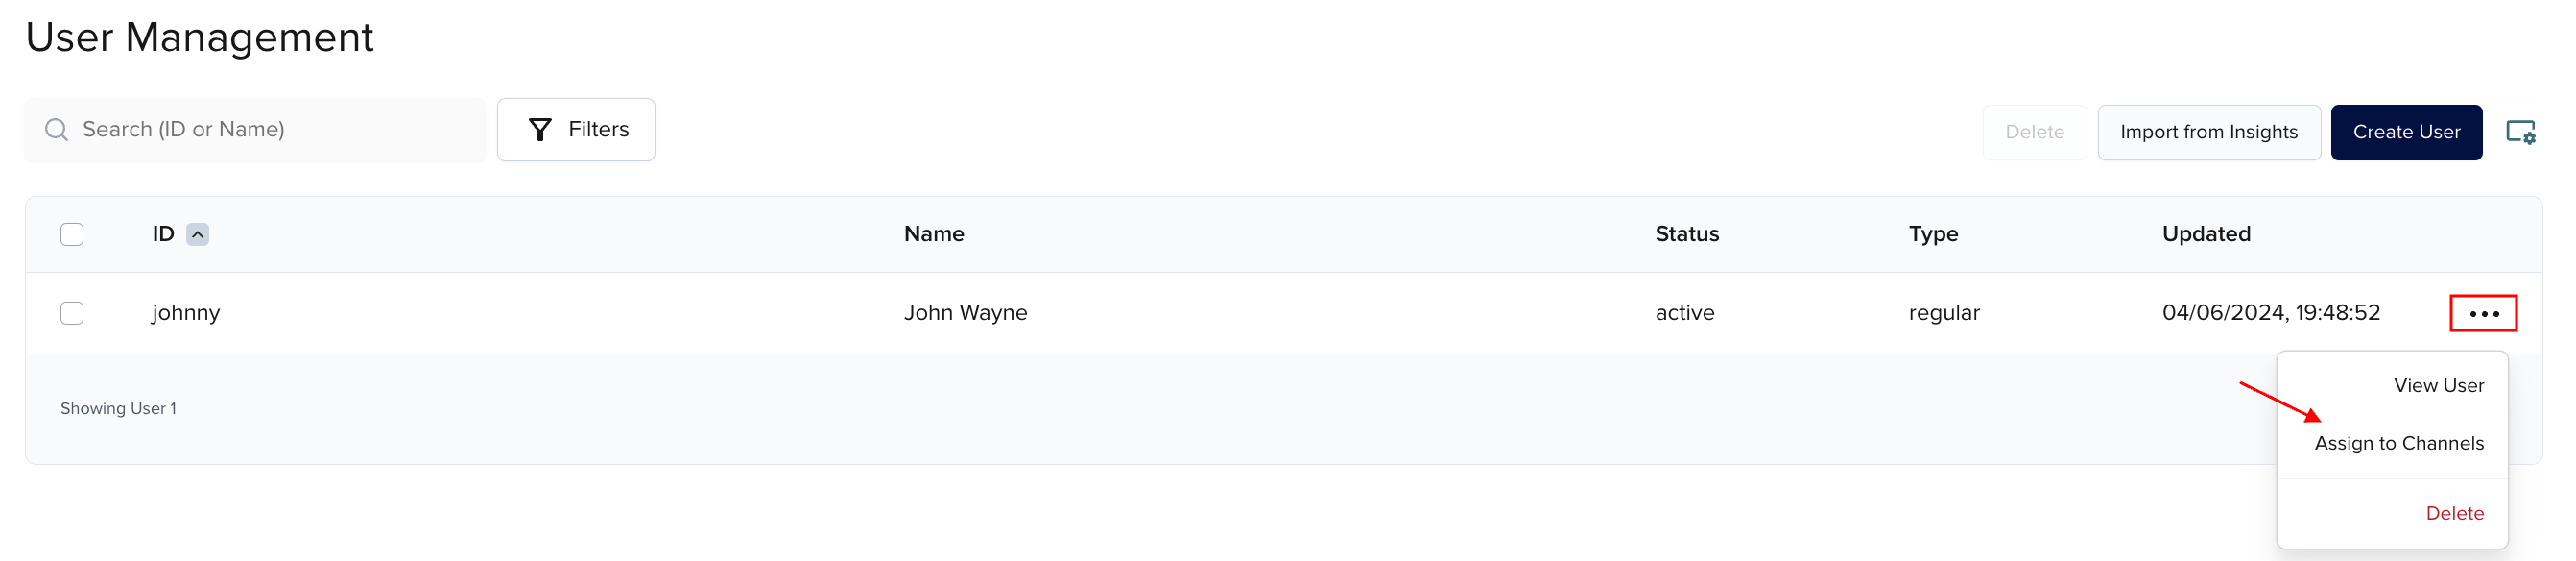
Search for the user. Click anywhere in the user's table row to open the record. Or click the Actions menu (⋮) next to the user and select View User.

Filtering large data volumes
When working with a large number of users, avoid using the quick search box at the top of the page as it performs a slower
containssearch across all users. For better performance, use the Filters button with theORcondition, and set up anequalsfilter with the exact user ID(s) you're looking for. This same limitation applies to the Channel Management module when searching through applications with many channel records. -
Edit the field you want to update and click the Save button.
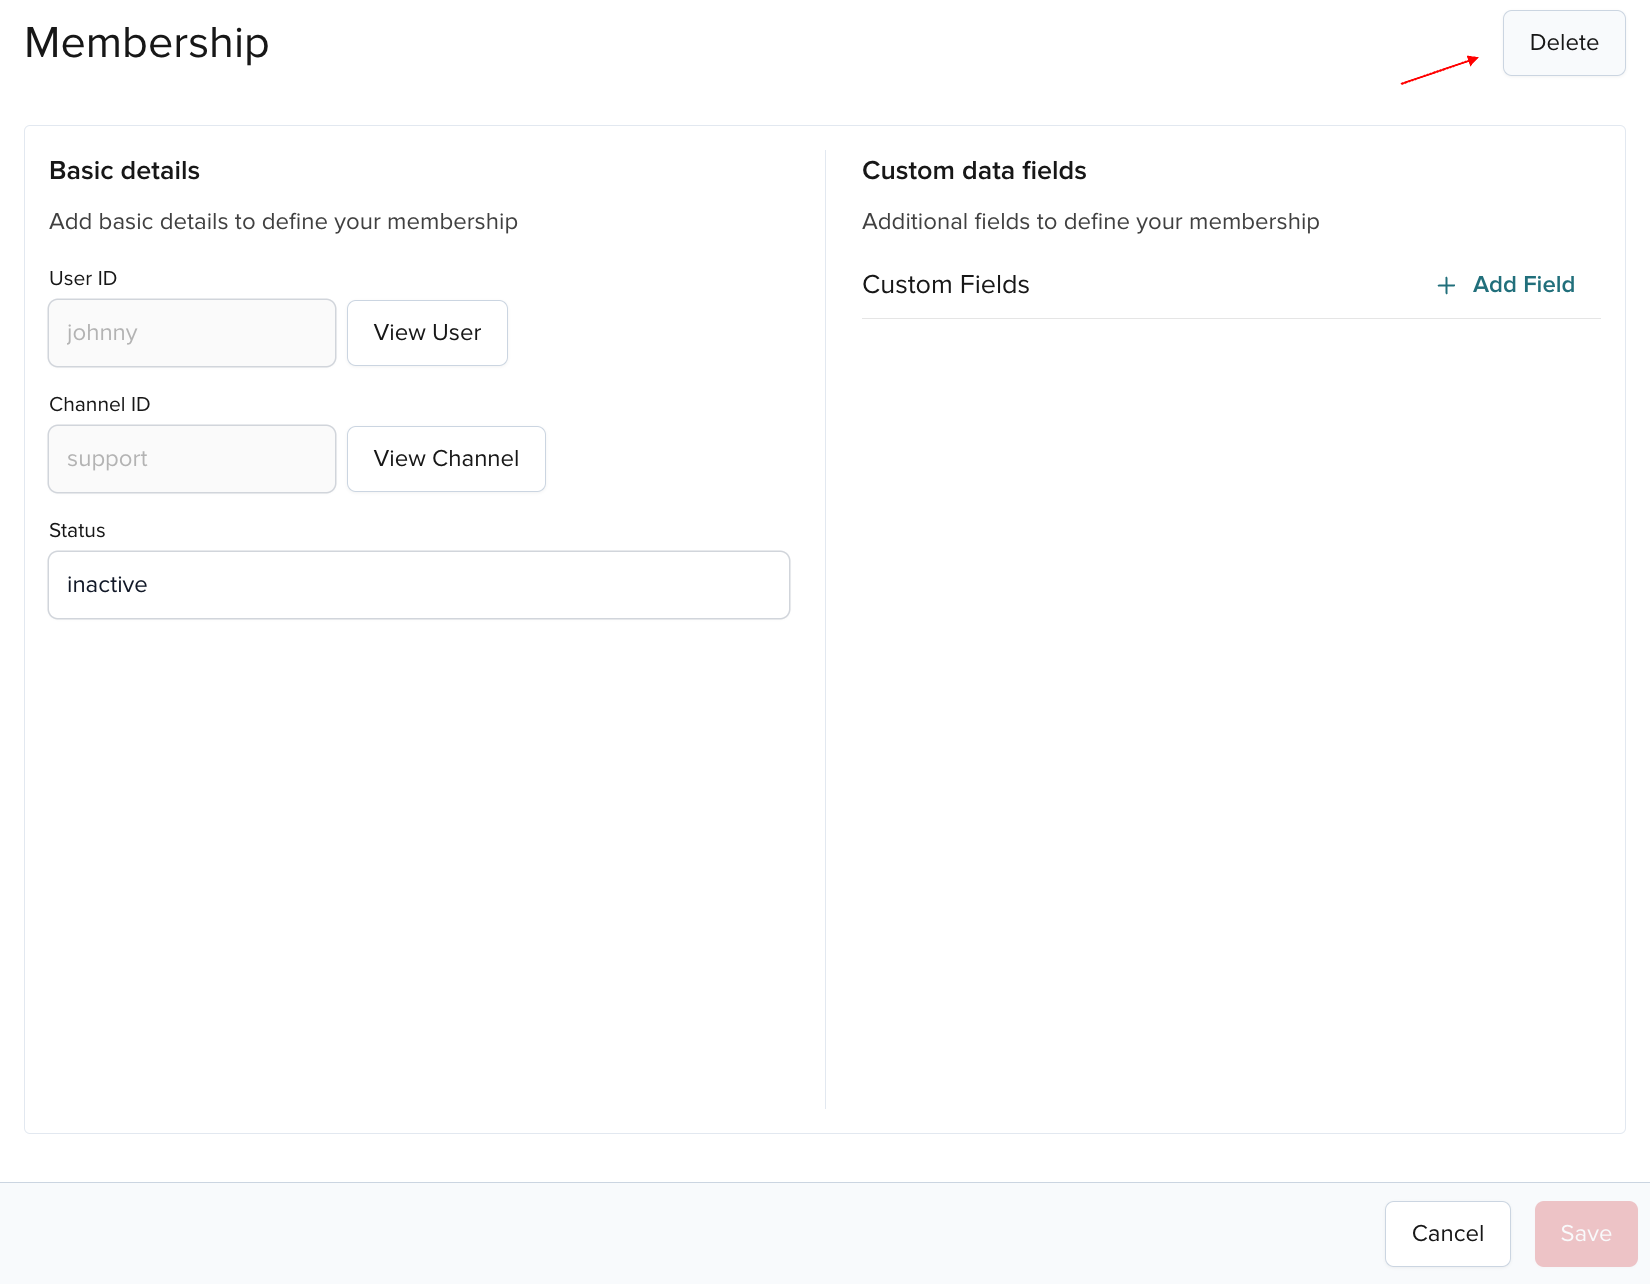
Delete users
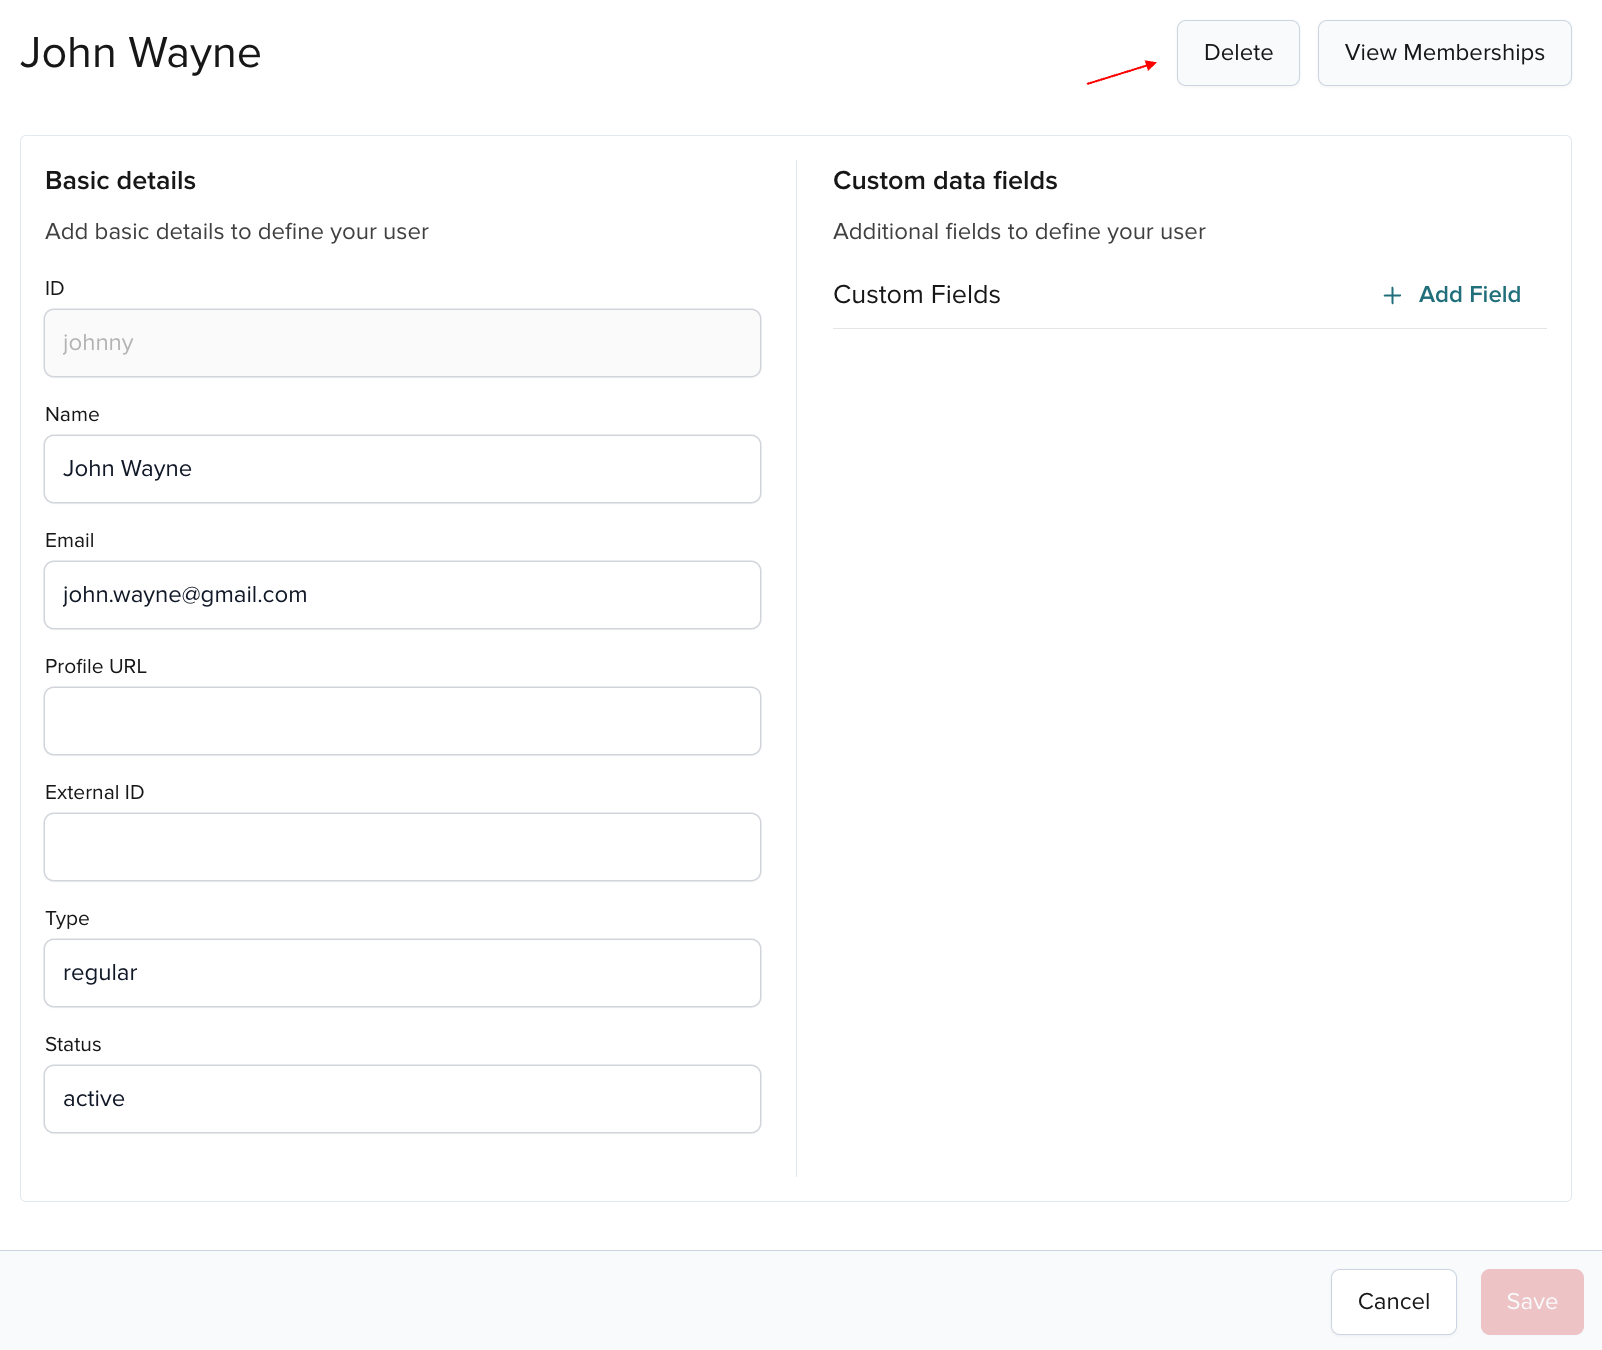
You can delete an existing user in one of the following ways.
Delete single user
Follow these steps from the main User Management view:
- User list
- Actions menu
- User details
-
Select the user to remove and click the Delete button.

-
When a modal pops up, click Confirm.
-
Click the "More actions" icon next to the user and select Delete.

-
When a modal pops up, click Confirm.
-
Click the selected user entry (any column).

-
Click the Delete icon.
-
When a modal pops up, click Confirm.
Delete multiple users
To remove multiple users at once, follow these steps from the main User Management view:
-
Select the users to remove and click the Delete button.
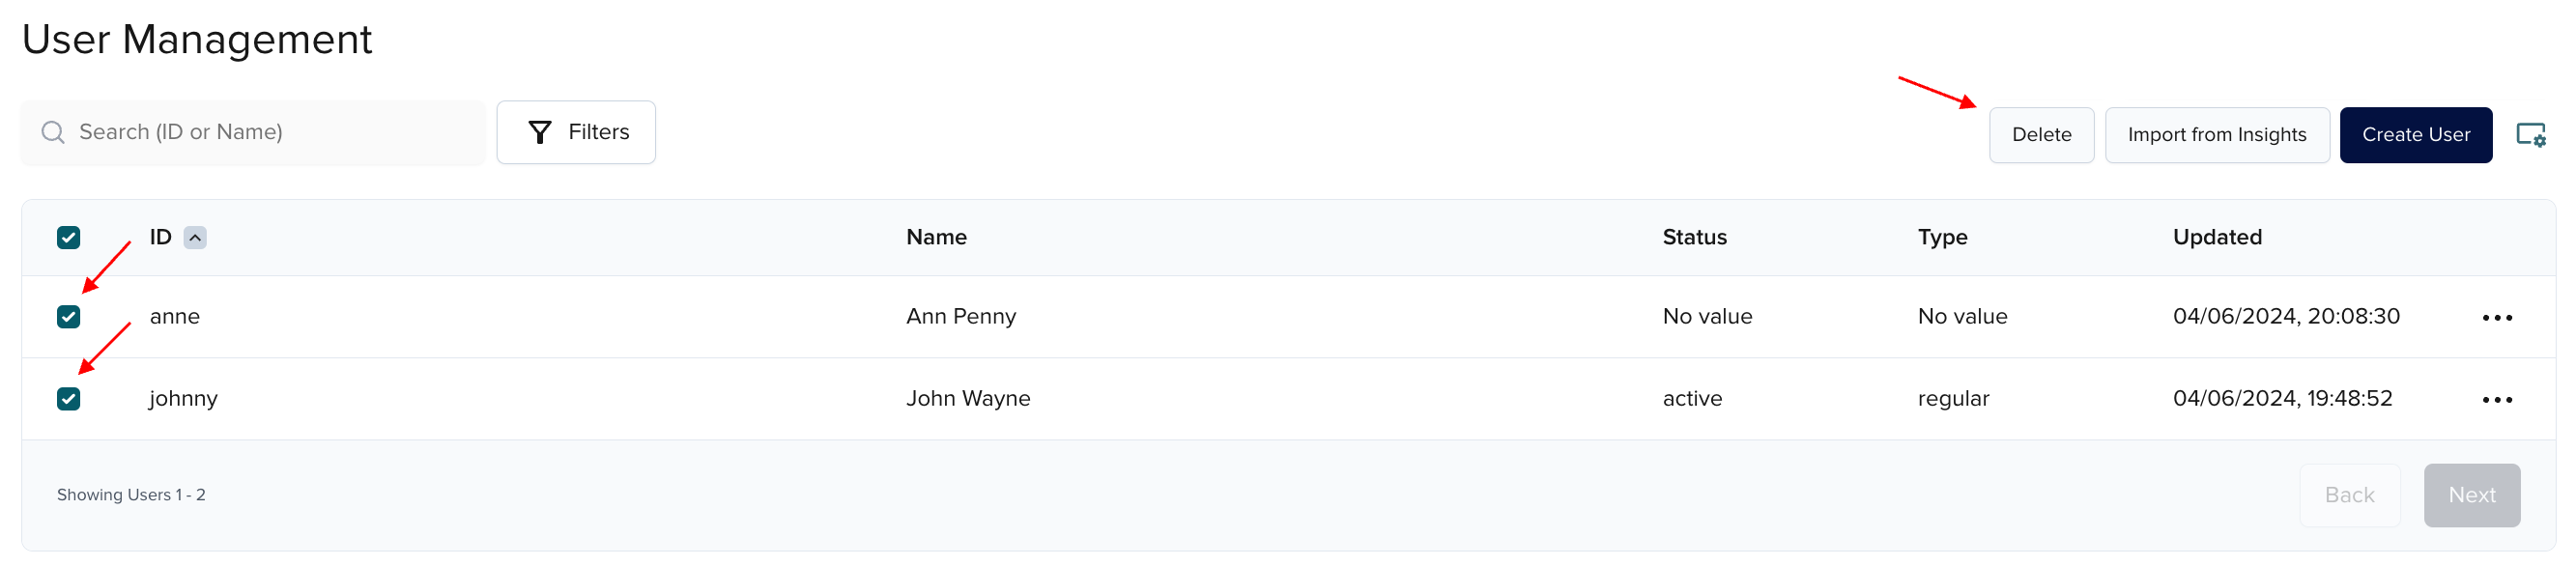
-
When a modal pops up, click Confirm.
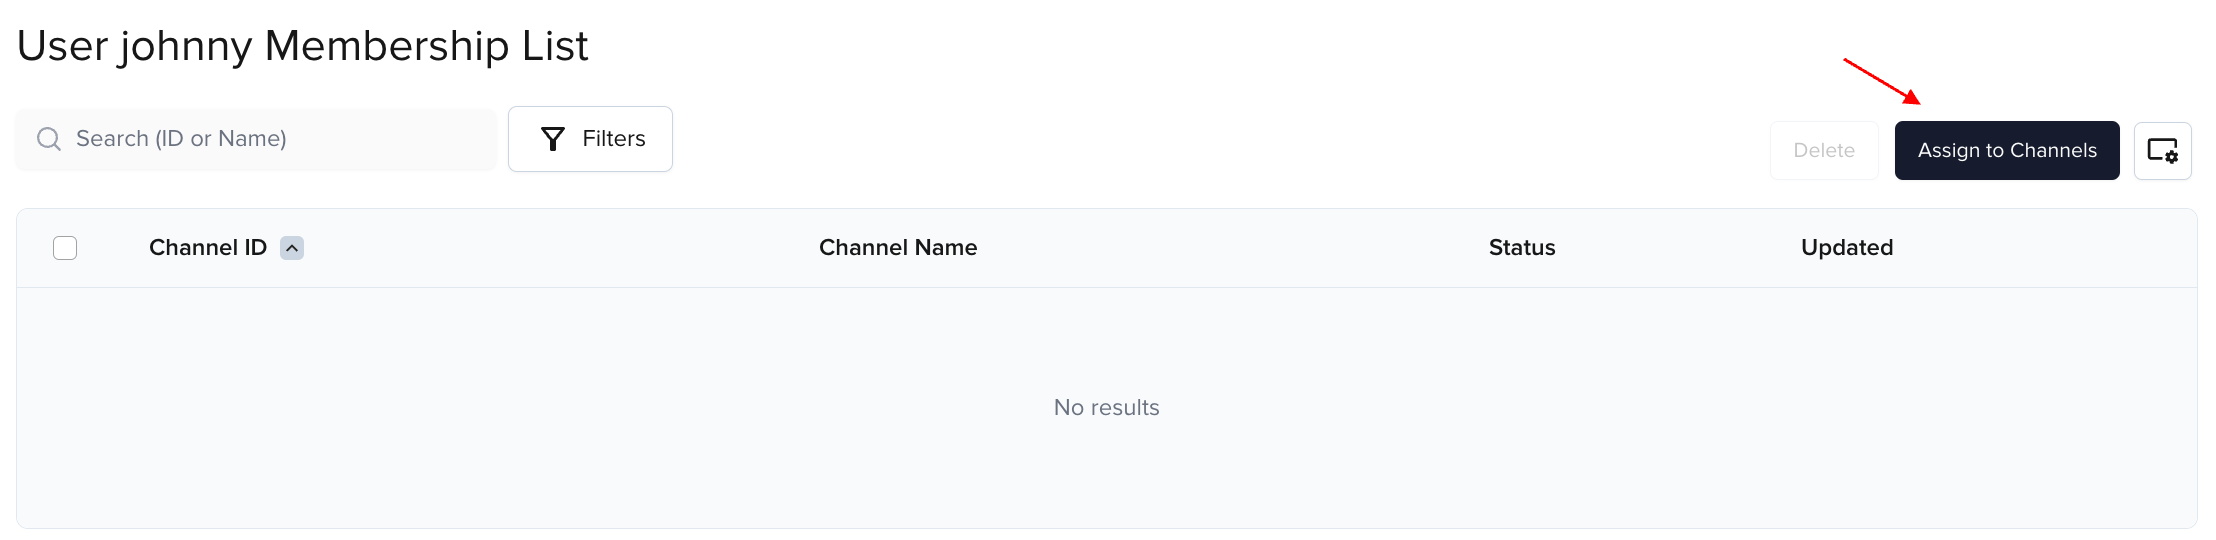
Manage membership
Manage user-channel membership from the User Management section.
Add membership
You can create user-channel membership in one of the following ways.
Follow these steps from the main User Management view:
- Actions menu
- Channel details
-
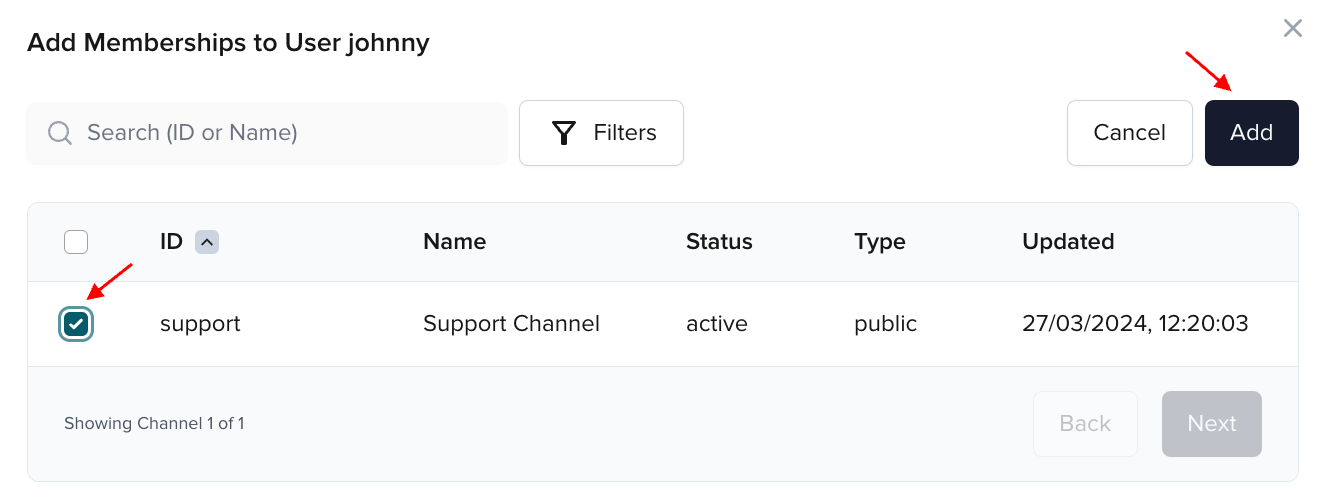
Click the "More actions" icon next to the user and select Assign to Channels.
-
Select the channel on a modal and click the Add button.
-
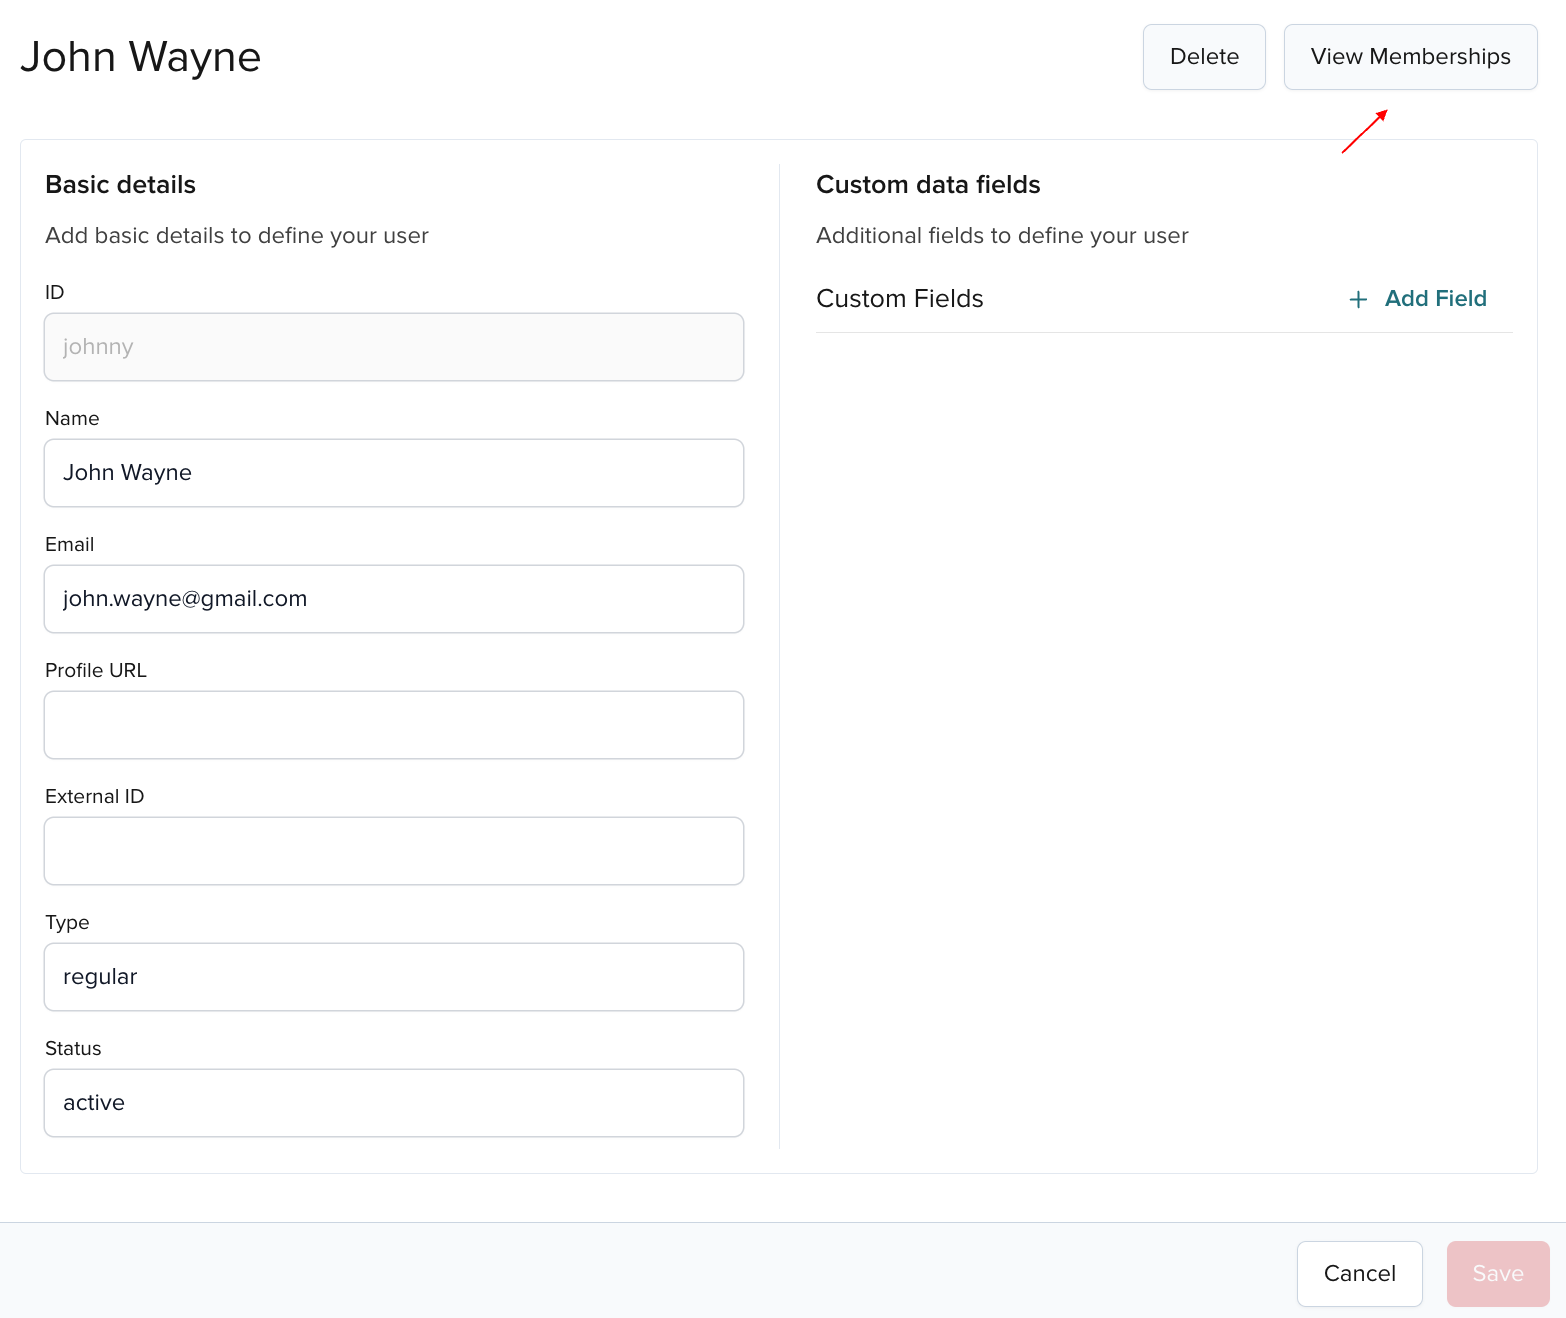
Click the user entry (any column).
-
Scroll down and click the View Memberships button at the bottom.
-
When the user membership view appears, click Assign to Channels.
-
Select the channel on a modal and click the Add button.
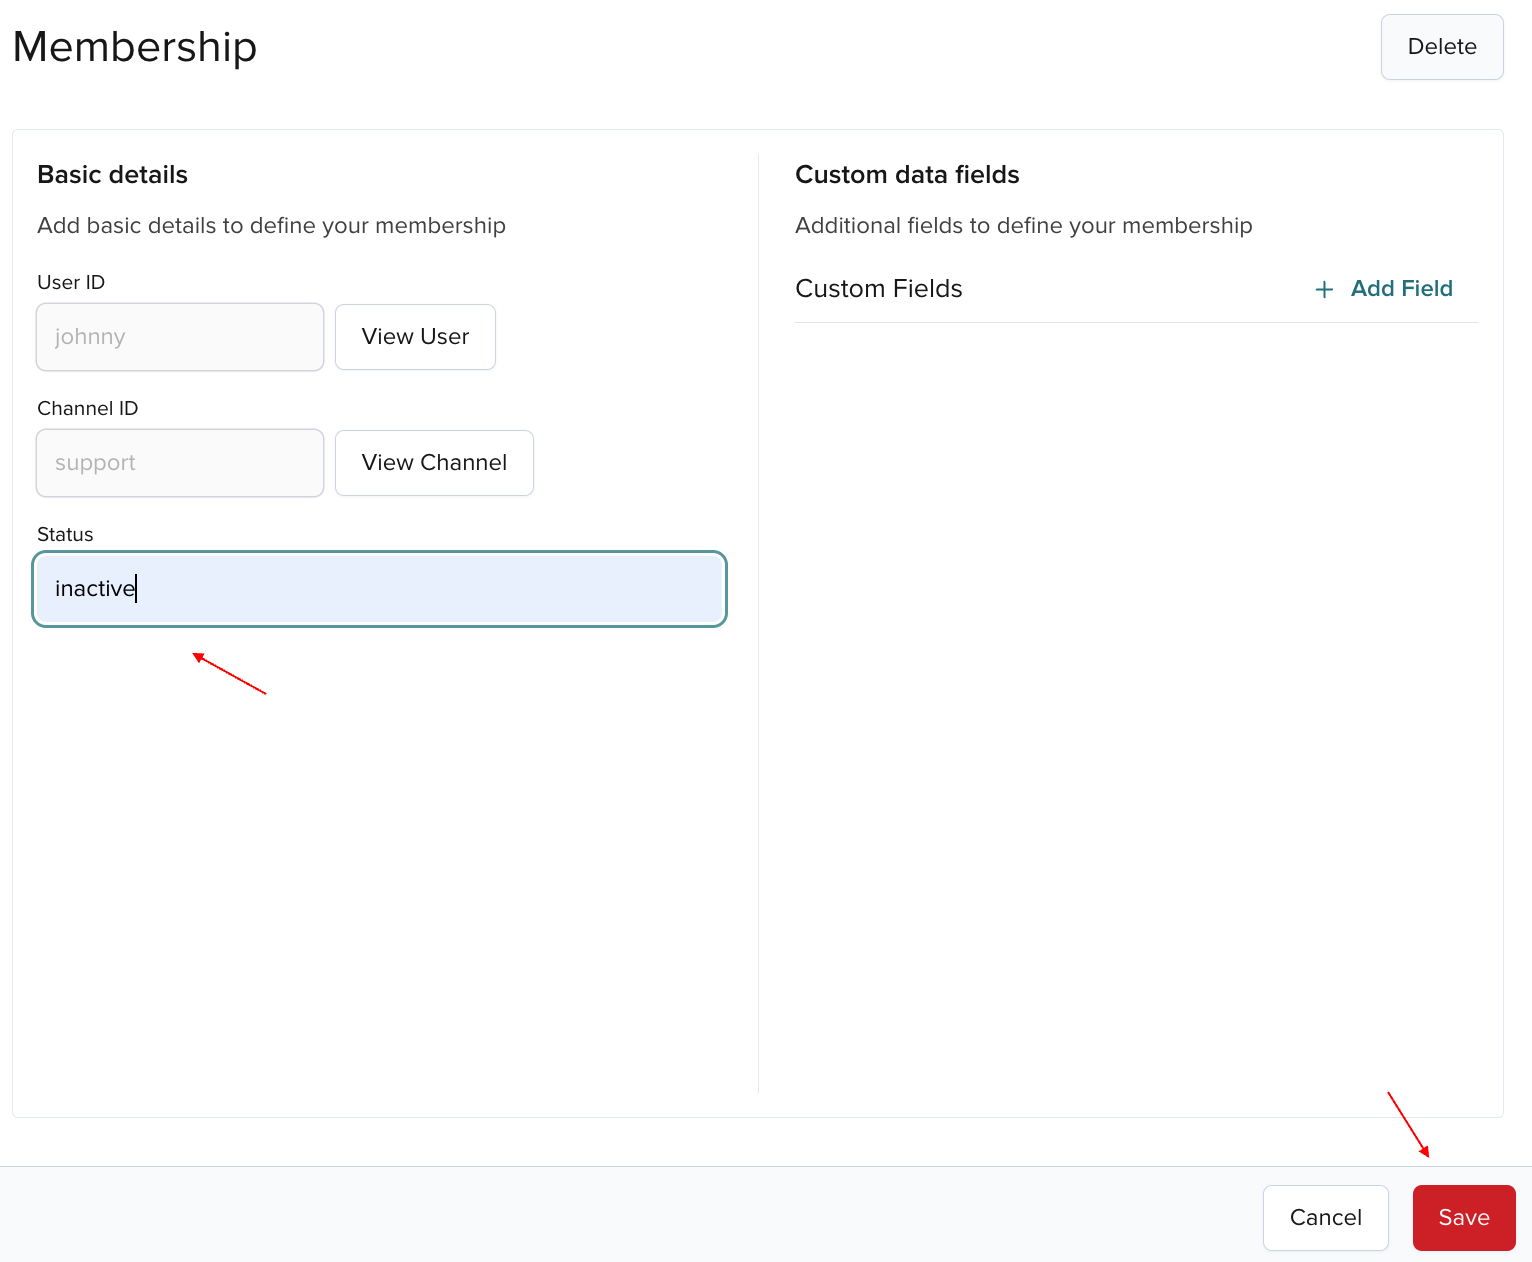
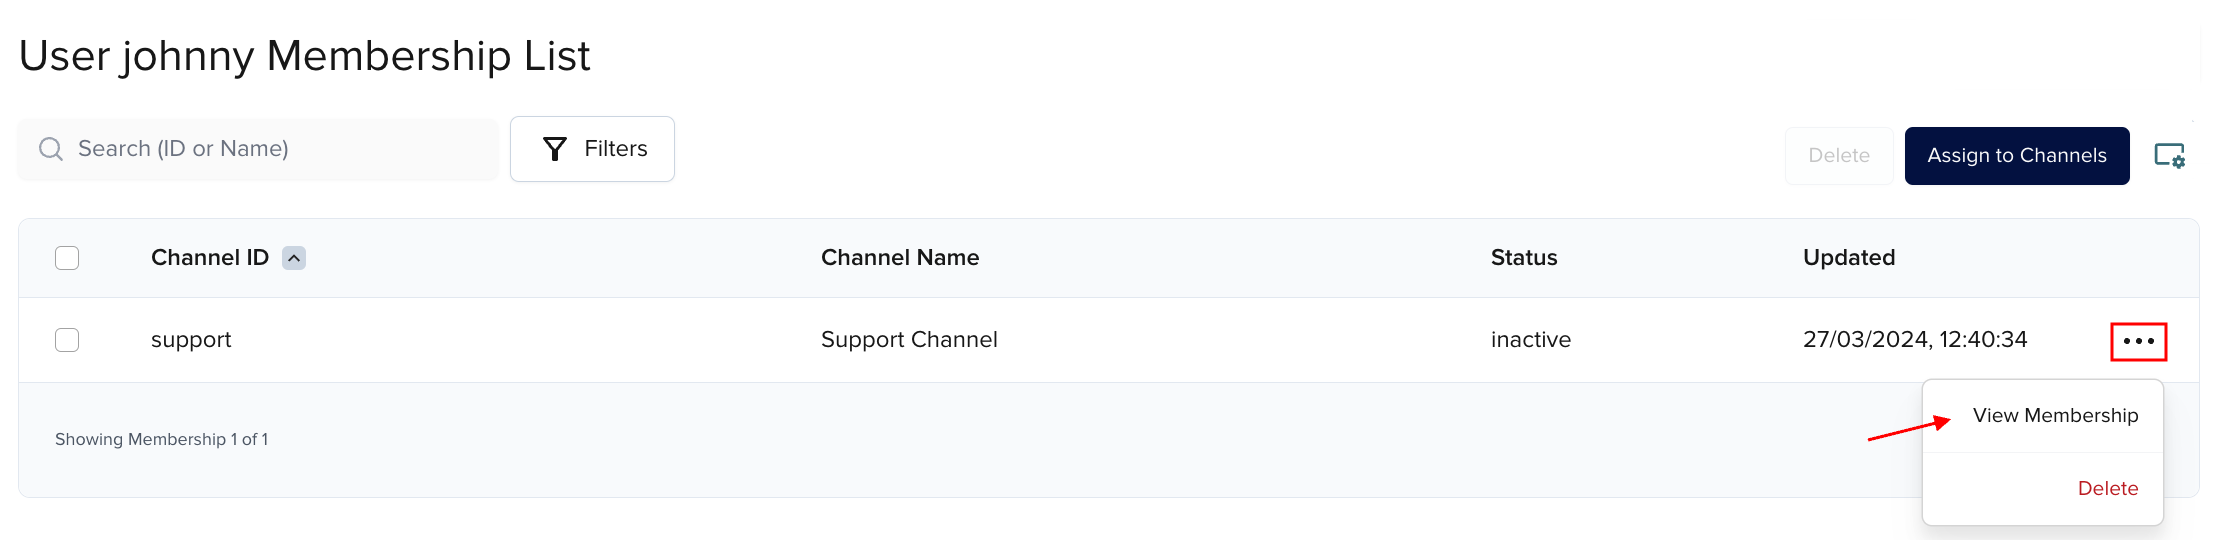
Update membership
Follow these steps to update details on the user-channel membership.
-
Click the user entry (any column).
-
Scroll down and click the View Memberships button at the bottom.
-
Click the channel entry (any column) or the "More actions" icon next to the channel and select View Membership.
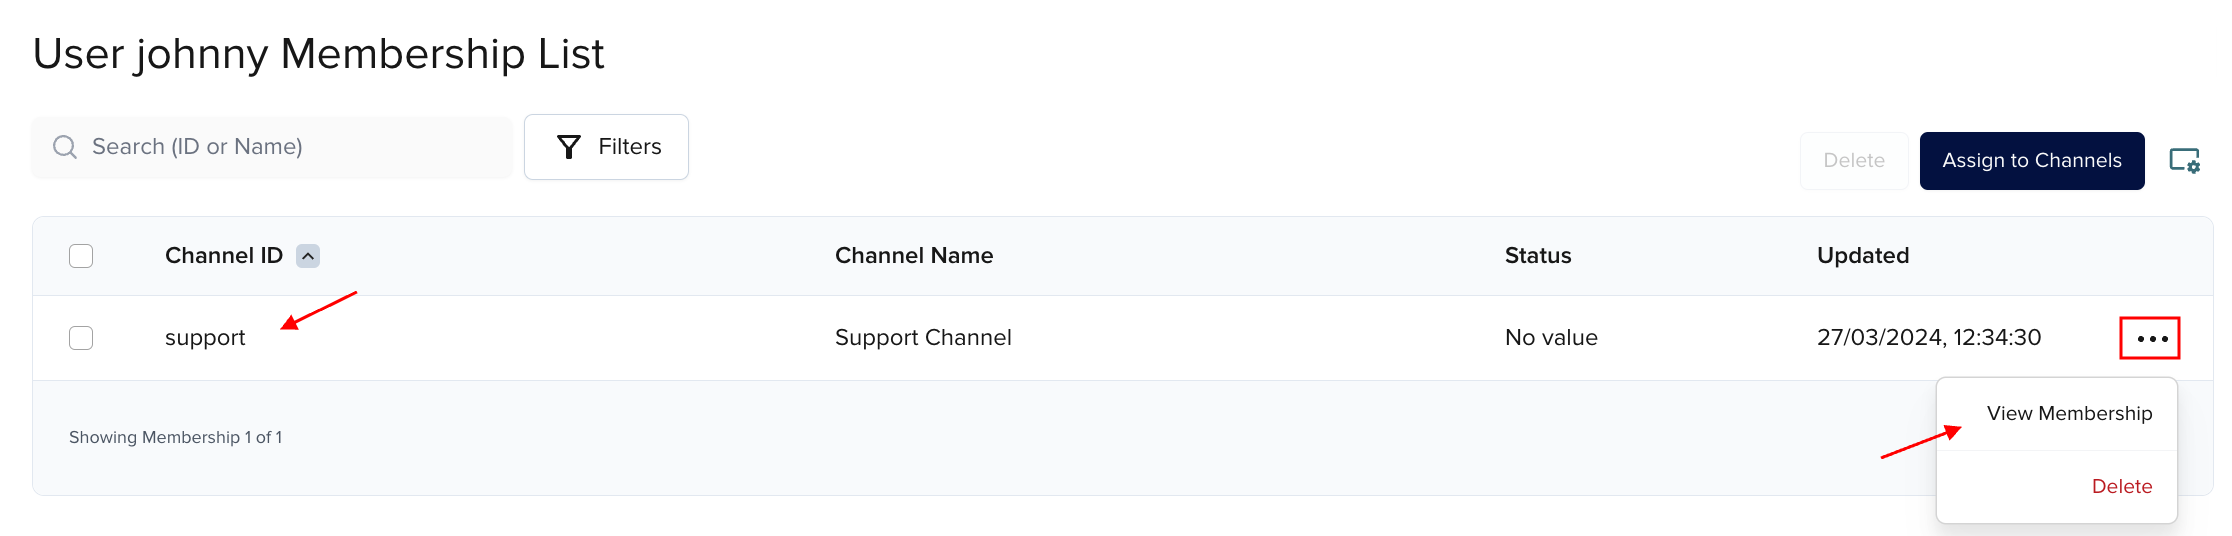
-
Update the field(s) and click the Save button.
Delete membership
Follow these steps to remove users from a channel (delete membership).
-
Click the user entry (any column).
-
Scroll down and click the View Memberships button at the bottom.
-
Select the user entry and click the Delete button or select the "More actions" icon next to the given channel and click Delete. Confirm your choice on the pop-up modal.

-
Alternatively, click the channel entry (any column) or the "More actions" icon next to the given channel and select View Membership.
Then, click the Delete button and Confirm when a modal pops up.
Bulk delete
If a user is a member of more than one channel, you can remove multiple memberships at once.
-
Follow the steps 1-2 described in the Delete membership section.
-
Select channel memberships you want to remove and click the Delete button.
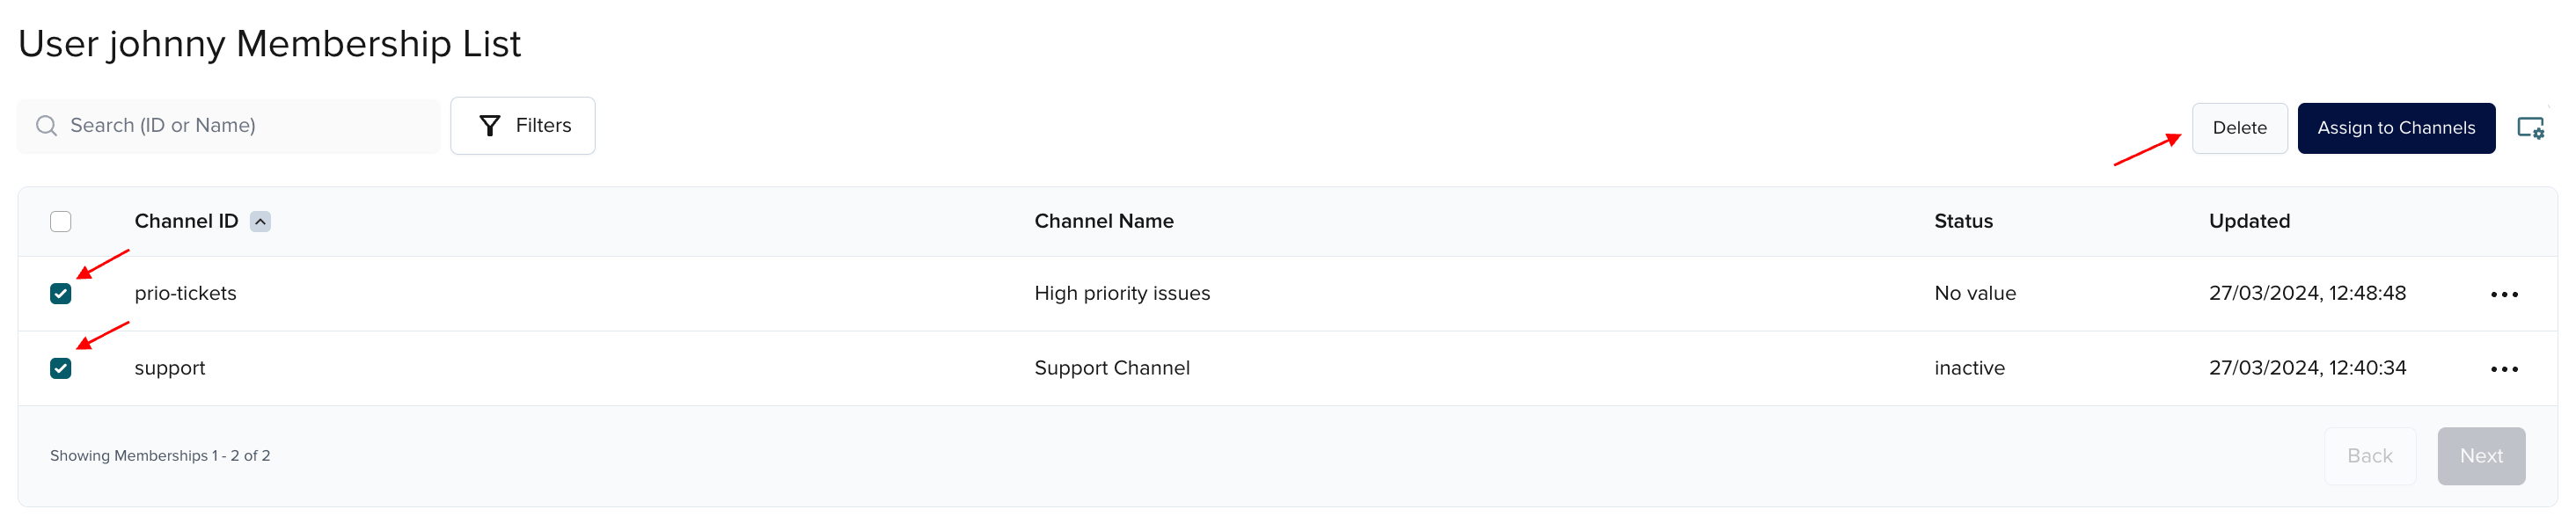
-
When a modal pops up, click Confirm.
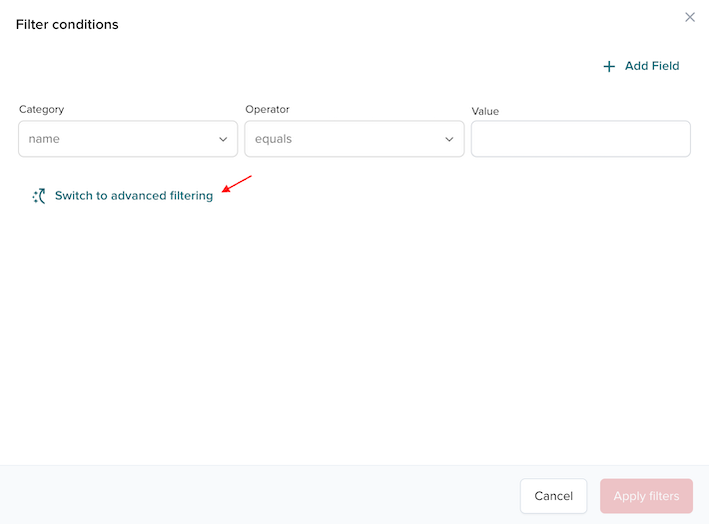
Filters
You can filter users and their channel membership using the Filters icon on the user and membership list views.

After choosing this option, you can filter users or memberships through all available fields apart from the custom ones. Choose Category, Operator, and Value.
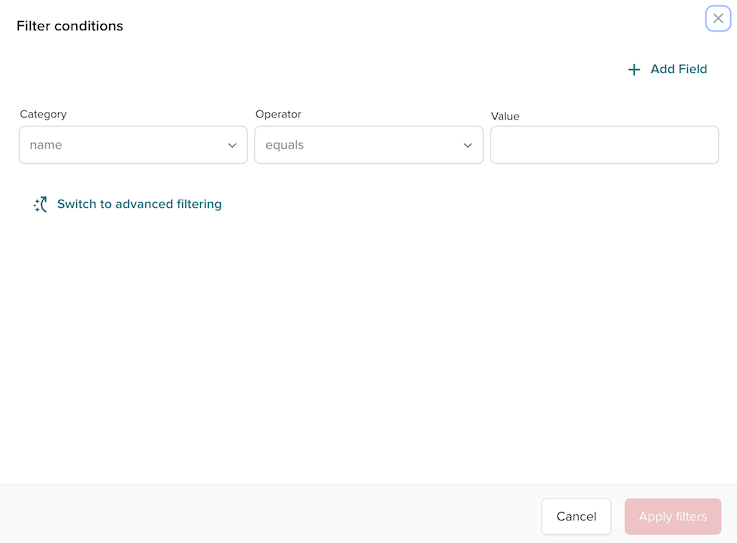
Click Add Field to add additional filtering rows.
This way, you can add multiple filters for different categories.
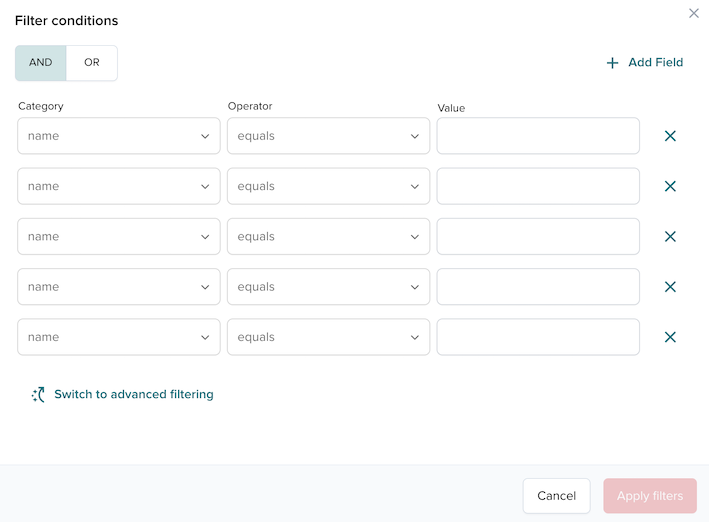
Advanced filtering
You can also click the Switch to advanced filtering button to add advanced filtering that can include custom fields.
In the modal field, enter the expression using App Context Filtering Language.
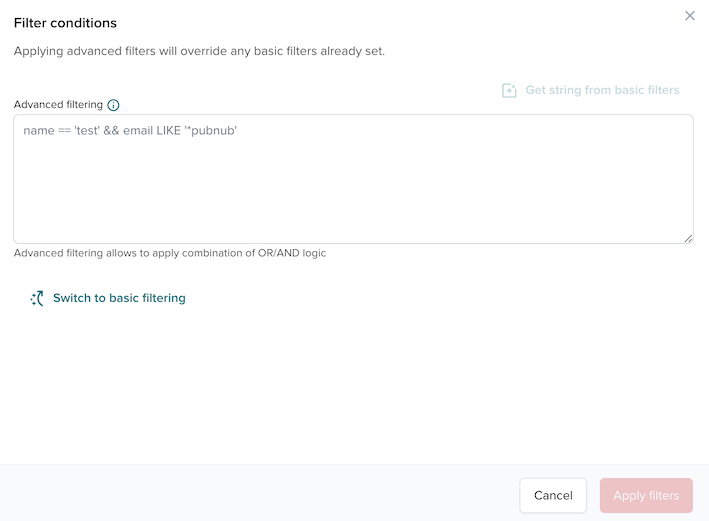
For example, to find all users named John that have the active status and have Support Agent as a custom field (Occupancy), enter (name LIKE '*john*') && (status == "active") && (occupancy == "Support Agent") and press Apply filters.