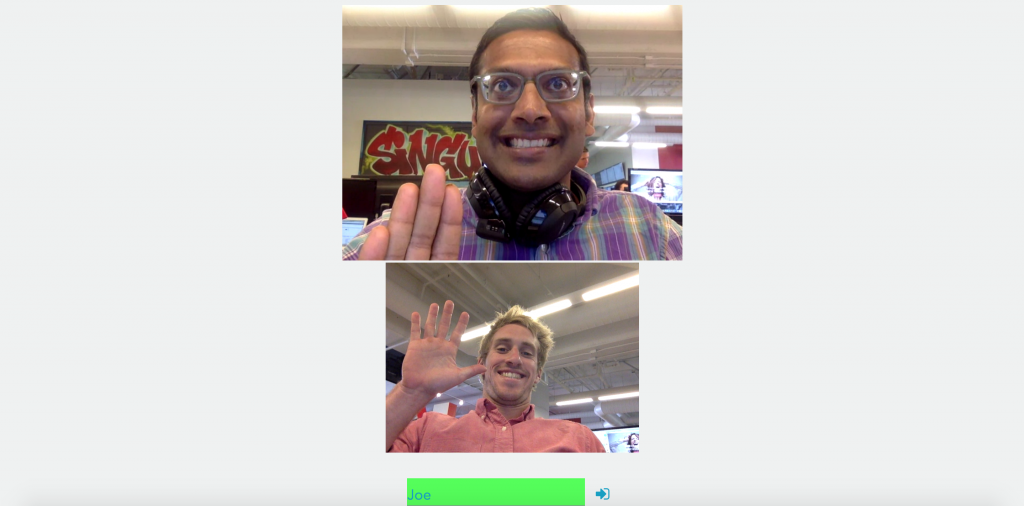
Since we wrote this post, we’ve made some changes to our what we do, and what we don’t do with WebRTC. Learn more here.

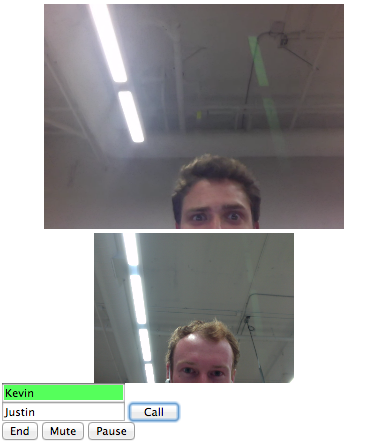
In this part, we’ve added a feature that allows the caller to see themselves, as well as the person they’re chatting with.
Picking up where we left off from Part One: WebRTC Video Chat in 20 Lines of JavaScript, it’s time to bolster our WebRTC video chat application. If you haven’t seen Part One yet, check it out then come back here!
In this tutorial, we’ll show you how to use a wrapper class to provide some basic group chat functionality to your WebRTC video chat app. Building off our simple WebRTC chat app we built in Part One, we’ll add the following features:
- Make/End Calls
- Thumbnail Streams (the caller can see themselves, as well as the person they’re chatting with)
- Mute Call
- Pause Video
- Group Chatting
Check out the live WebRTC video chat demo here, open up two windows, and watch it in action!
And if you want to check out the project code for the tutorial series, it’s available here.
A Note on Testing and Debugging
If you try to open file://<your-webrtc-project> in your browser, you will likely run into Cross-Origin Resource Sharing (CORS) errors since the browser will block your requests to use video and microphone features. To test your code you have a few options. You can upload your files to a web server, like Github Pages if you prefer. However, to keep development local, I recommend you setup a simple server using Python.
To do this, open your terminal and change directories into your current project and depending on your version of Python, run one of the following modules.
For example, I run Python2.7 and the command I use is python -m SimpleHTTPServer 8001. Now I can go to http://localhost:8001/index.html to debug my app! Try making an index.html with anything in it and serve it on localhost before you continue.
Step 1: The HTML5 Backbone
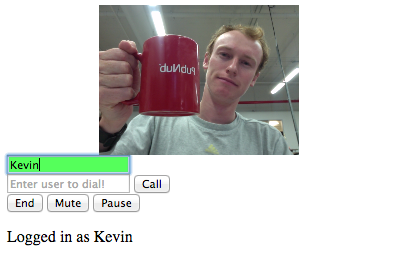
For the sake of the demo, let’s keep the HTML short and simple. First we need a div to house our videos. Then, we will make login field so you can specify your name, a call field so you can dial someone, and a few buttons to implement features.
This should leave you with an elaborate, well styled HTML file that looks something like this:

You will notice there are a few functions that we will need to create in the JavaScript:
- –
login(form): Prepare the phone to receive calls and setup functionality. - –
makeCall(form): Make a call to the number in the form. - –
end(): Hangup the current call. - –
mute(): Mute your local audio stream. - –
pause(): Pause your video stream from sending.
Step 2: The JavaScript Imports
There are three libraries that you will need to include to make WebRTC operations much easier:
- Include jQuery to make modifying DOM elements a breeze.
- Include the PubNub JavaScript SDK to facilitate the WebRTC signaling.
- Include the PubNub WebRTC SDK, and SDK Wrapper libraries which makes placing phone calls as simple as calling the
dial(number)function.
Now we are ready to write our calling functions for login and makeCall!
Step 3: Receiving Calls
In order to start facilitating video calls, you will need a publish and subscribe key. To get your pub/sub keys, you’ll first need to sign up for a PubNub account. Once you sign up, you can find your unique PubNub keys in the PubNub Developer Dashboard. The free Sandbox tier should give you all the bandwidth you need to build and test your WebRTC Application.
3.1 Prepare to Receive
First, let’s locate our video holder, where other callers’ faces go, and thumbnail holder, where our video stream will be held.
Now, to implement the login function. This function will set up the phone using the username provided in the form as a UUID.
This is the basis of our login function. The whole purpose of login is to set up our phone and attach all the features we want to it.
PHONE({configs}) is a constructor from the PubNub WebRTC SDK, while CONTROLLER(phone) is the wrapper library that attaches many useful functions to your phone object. PHONE receives a config object with pub/sub keys and a phone number.
The ctrl wrapper also does some behind the scenes user management, so call ctrl.ready and ctrl.receive instead of their phone counterparts.
Now, let’s look at those functions. ctrl.ready is called when you have authorized video and mic permissions and your phone is ready to receive calls. This means our local stream is ready and we can add it to our thumbnail div using ctrl.addLocalStream.
Now when you test your app, you should see your local stream in the thumbnail holder.

3.2 Handle Incoming Calls
Time to define ctrl.receive, which is called any time there is a new incoming call, or a user ends a call. This callback is handed a session, variable which holds all the data about the joining/leaving user, including their video stream.
The simplest thing you can do here is appendChild to your video_out div, and remove it when they exit.
All it takes to add a video stream to your window is video_out.appendChild(session.video). However, a controller function ctrl.getVideoElement(number) is used to get the users video element from your screen, then removes it.
All user’s video elements have a HTML5 data tag with their number on it, use this to your advantage. All the getVideoElement function does is locate a video element by that data tag using $('*[data-number="'+number+'"]').
Step 4: Making Calls
We now have a phone ready to receive a call, so it is time to create a makeCall function.
If window.phone is undefined, we cannot place a call. This will hafppen if the user did not log in first. If it is, we then check to see if a user is online with ctrl.isOnline(number, function(isOn){...} This will check if num is online. Their status will be passed to the second parameter, a callback function. In that callback function we simply use an if statement. If the user is online, ctrl.dial(number) to dial them and begin a video chat.

Testing time! Fire up your python server and go test your app on localhost. When you are finished staring at yourself in the thumbnail, you may proceed.
Step 5: Additional Features
We still have a few functions to implement, namely end, mute, and pause. Hanging up a call should be easy, so we made it easy.
Now, muting a call and pausing a video stream offers some nice customization. The controller wrapper has functions ctrl.toggleVideo() and ctrl.toggleAudio(). Both return a boolean whether video and audio is enabled after the toggle.
These functions will change the buttons text depending on whether or not their stream is paused or volume is muted. However, both these functions also publish a control message to all the other users in your group chat. You can react to a user pausing their stream or muting their mic using the controllers ctrl.videoToggle and ctrl.audioToggled listeners.
Head back to your login function, where all phone and controller configurations were made. At the end of the function just before returning false, let’s add a video/audio toggle listener.
You can see that both callbacks to the toggle listeners take two parameters, session, and isEnabled). That session is the same session from the receiver, which holds all information about the user who toggled a stream, and isEnabled is a boolean which tells if the stream is muted/paused or not.
For video, we simply get the video element and toggle it’s visibility with jQuery if a user pauses their stream. As for audio, we add a slight transparency to the video element, allowing you to immediately tell who is muted.
What Now?
This guide has only provided simple suggestions for your video chatting app. Get creative! These are very open callbacks. If you wanted to append a mic-off image when a user mutes, you can. Or change their video element to a photo when they pause streaming, easy.
Want to learn more?
Good, that never-ending quest for knowledge will get you far in life. Here are some other resources PubNub offers on WebRTC: