Motion-controlled Servos with Leap Motion & Raspberry Pi
The ability to make a physical object mirror the movement of your hands is something out of a science fiction movie. But here at PubNub, we just made it a reality using Leap Motion, Raspberry Pi, several micro-servos and PubNub Data Streams. And even better, you can control the physical object from anywhere on Earth.
Project Overview
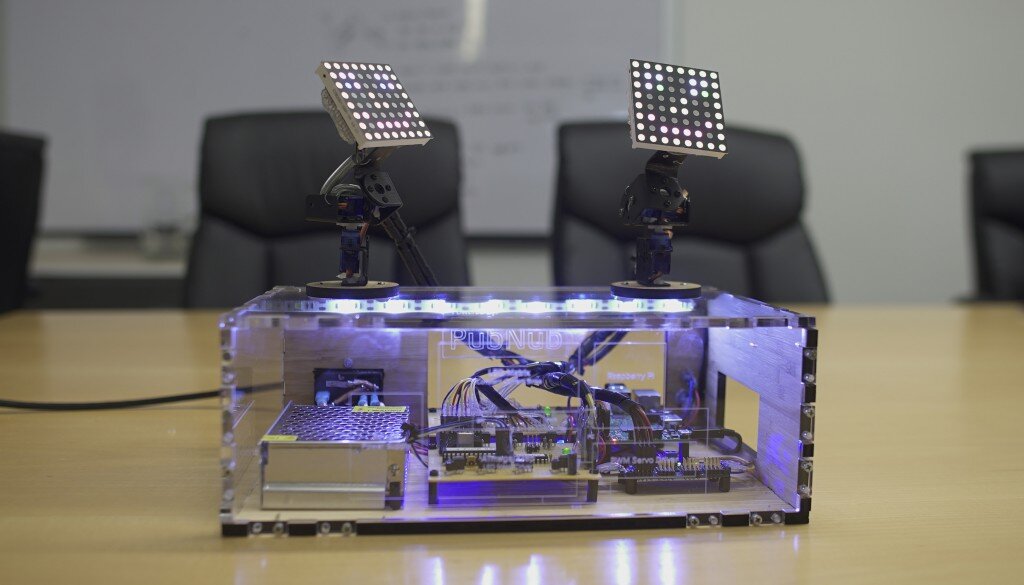
The user controls the servos using the Leap Motion. The two servos mirror the movement of the user's two individual hands. Attached to the servos are 8×8 RGB LED Matrices, which react to each finger movement on your hand. The Leap Motion communicates directly with the Raspberry Pi via PubNub Data Streams with minimal latency, and the Raspberry Pi then drives the servos.
Here's the final project in-action:
In this tutorial, we'll show you how to build the entire thing. Although in this example we use PubNub to communicate with our Raspberry Pi to control servos, the same techniques can be applied to control any internet connected device. PubNub is simply the communication layer used to allow any two devices to speak. In this case we use the Leap Motion as a Raspberry Pi controller, but you can imagine using PubNub to initially configure devices or for real-time data collection.
All the code you need for the project is available in our open source GitHub repository here.
Additionally, we have a separate tutorial for assembling the servos, as well as creating the driver for the LED matrices.

What You'll Need
Before we begin this tutorial, you will need several components:
- Leap Motion + Leap Motion Java SDK
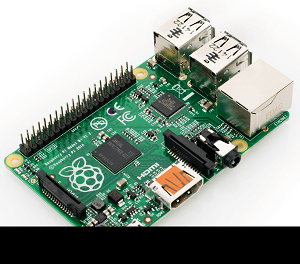
- Raspberry Pi Model B+
- Tower Pro Micro Servo (x4)
- Adafruit PWM Servo Driver
- Optional: Display case (we ordered our's from Ponoko)
Communicating from Leap Motion to Pi

To recreate real-time mirroring, the Leap Motion publishes messages 20x a second with information about each of your hands and all of your fingers to PubNub. On the other end, our Raspberry Pi is subscribed to the same channel and parses these messages to control the servos and the lights.
First, open up a Java IDE and create a new project. We used IntelliJ with JDK8.
If you've never worked with a Leap Motion in Java before, you should first check out this getting started guide for the Leap Motion Java SDK.
Next, install the PubNub Java SDK. If your project has all the proper imports at the top of the file you should see the following:
import java.io.IOException; import java.lang.Math; import com.leapmotion.leap.*; import com.pubnub.api.*; import org.json.*;
Now that the project has both Leap Motion and PubNub SDKs installed, let's get started.
It is crucial that you make your project implement Runnable so that we can have all Leap activity operate in its own thread. Begin by setting up the project main, an implementation of the Runnable interface and initializing of global variables we will be using later like so:
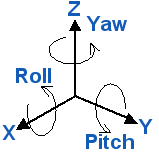
The Leap Motion captures about 300 frames each second. Within each frame, we have access to tons of information about our hands, such as the number of fingers extended, pitch, yaw, and hand gestures. The servos move in a sweeping motion with 180 degrees of rotation. In order to simulate a hand's motion, we use two servos where one servo monitors the pitch (rotation around X-axis) of the hand and the other monitors the yaw (rotation around Y-axis).
The result is a servo which can mimic most of a hand's movements.

Use a function to start tracking the user's hands, which will initialize a new Leap Controller, start a new thread, and then process all the information about the hands. The function named startTracking() looks like this:
When the thread starts running, it calls captureFrame(), which will look at the most recent frame for any hands. If a hand is found, it calls the function handleHand(), which will get the values of the hand’s pitch & yaw. If the frame does in fact have hands, a message is published containing all relevant hand information.
This was implemented like so:
The values the Leap Motion outputs for pitch and yaw are in radians, however the servos are expecting a pulse width modulation (or PWM) between 150 and 600MHz. Thus, we do some conversions to take the radians and convert them into degrees and then normalize the degrees into the corresponding PWM value.
These functions look like this:
The last piece of code is the cleanup for when we press enter to kill the program and center our servos. This code looks like this:
Try running the program and check out the PubNub debug console to view what the Leap Motion is publishing. If all is correct, you should see JSON that looks something like this:
{ "right_hand":{ "right_yaw":450, "right_pitch":300 }, "left_hand":{ "left_yaw":450, "left_pitch":300 } } Now that the Leap Motion is publishing data, we need to do is set up our Raspberry Pi to subscribe and parse the retrieved data to drive and control the servos.
Controlling Servos With A Raspberry Pi

Thankfully, the Raspberry Pi has HW I2C available, which can be used to communicate with a PWM driver like the Adafruit 16-channel 12-bit PWM/Servo Driver. In order to use the PWM Servo Driver, the Pi needs to be configured for I2C (to do this, check out this Adafruit tutorial).
Don't worry about having the Adafruit Cobbler, it's not needed for this project. If you do this part correctly, you should be able to run the example and see the servo spin. The program needs to do the following things:
- Subscribe to PubNub and receive messages published from the Leap Motion
- Parse the JSON
- Drive the servos using our new values
Connecting the Raspberry Pi, PWM Driver and Servos
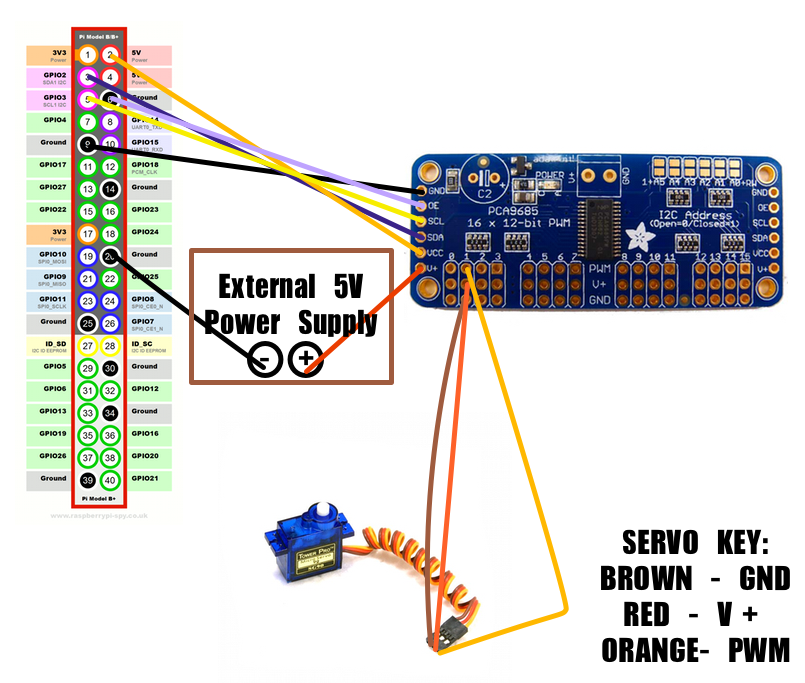
Begin by connecting the PWM driver to the Raspberry Pi, and then the servos to the PWM driver. Check out the schematic below: 
- Channel 1 is Left Yaw
- Channel 2 is Left Pitch
- Channel 3 is Right Yaw
- Channel 4 is Right Pitch
Setting up your Raspberry Pi with PubNub Begin by getting all the necessary imports for the project by adding the following:
from Pubnub import Pubnub from Adafruit_PWM_Servo_Driver import PWM import RPi.GPIO as GPIO import time import sys, os import json, httplib import base64 import serial import smbus GPIO.setmode(GPIO.BCM)
Also, add the following code which will subscribe to PubNub, and also defines all of the callbacks:
In the callback, we call handleLeft and handleRight which will parse the JSON object and use the values to drive our servos. In order for this to work, we need to initialize the PWM device.
We do all of this like so:
That is all we need to do! Go ahead and power up your Raspberry Pi and Leap Motion and try it out for yourself! The project used a custom built driver to speak to our 8×8 LED matrices. For instructions on how to set that up, look here.
Wrapping Up
Although this is where our tutorial ends, you can certainly use the code and take this project even further, to basically control any servos in real time from anywhere on Earth. We have a ton of tutorials on Raspberry Pi, remote control, and the Internet of Things in general. Check them out!
UPDATE: Apparently the people at IoTEvolution Battle of the Platforms though this demo was pretty cool, and we took home the “Best Enterprise Support Solution” award after our live demonstration!
Read more: Internet of Things Tutorial | Get Started w/ Raspberry Pi
