---
source_url: https://www.pubnub.com/docs/chat/components/react
title: Get started with PubNub Chat Components for React
updated_at: 2026-05-22T11:04:09.858Z
---
> Documentation Index
> For a curated overview of PubNub documentation, see: https://www.pubnub.com/docs/llms.txt
> For the full list of all documentation pages, see: https://www.pubnub.com/docs/llms-full.txt
# Get started with PubNub Chat Components for React
:::warning Migrate to Chat SDK
PubNub will stop supporting Chat Components on January 1, 2025 but you are [welcome to contribute](https://github.com/pubnub/react-chat-components). Learn how to migrate to the Chat SDK [here](https://www.pubnub.com/docs/general/resources/migration-guides/react-components-chat-sdk).
:::
See how you can get a 1:1 chat app up and running.
You will download a sample React app that uses two PubNub Chat Components for React: [Message Input](https://www.pubnub.com/docs/chat/components/react/ui-components/message-input) and [Message List](https://www.pubnub.com/docs/chat/components/react/ui-components/message-list). Then, you'll run the app and send your first message by typing it in the message input field. The messages will pile up on the screen as you send them.
## Prerequisites
* [yarn](https://classic.yarnpkg.com/en/docs/install)
* [Node.js](https://nodejs.org/en/download/package-manager/)
* Code editor (for example, [Visual Studio Code](https://code.visualstudio.com/download))
:::tip Tools used
This guide uses [React v16.8+](https://www.npmjs.com/package/react/v/16.8.0), [ReactDOM v16.8+](https://www.npmjs.com/package/react-dom), [PubNub JavaScript SDK v4.29+](https://www.pubnub.com/docs/sdks/javascript), and [PubNub React SDK v2.1.0+](https://www.pubnub.com/docs/sdks/react).
:::
## Steps
Before you start, you need to obtain [Publish and Subscribe Keys](https://www.pubnub.com/docs/general/basics/initialize-pubnub) for your chat app. You need them to initialize the PubNub object in your app to send and receive messages through the PubNub Network. To get both keys, sign in or create an [account](https://www.pubnub.com/docs/general/setup/account-setup) on the [Admin Portal](https://admin.pubnub.com/). The autogenerated Demo Keyset in My First App already contains the configuration required to complete this guide.
:::note Keyset configuration
When you create a new app on the Admin Portal, the first set of keys is generated automatically, but a single app can have as many keysets as you like. We recommend that you create separate keysets for production and test environments. There are some of the functionalities you might need to enable on your keyset depending on the use case, but they won't be required to complete this guide. These options include:
* [PRESENCE](https://www.pubnub.com/docs/sdks/javascript/api-reference/presence) to monitor the subscribers of channels and delivers information on their real-time status
* [MESSAGE PERSISTENCE](https://www.pubnub.com/docs/sdks/javascript/api-reference/storage-and-playback) (including correct **Retention**) to persist all messages as they're published.
* [APP CONTEXT](https://www.pubnub.com/docs/sdks/javascript/api-reference/objects) to easily store metadata about your application users and channels, and their membership associations, without the need to stand up your own databases. When using this feature, make sure you select a geographical region corresponding to most users of your application and to have these enabled: **User Metadata Events**, **Channel Metadata Events**, and **Membership Events**.
:::
### Run the chat app
Now that you have your keyset, you can set up a chat app in two ways:
#### Download starter
1. Download the getting-started app from the react-chat-components repository.
2. Unpack the archive into the folder of your choice.
3. Open the terminal app and install the dependencies in the root react-chat-components folder:
```sh
yarn
```
1. Go to the samples/react/getting-started folder.
2. Open the app in the code editor, navigate to the src/getting-started.tsx file and replace myPublishKey and mySubscribeKey with your own Publish and Subscribe Keys from the keyset on the Admin Portal. To associate a sender/current user with the PubNub messages, it's required to configure the userId parameter that refers to your user ID in the database. If you wish, modify the default value for the chat user.
```tsx
publishKey: "myPublishKey",
subscribeKey: "mySubscribeKey",
userId: "myFirstUser",
```
:::tip userId
For simplicity, the getting started app sets a static `userId`. However, if you implement chat in your app, you should generate a `userId` per user, device, and server and reuse it for their lifetime. Using separate User IDs in real-life apps is particularly important as it impacts your overall [billing](https://www.pubnub.com/docs/general/setup/users-and-devices#billing) and the way your app [works](https://www.pubnub.com/docs/general/setup/users-and-devices#presence).
:::
The complete `getting-started.tsx` file looks as follows:
```jsx
/* Imports PubNub JavaScript and React SDKs to create and access PubNub instance across your app. */
/* Imports the required PubNub Chat Components to easily create chat apps with PubNub. */
import React from "react";
import PubNub from "pubnub";
import { PubNubProvider } from "pubnub-react";
import { Chat, MessageList, MessageInput } from "@pubnub/react-chat-components";
/* Creates and configures your PubNub instance. Be sure to replace "myPublishKey" and "mySubscribeKey"
with your own keyset. If you wish, modify the default "myFirstUser" userId value for the chat user. */
const pubnub = new PubNub({
publishKey: "myPublishKey",
subscribeKey: "mySubscribeKey",
userId: "myFirstUser",
});
const currentChannel = "Default";
const theme = "light";
function App(): JSX.Element {
return (
{/* PubNubProvider is a part of the PubNub React SDK and allows you to access PubNub instance
in components down the tree. */}
{/* Chat is an obligatory state provider. It allows you to configure some common component
options, like the current channel and the general theme for the app. */}
);
}
export default App;
```
1. Back in the terminal, run the app on the dev server.
```sh
yarn start
```
#### Extend existing app
1. Open the terminal in the location of your app files and add the PubNub JavaScript SDK, React framework packages, and PubNub Chat Components for React.
```sh
yarn add pubnub pubnub-react @pubnub/react-chat-components
```
1. Open your application source files in your favorite code editor. Copy over the snippet below into your app source file (for example, `src/App.tsx`). Remember to place your own keys from the Admin Portal for the `publishKey` and `subscribeKey` parameters in the PubNub instance configuration.
```jsx
/* Imports PubNub JavaScript and React SDKs to create and access PubNub instance across your app. */
/* Imports the required PubNub Chat Components to easily create chat apps with PubNub. */
import React from "react";
import PubNub from "pubnub";
import { PubNubProvider } from "pubnub-react";
import { Chat, MessageList, MessageInput } from "@pubnub/react-chat-components";
/* Creates and configures your PubNub instance. Be sure to replace "myPublishKey" and "mySubscribeKey"
with your own keyset. If you wish, modify the default "myFirstUser" userId value for the chat user. */
const pubnub = new PubNub({
publishKey: "myPublishKey",
subscribeKey: "mySubscribeKey",
userId: "myFirstUser",
});
const currentChannel = "Default";
const theme = "light";
function App(): JSX.Element {
return (
{/* PubNubProvider is a part of the PubNub React SDK and allows you to access PubNub instance
in components down the tree. */}
{/* Chat is an obligatory state provider. It allows you to configure some common component
options, like the current channel and the general theme for the app. */}
);
}
export default App;
```
1. Run your app on the dev server.
```sh
yarn start
```
### Send your first message
1. Open the dev server in the browser at the default address http://127.0.0.1:5173/.
2. Type and send your first message. The messages will pile up on the screen as you send them.
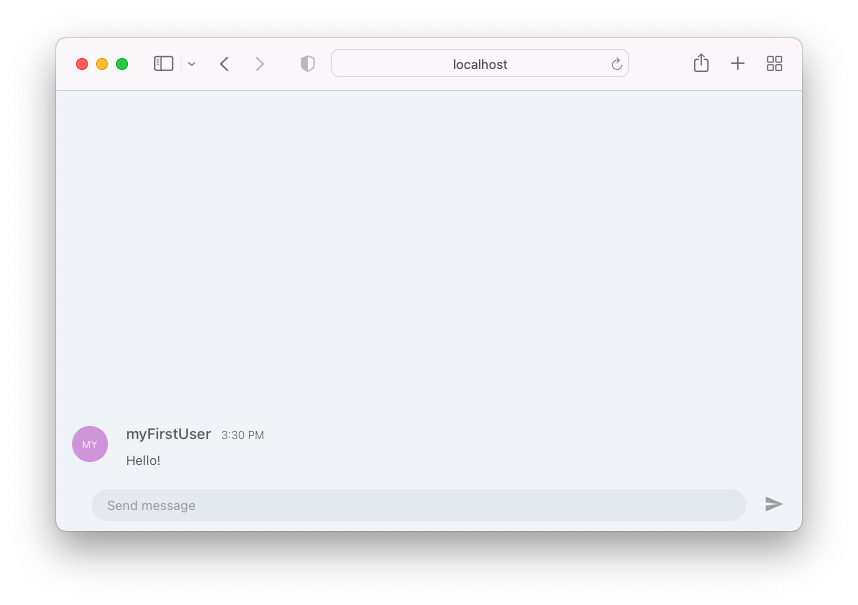
1. To verify that the app is connected to the PubNub Network, mock a real-live chat conversation with `myFirstUser`. Open localhost in a new browser tab, send a message from one tab and reply to it from another.
### Next steps
With a React app running, find out how you can expand and customize it. Check out our:
* Sample group chat ([preview](https://react-components-chat.pubnub.com/) and [GitHub sources](https://github.com/pubnub/react-chat-components/tree/master/samples/react/group-chat)).