I love IFTTT. Frankly speaking, that’s how I deal with everything in programming. If this happens, I will do this, otherwise I will do that. Plus, as a developer, we can’t survive without conditionals in our programs. One of their “recipes” (that’s what they call a combination of apps to complete a purpose) is “Heads up! ISS overhead”. It’s my favorite. I tried it for couple of weeks and I used to get notification when ISS was hovering over my city, and in that moment I would look up in the sky and hope to see the shining International Space Station. Of course, I didn’t as it is too small for us to see. I loved the app though, so I thought, if I were to make it from scratch, how could I do it?
I found Open Notify, which is an open source project to provide a simple programming interface for some of NASA’s awesome data. One of the data they provide is of current location of ISS. The API is pretty simple and well documented. As soon as I saw that, I knew this would be possible.
Design
Demo
This is what the finished project will look like:
Video ISS PubNub from PubNub on Vimeo.
Server Side
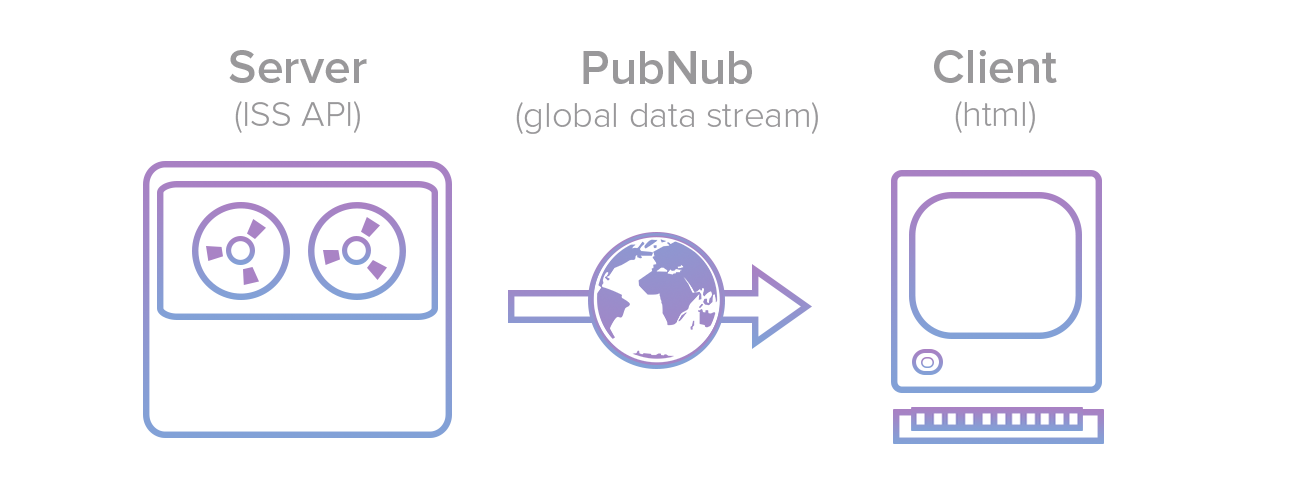
This is all the code we need to get a location from the ISS api and publish it through PubNub.
Let’s go through it step by step:
- We installed 2 npm packages: ‘get-json’ and ‘pubnub’
- npm install get-json —save
- npm install pubnub —save
- Initialized PubNub with publish and subscribe keys
- Wrote a function getISSlocation to publish the coordinates of the ISS to pubnub. The function starts with an HTTP call to the ISS RESTful API, proceeds with parsing of the coordinates and terminates on the publishing of the processed data to pubnub.
- Then, we set the timeout to execute the above function every 3000 milliseconds.
- At last, we called the function getISSlocation, which means this function will run whenever we start the script.
You can start the server side script with node index.js. You will see output like this:
josh@demodev2:~/demos/pubnub-iss$ node index.js
[ 1, 'Sent', '14555624039754370' ]
[ 1, 'Sent', '14555624065031441' ]
[ 1, 'Sent', '14555624095721667' ]
^C
You can find the source code of this demo here. The client side part is the index.html file. Most of it is plain HTML5 boilerplate using a CDN for PubNub and Mapbox. So let’s jump right into the heart of it. The HTML has only one important part:
<div id="map"></div>
<pre id='coordinates' class=‘ui-coordinates'></pre>
#map is where the map will be rendered and #coordinates is where the coordinates will be displayed.
Now comes the JS part. Initially some variable declarations
var lat, lon;
var pubnub = PUBNUB({
subscribe_key : 'my_sub_key'
});
Then, we initialize the Mapbox instances of maps, markers and polyline
   L.mapbox.accessToken = 'pk.eyJ1IjoiYW5tb2wxNzcxIiwiYSI6ImNYZXN1N28ifQ.s-1Hjdb2UR9_6eeTPJGn3A';
    var map = L.mapbox.map('map', 'mapbox.streets');
    var marker = L.marker([-73, 40], {
        icon: L.mapbox.marker.icon({
          'marker-size': 'large',
          'marker-symbol': 'rocket',
          "marker-color": "#63b6e5"
        })
    });
marker.addTo(map);
var polyline = L.polyline([]).addTo(map);
var pointsAdded = 0;
var coordinates = document.getElementById('coordinates');
Lastly, the PubNub subscribe part. Every time it receives a new message it will move the map and adjust the marker. It will also add the add another point to the polyline so we can see the path that ISS has taken.
    pubnub.subscribe({
       channel : "iss-pubnub",
       message : function(message){
         lat = message.latitude;
           lon = message.longitude;
           map.setView([lat, lon]);
           marker.setLatLng([lat, lon], 15);
           polyline.addLatLng([lat, lon], pointsAdded);
           coordinates.innerHTML = 'Latitude: ' + lat + '<br />Longitude: ' + lon;
       }
   })
Please note that the subscribe key and channel in the client side are same as server side. Notice that I didn’t put the publish key into the client side HTML. This HTML will be on the public web and can be downloaded by anyone, thus exposing the keys. If I put the publish key here then anyone could, however unlikely, publish fake data to the stream.
Once that’s done and we run node index.js from the terminal while being in that folder, VOILA! We can now see the location of ISS on our devices or a jumbotron (if you like) powered through PubNub.
Conclusion
You can find the source code of this demo on github or view the live demo.
You can use this concept as a guideline whenever you want to stream the ever changing data from one source and want to publish it somewhere else. For example, you can do the same with stock market, where you get the notification of companies you want to track with their stock prices and their news, in real-time. Let us know what you come up with.
